
Bodice Description
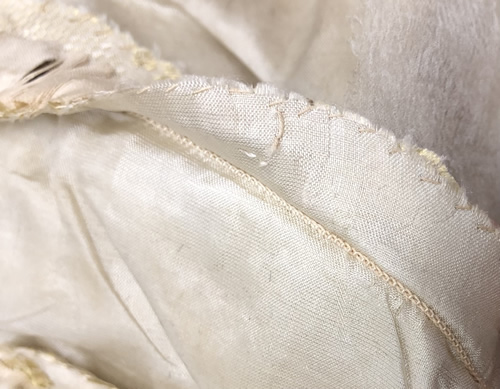
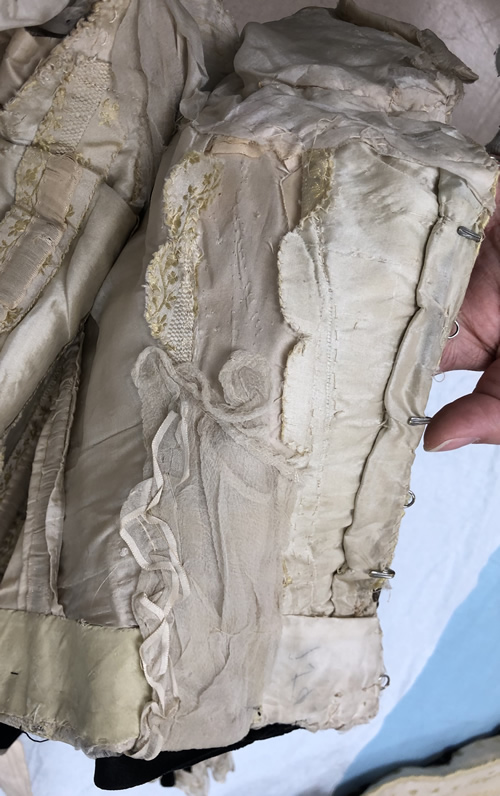
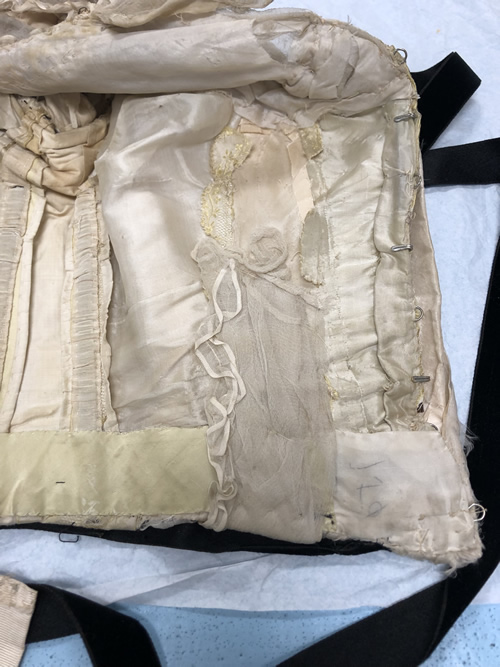
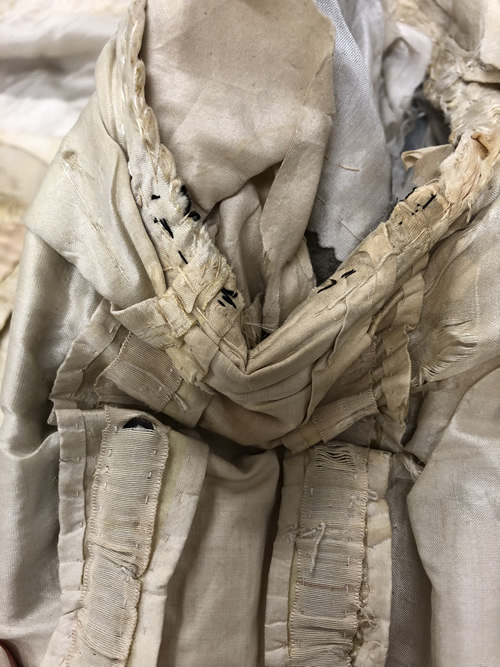
The bodice, as it is now, has three separate layers. The base layer is constructed of the silk brocade flatlined to a lightweight silk taffeta. It consists of 14 pieces as well as a single piece on each side for the strap over the shoulder. The seams on the back of the bodice are machine sewn with a chain stitch (see Figure 1 below). This stitch length is very small, measuring approximately 1 mm per stitch. These seams are finished with a neat hand overcast and they have been clipped into a scallop along the back bodice (see Figure 1 below). This portion of the bodice has an excess length of about 1" that has been tucked into a fold across the upper back but not secured with any stitching. This can be seen in Figure 2 below, where the length bunches under the armscyes and tucks into a fold just underneath the yoke.
Figure 1: Chain Stitching |
Figure 2: Bodice Interior |
 |
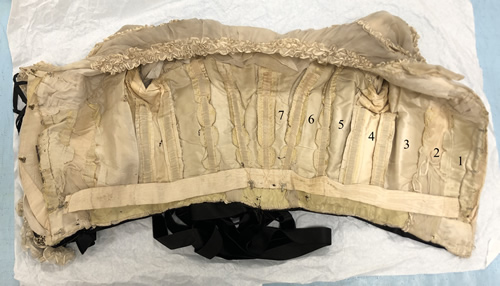 |
The side front and side back seams on the underarm piece (numbered 4 in Figure 2 above) have been machine stitched with a lock stitch. The underarm panel is constructed of a different material which supports the theory that this garment was either heavily altered or reconstructed at one point in time. This panel is a lightweight cotton or linen flatlined to a heavier, slightly more yellowed silk taffeta. The seams here are bound by hand with a soft, plain-woven silk tape (see Figure 2
Figure 3: Bound Seam with Lockstitch |
 |
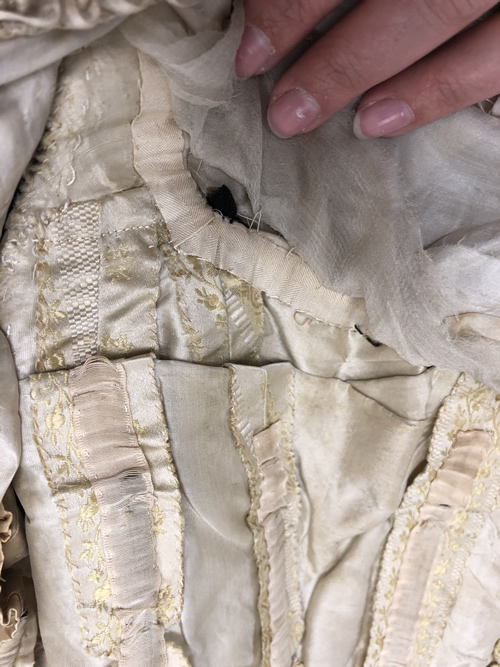
The two side front panels (numbered 2 and 3 in Figure 2 above) are constructed of a single layer of taffeta overlapped and hand stitched with a running stitch on the seam line. Panel 2 is constructed of a heavier weight taffeta that is the same material as the middle layer of the bodice. Panel 3 is constructed of a single layer of the original taffeta. There is a bit of the fashion fabric tucked into a seam between these two pieces (see Figure 2). I believe this could indicate another alteration, or perhaps the fabric had deteriorated in these areas from the presence of sweat and it has been clipped out.
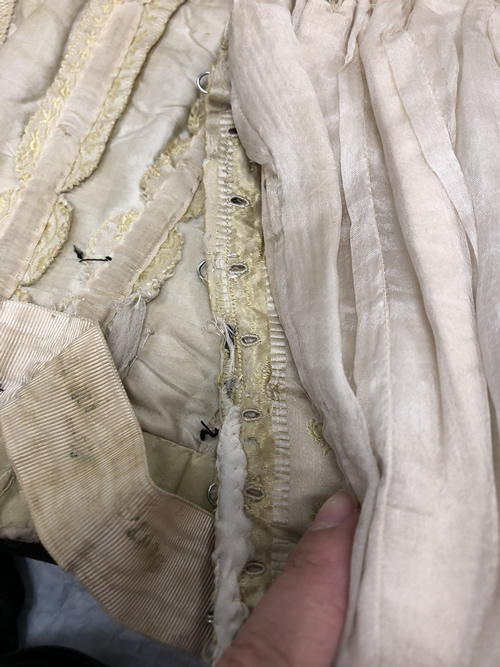
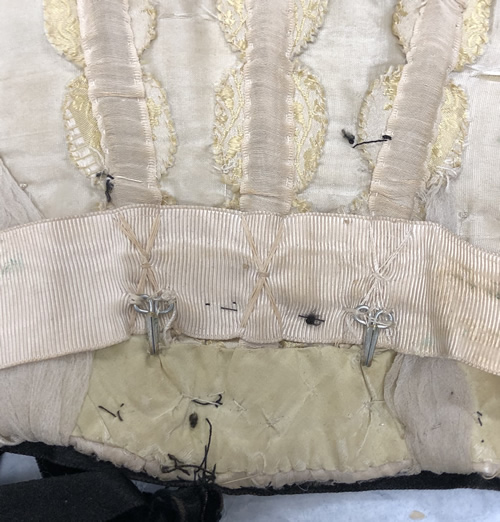
The center front panel is constructed in the same way as the back panels – the fashion fabric is flatlined to a lightweight taffeta. On the front of the panel we can see a series of 12 hand bound eyelets (see Figures 4 and 5 below), indicating that it laced together at the center front when it was originally constructed. I believe the panel originally had two layers of taffeta flatlined to the fashion fabric. Later, an alternating hook and eye closure was added to this piece and the layer of taffeta that rests closest to the body was peeled up and used to conceal the underside of the hook and eyes. This created a tuck that is bound by hand around the front seam. The alternating hook and eye closure helps support the theory that a professional dressmaker worked on the reconstruction of this gown. A thin piece of baleen is set into a channel that was machine stitched with a chain stitch. This baleen measures approximately 6" on each side, but I believe it originally ran the length of the entire channel, which is 11 3/8" and it was shortened on a later iteration of the bodice. The front base layer is also longer than the outer layers and there is a tuck measuring 1" (total) on the center front.
Figure 4: Front Bodice Interior |
Figure 5: Center Front Eyelets |
 |
 |
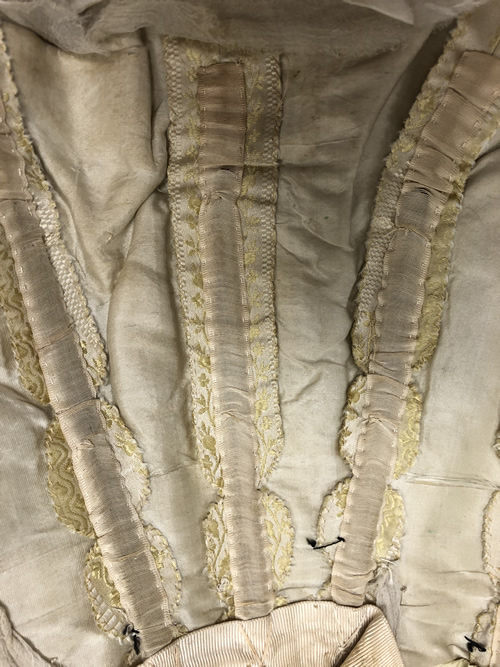
The bodice is supported by 9 pieces of baleen in 1/2" grosgrain channels that have been hand sewn on each seam from the underarm to the center back (see Figure 6). The bones are about 1 cm in width and do not run the full length of the casing on any seam. As there are no bones in the front bodice (with the exception of the center front) we can assume the length of the bone extended through the entire channel before the dress was altered.
The second layer of the bodice is silk habotai with evenly spaced 1/4" tucks flatlined to a lightweight taffeta. There are two seams constructed with a machine lockstitch in the taffeta layer, but no distinguishable seam is present in the layer of silk habotai. The center front of the taffeta is the straight-of-grain selvedge edge. The tucking on the silk habotai is done on the straight-of-grain. The back of this layer is set flat against the under-bodice at the top and has a small amount of easing towards the bottom. The length of this layer is about an inch shorter than the base, which creates the fold along the upper back on the bodice interior.
Figure 6: Bone Detail at Center |
 |
On the front bodice, the habotai layer was cut slightly larger than the taffeta and eased down before being flatlined together. The two layers were then pleated and eased onto the base layer at the yoke line. The pleating and easing were done organically by the dressmaker and are not even on each side. From the center front to the princess line, the excess is gathered down to 4" on one side and 3 1/2" on the other. There is an additional pleat falling towards the side seam that measures about 1/2" wide on just the taffeta layer. At the waist, there are three pleats folding towards the side seam: the first two near the center front about 3/4" wide, and the third about 1/2" wide.
Figure 7: Side FrontBodice Exterior |
Figure 8: Side FrontBodice Interior |
 |
 |
After being attached together at the yoke and waistline, these layers were sewn to the shoulder strap. This seam is flat felled on both sides. Both layers are finished along the neckline with a piece of 1/2" silk twill weave tape that is hand stitched over the seam allowance (see Figure 7 above).
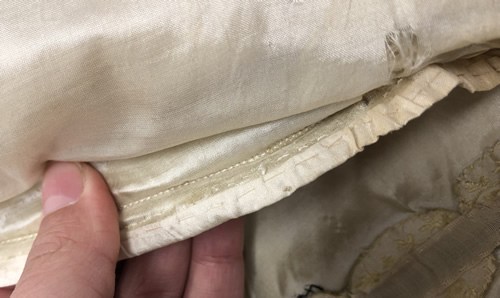
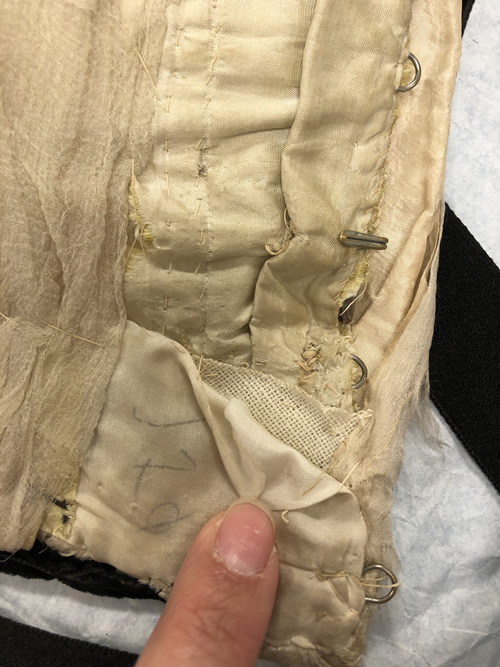
The hem of the bodice is turned up with a piece of bias taffeta that is 1 1/2" wide and hand stitched at the top and bottom. This is the same taffeta that was used to create the underarm piece (piece 4 in Figure 2 above). The hems of the center front panels are turned up in a similar fashion, but a different, lighter weight taffeta has been used. There is a number penciled onto this piece of taffeta – 170 - that may have been used as a catalog or rental number at one point. A small piece of buckram waist banding can be seen poking out from under this binding (Figure 8). The buckram has also been used to stabilize the hem at the center front on the other side, though it is completely concealed. The buckram does not continue past the side front seam.
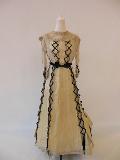
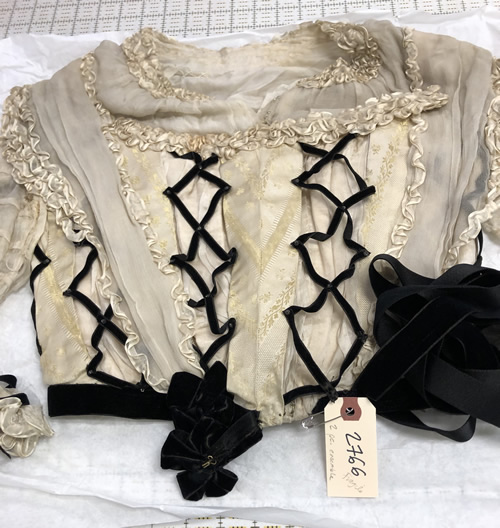
Figure 9: Bodice Front |
Figure 10: Pane Cross Stitch Detail |
 |
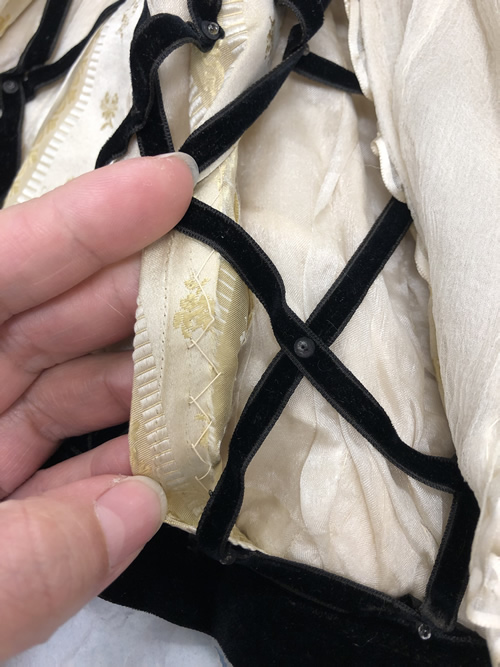 |
The outermost layer of the bodice is made up of 10 panes of the floral silk brocade. The center front pane is made of two panels cut on the bias and stitched together so that the stripe on the brocade forms a chevron pointing to the waist (see Figure 9 above). Each pane is finished by turning back the raw edges and stitching with a cross stitch. There is some scarring present on the third piece from the center that indicates it was once stitched through by machine (see Figure 10 above). This is further evidence that the garment has been re-made. These panes are spaced apart across the bodice and connected by a lattice of black velvet ribbon that measures 1/4" wide. The ribbon is mitered into a point at each connection to the panes. It is decorated with a matte black sequin and a clear glass seed bead stitched at each intersection of the lattice and at each point.
Figure 11: Shoulder Drape Exterior |
Figure 12: Shoulder Drape Interior |
 |
 |
The shoulder flanges are made of silk gauze and measure 3 1/4" wide at the top of the shoulder with a 1 1/2" extension of silk habotai. The extension is half-oval shaped and centered over the top of the shoulder. There is a French seam on the top of the flange that has been machine stitched with a chain stitch (Figure 15). At the center front, the flange is pleated down into a width of 2" organically by the dress maker, so each side is pleated slightly differently. The right side of the bodice has four and the left has three stacked pleats (Figure 11). The shoulders each have two pleats falling away from the neckline. The first pleat measures 1 1/2" and the second pleat measures 1 1/2". Each overlap by about 1/2". At the back of the bodice, the flange is both gathered and pleated into the waist. The excess length from each flange (about 7.5” total) is folded inside the bodice and tacked up by hand. There is a single row of gathered silk ribbon on the full length of the flange closest to the neckline. On the side of the flange closest to the shoulder, there is a single row of ribbon stitched the full length of the flange, and an additional three rows of ribbon stitched over the half-oval shaped extension.
Figure 12: Shoulder Drape Left and Right Sides |
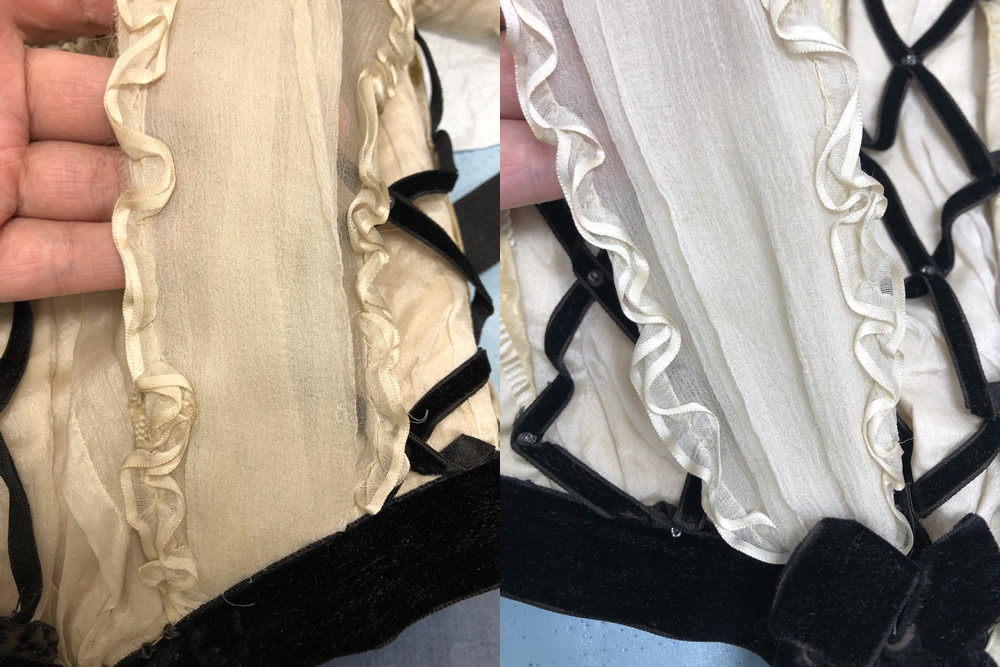 |
The yoke is constructed of silk gauze gathered down at the neckline and flatlined to a piece of silk habotai. The yoke is set into the bodice and secured with hand stitching (see Figure 7 above). The edge is left raw. The neckline edge was finished by turning the layers into each other and top stitching by hand. Three rows of 5/8" gathered silk organza ribbon with satin edges are stitched by hand around the neckline. There is a small placket cut of silk gauze flatlined to silk organza. This placket measures 3 1/4" by 1 1/4" and is stitched to the center front of the yoke. The yoke line of the bodice is also trimmed with three rows of gathered ribbon. The ribbon is stitched to a strip of silk gauze and then hand stitched to the bodice.
The bodice base closes at center front with alternating hook and eye closures. The second layer of the bodice closes right over left with hook and eye closures at the center front. The final layer conceals the joins of the first two by overlapping the center front, right over left. There are small hooks stitched to the points of the latticed ribbon which attach to crochet thread loops on the side front pane. The neckline ribbon that is stitched to the gauze strip also overlaps right over left and closes with a hook and bar. The yoke line closes along the placket right over left with a hook and bar.
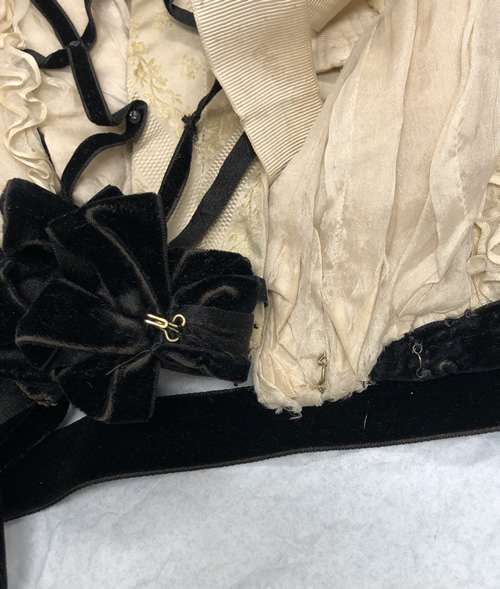
Figure 13: Rosette Closure |
Figure 14: Pins in Waistband |
 |
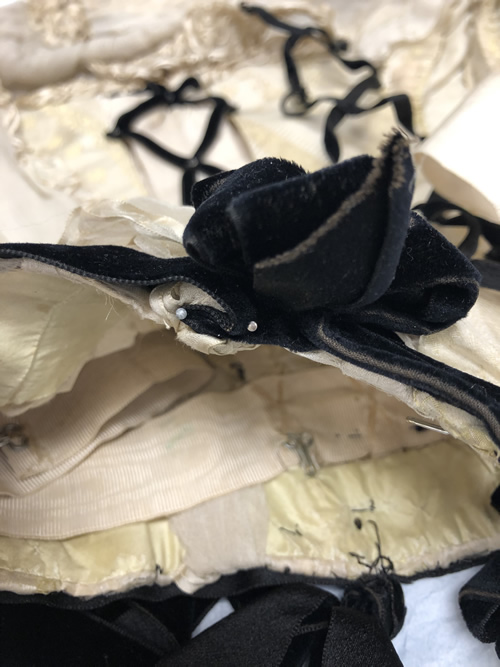 |
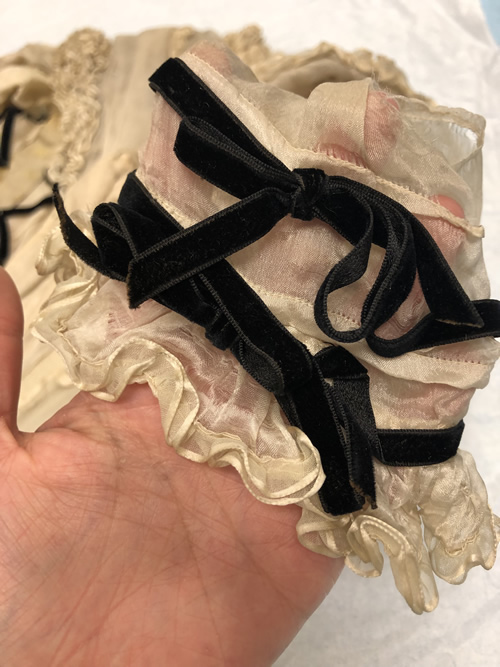
The back waist is trimmed with two rows of black velvet ribbon measuring 7/8" wide. These ribbons overlap at the side seam and the bottom ribbon is clipped away so the front waist is trimmed with only one ribbon. The ribbon is continuous and tied into two five-loop cockade style bows that rest at the bottom of the princess line either side of center front. On the right side, there is an excess of ribbon which was folded and pinned back, but never stitched. There are still straight pins present (Figure 14 above). The ribbon at the center front is mitered into a soft point by hand, and the rosette on the overlapping side has a hook that closes the waistline of the bodice with a corresponding bar (Figure 13). The ribbon extends beyond the hem of the garment along the side front to slightly change the shape of the waistline. There is a bow tacked at center back tied out of the same ribbon. The loops measure 8 3/4" and the tails are two different lengths, the shortest being 32.5" and the longest being 38.5".
Figure 15: Tucks on Grain Line |
Figure 16: Trim Detail on Ruffle |
 |
 |
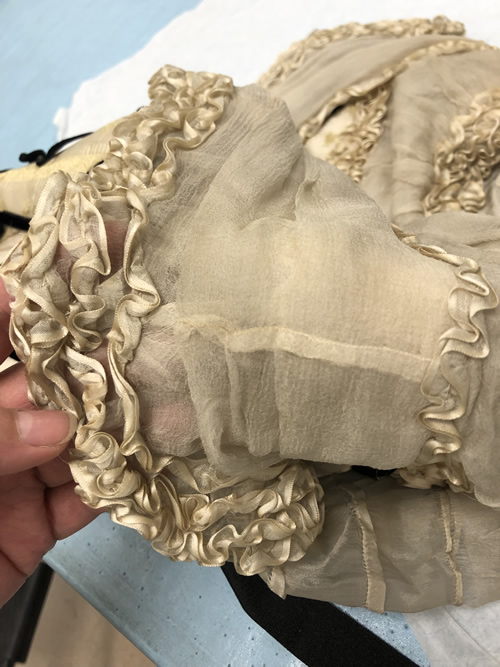
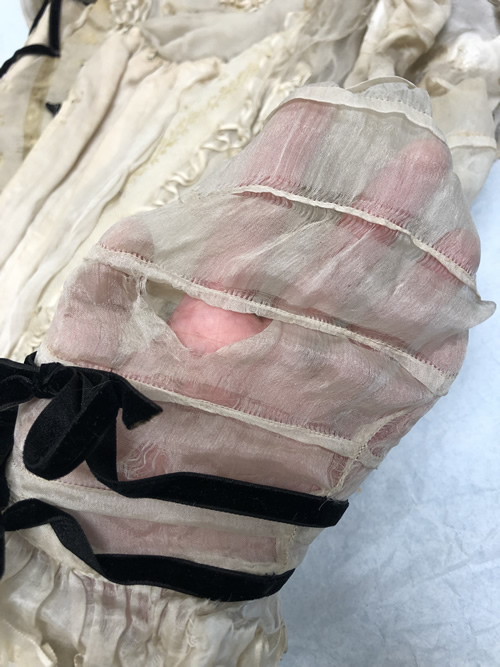
The sleeves are badly damaged and difficult to handle. They are constructed from a thin silk habotai that has deteriorated badly over the years (Figure 15). As much as I can discern from the placement of the tucks on the grain line, they are tube-like in construction with a slight bit of shaping happening along a seam running from the front muscle point to the hem. This seam is done as a French seam and has been lock stitched by machine. There are two ribbons at the hem above the ruffle spaced 3/4" apart. They tie on the outside arm in a neat bow and are loosely tacked in several places along the sleeve (Figure 16). There are eleven 1/4" tucks down the length of the sleeve. The sleeve length falls just below the waistline which indicates 3/4 length sleeves. There is a gathered ruffle at the hem of the sleeve that measures 1.5” wide and has gathered ribbon trim along the hem to match the yoke line and shoulder drapes. The cap appears to be fitted and not have much fullness. The sleeve is set in by hand and the seam allowance is overcast by hand (Figure 16 below).
Figure 16: Armscye Detail |
 |
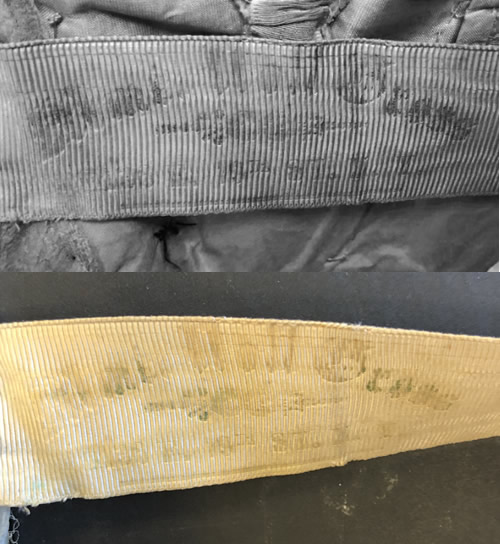
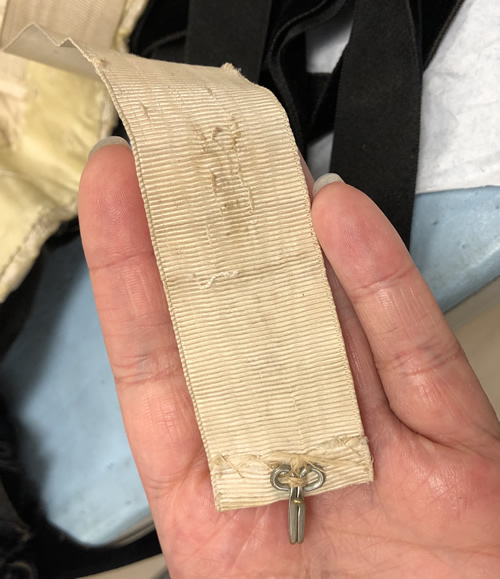
On the inside of the bodice there is a silk moiré grosgrain waist tape. The tape is attached only at the center back and side back seams with three large X shaped stitches (Figure 17 below). There are two hooks stitched at the bottom of the waist tape. I believe these attached to the skirt to keep it from falling. The waist tape closes with a single hook. No bar is present. There is some scarring and fading on the waist tape where hooks and eyes had been stitched (Figure 19 below). On the waist tape there is also evidence of a dressmaker’s stamp (Figure 18). The ink is mostly gone - only small bits of greenish pigment remain, however a slight impression can be seen when the tape is held perpendicular to a light source. I’ve tried my best to enhance the image of the label with digital manipulation. It appears to have a brand (or dressmaker’s name) that is not very distinguishable. There is also an address stamped below the name, which appears to read either 136 W. 79th St N.Y. or 136 W. 19th St N.Y.
Figure 17: Waist X Stitch |
Figure 18: Stamped LabelAnd Enhancement |
Figure 19: Waist TapeClosure and Scarring |
 |
 |
 |
Detailed Measurements of Original Bodice
Center front to waist (bodice): 14 5/8"
Center back to waist: 13 3/4"
Neckline: 17 3/4"
Front neckline to shoulder seam: 3.5"
Front neckline to bottom of yoke: 3 3/4"
Armscye: 14.25"
Shoulder to shoulder front: 16"
Front yoke (armscye to armscye): 15"
Underarm to waist: 8"
Back neck to bottom of yoke: 4"
Back yoke (armscye to armscye): 14 1/4""
Shoulder to shoulder back: 15 1/2"
Waist measurement of bodice: 26"
Waist tape: 25"
Bust: 36"
© Alexandra Hagman, 2022