
Reproduction
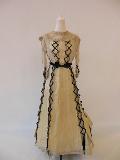
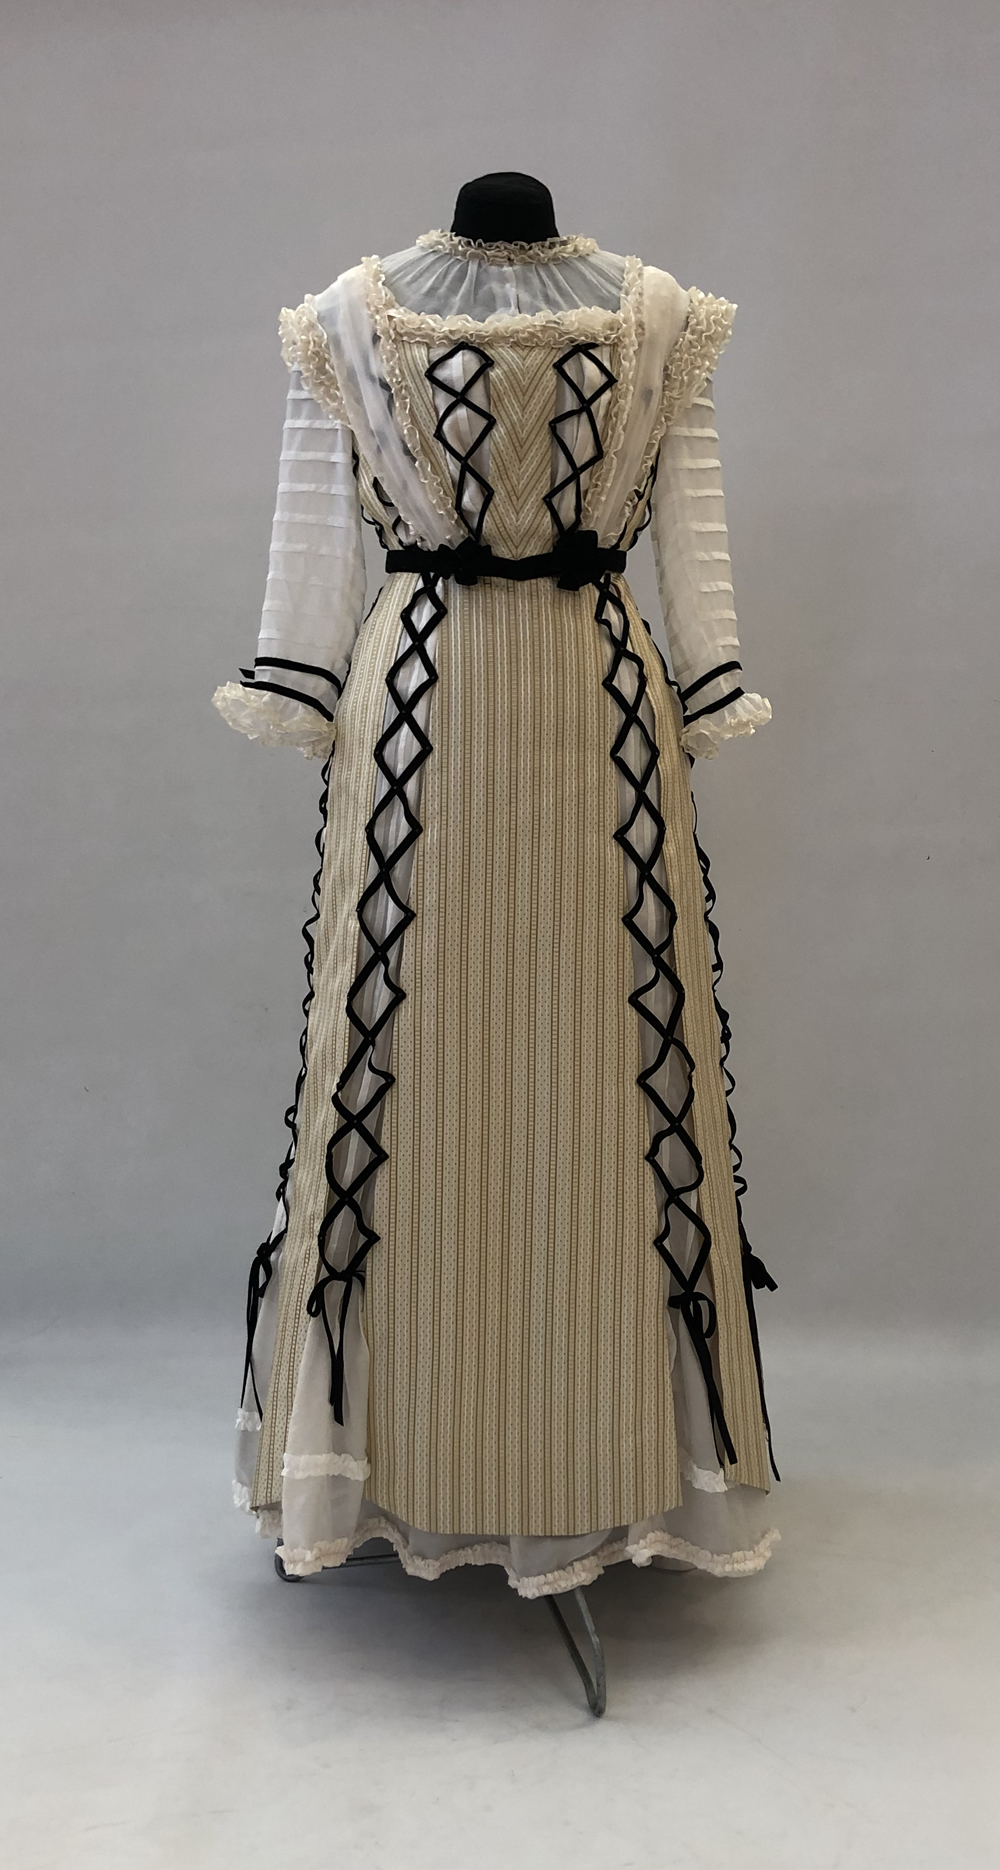
Figure 1: Front |
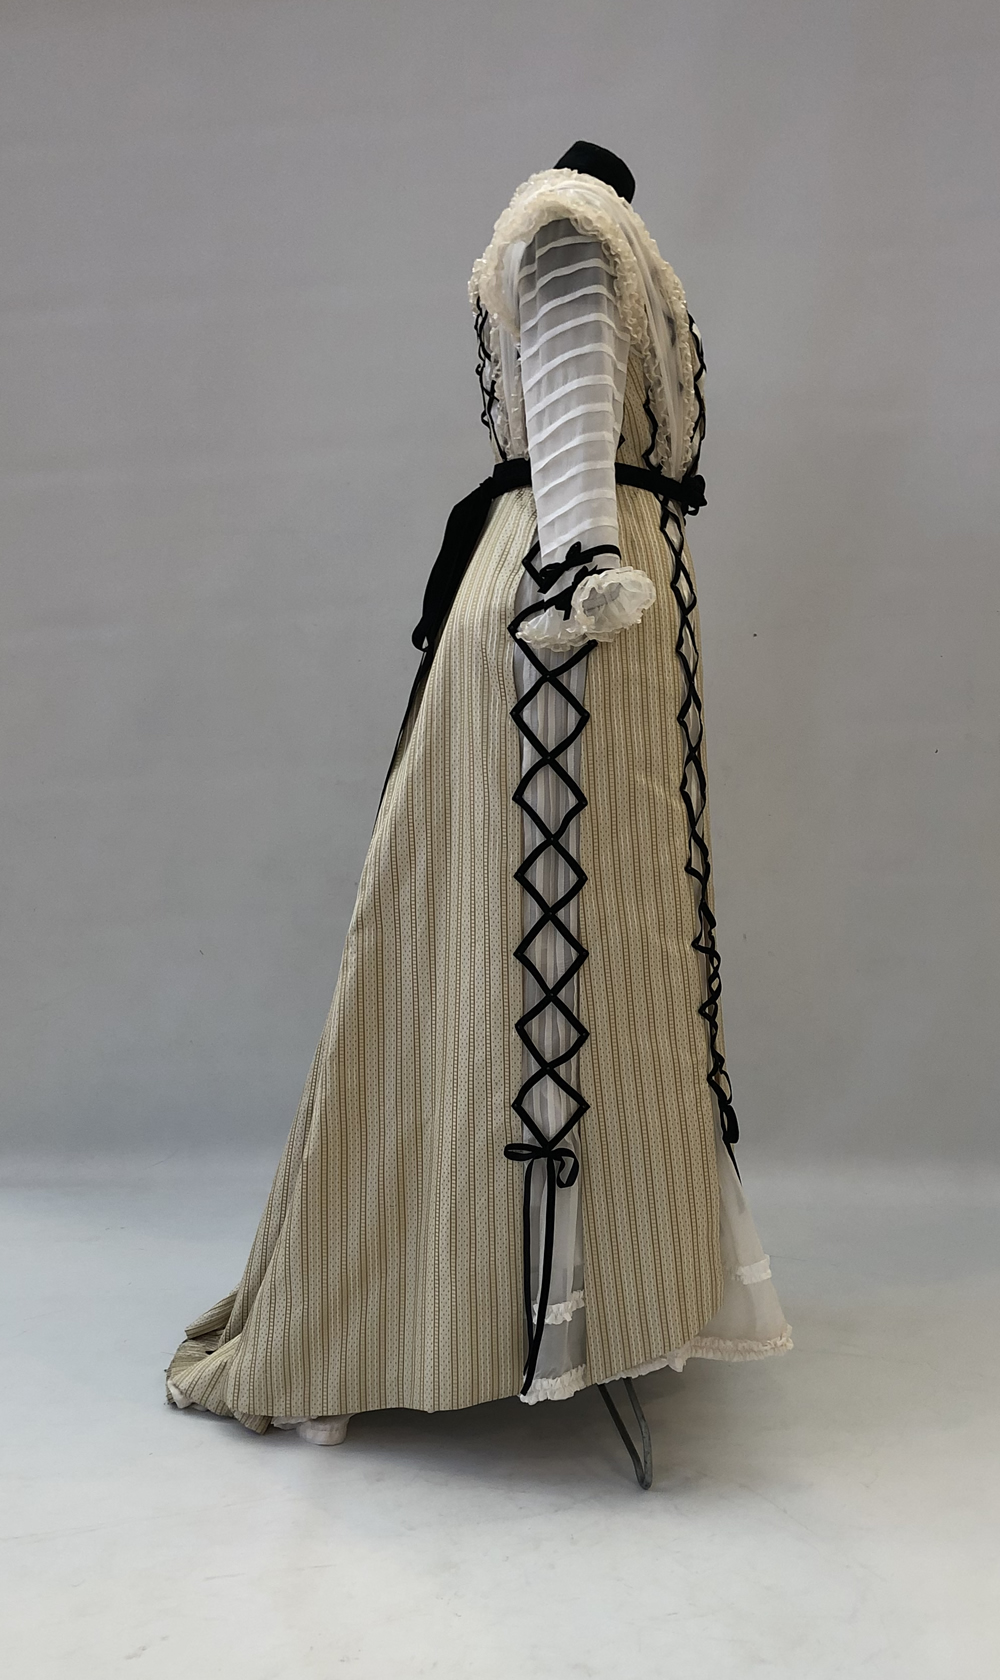
Figure 2: Side |
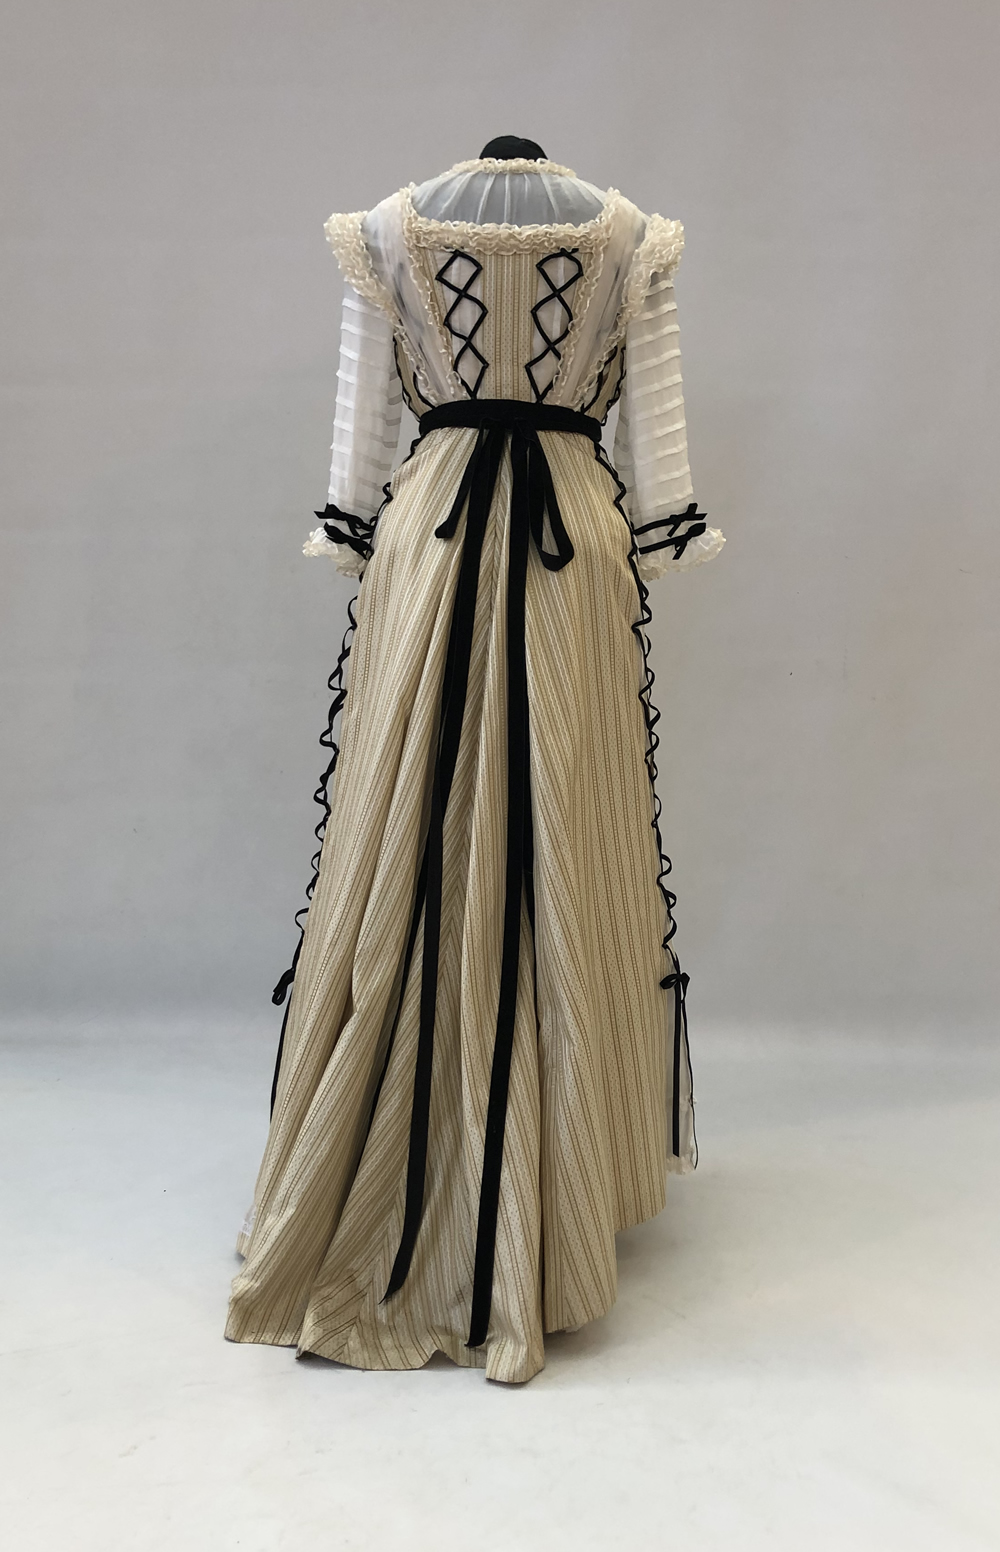
Figure 3: Back |
 |
 |
 |
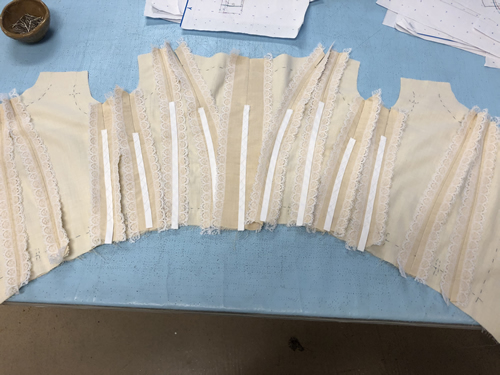
To lift the pattern from the bodice, I carefully draped muslin over each piece and drew seam lines with a pencil. Any area that was too delicate to use this technique, I instead took detailed measurements and drafted the pattern. Some areas, such as pleat width on the bodice and skirt, are asymmetrical. For these areas, I lifted the pattern from the side that seemed to be the most consistently pleated and constructed my reproduction as a symmetrical garment.
When choosing materials to produce my reproduction, I tried to keep the fiber content as true to the original as possible. The fashion fabric is a fine silk brocade that is much thinner than the original. I purchased silk gauze and 5mm silk habotai from Dharma and dipped them with Rit dye so they did not appear bright white. The gauze I was able to purchase was woven with a loser weave than the original so it proved a bit difficult to work with when stitching and tacking pleats. The trimmings were the most difficult to source. The bodice and skirt have three different types of velvet ribbon of varying fiber contents, mostly polyester and rayon blends. The ribbon is stiffer and less drapey than the original. The satin edged organza ribbon is polyester and actually very stiff. In an attempt to soften the ribbon, I boiled it, and then washed it with salt and soda ash. The treatment improved the hand of the ribbon slightly. For the bones, I purchased synthetic plastic whale bone. It is thicker than the original but holds its shape well and is easily molded with steam. For bone casing I used 1/4" Prussian tape. I stitched this tape on to the seam allowances by machine anywhere the garment is unlikely to be altered, and cross stitched it on by hand over the underarm seams.
Figure 4: Bodice Base |
 |
On the base layer of the bodice I chose to use a lightweight cotton flatlined to a silk blend taffeta layer. The original is taffeta flatlined to the fashion fabric, but I chose to save on cost since the layer cannot be seen. I finished my seams by pinking and stitching finishing lace to the edge, then cross stitching the seam allowance down. A hand overcast would not have been as time efficient, nor or as durable, as the lace finish.
All other layers of the bodice are constructed in a similar manner to the original with the exception of seam finishing with lace and the use of machine stitching in any area that it could be done. The armscyes are bound with a lightweight taffeta, and the hem of the bodice is also bound using a wide strip of bias taffeta.
As my silk brocade was much lighter in weight and crisper in hand than the original, I chose to flatline each pane and skirt panel with silk organza. This improved the drape of the skirt panels and aided in finishing the edges of the panes. The edges are turned back, pinked, and finished using finishing lace. Then, I cross stitched the lace down to the organza layer only. The organza also gave me a layer to stitch the dust ruffle to so that I did not have to prick through to the fashion fabric, which might have caused a slight pucker (figure 43).
Figure 5: Dust Ruffle |
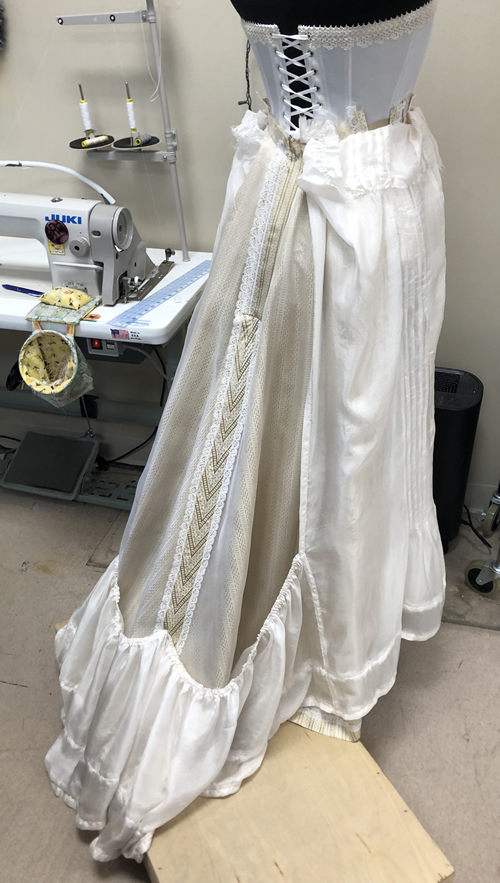 |
I finished the waist on the skirt by sandwiching all the layers between two pieces of grosgrain ribbon. I chose not to replicate the overlapping closure on the waist band at the back of the skirt. I felt it unnecessary in the construction of the skirt and that it would complicate dressing as the bodice needs to be hooked to the back waist of the skirt. Aside from this closure, all other closures are the same as on the original.
© Alexandra Hagman, 2022