


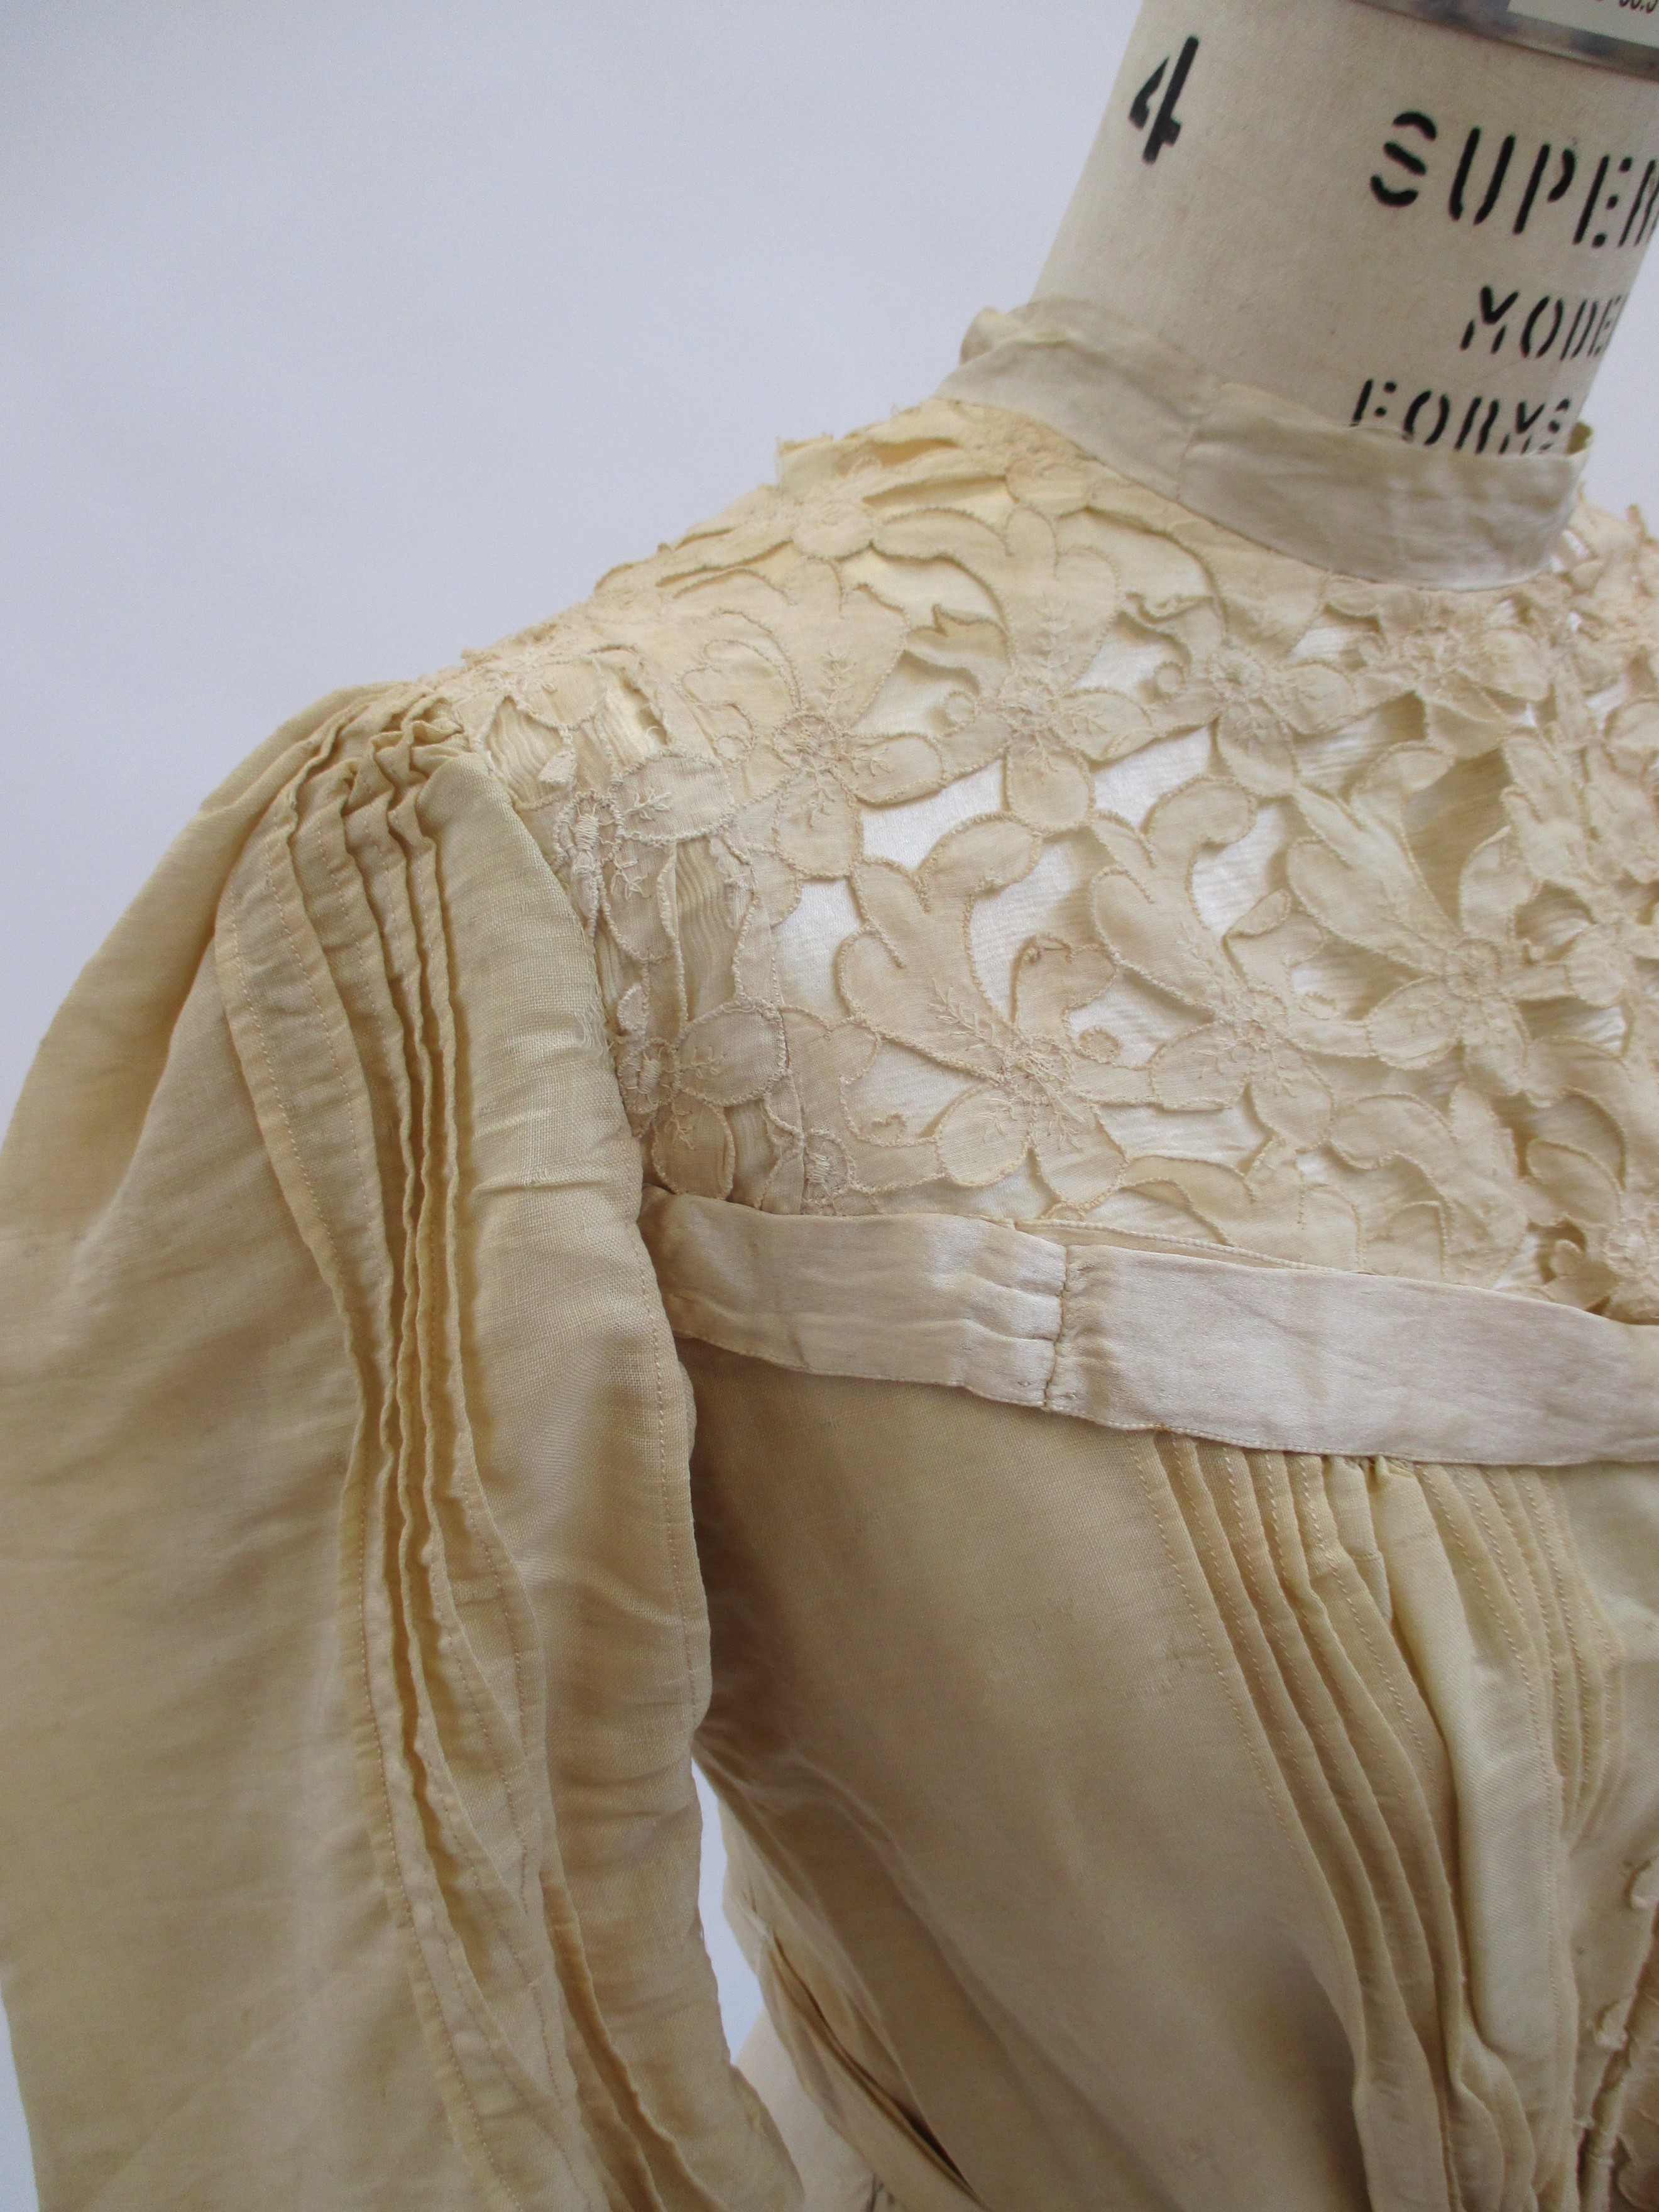
This charming bodice is one of hundreds that reside within the Costar Archive in the Department of Dramatic Art at the University of North Carolina Chapel Hill. The main fabric is a light tropical weight wool / linen blend fabric; it is used for the sleeves, cuffs, body of the bodice, as well as the bias binding around the yoke and hem. Cotton cutwork lace is flat lined over crepe silk for the yoke. Lightly glazed cotton broadcloth was used to make the underbodice and undersleeve. It is boned with whale bone. All of the fabrics, in their current state, appear cream with a peachy undertone. Once slightly brighter in the bodice's original state, it has aged and yellowed over time. There are no labels or maker's marks within the bodice to provide clues to its origin.
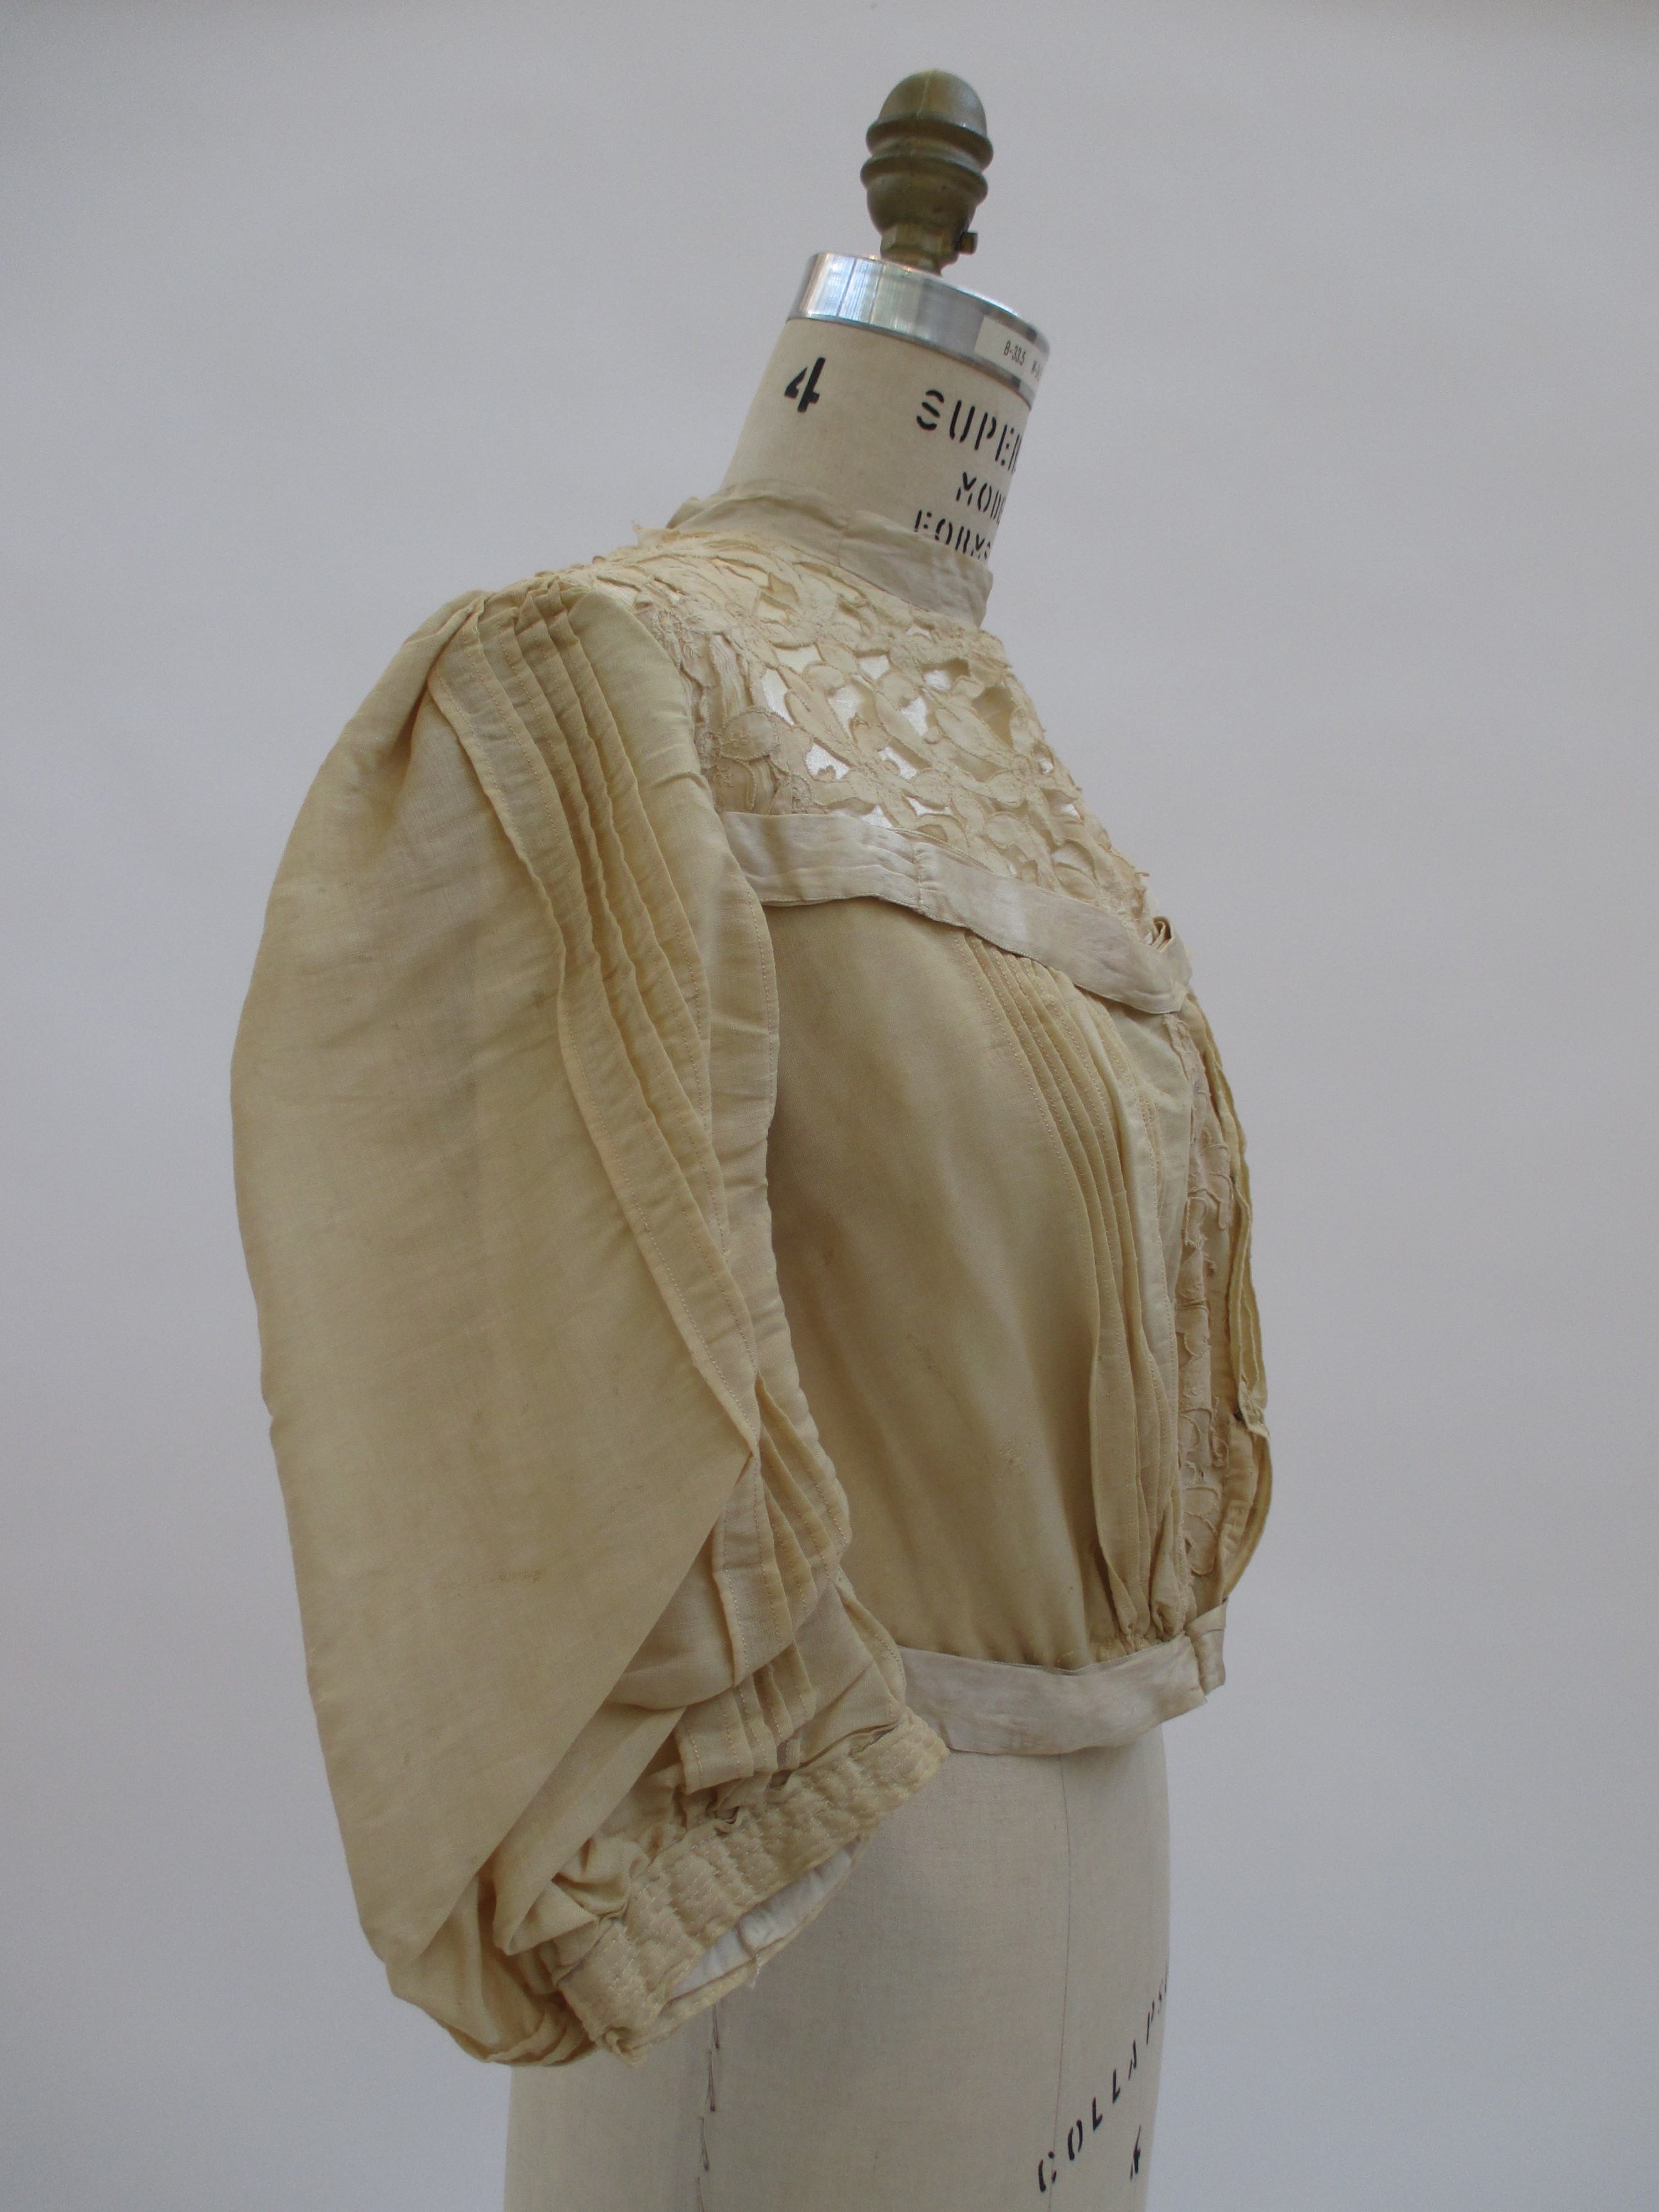
The bodice most likely dates from between 1900-1905. The Costar Collection contains eight other cream bodices with short or 3/4 length sleeves that fall within the same time period around the turn of the century. The structure of the garment emphasizes the smallness of the corseted waist. According to Blanche Payne on page 535 of The History of Costume, to emphasis the tight fit at the waist, the outer fabric was fitted to the body using tucks rather than the darts or princess seams used in earlier eras. Long leg-o-mutton sleeves, according to Jean Hunnisett in the first volume of Period Costume for Stage & Screen, were the most common sleeves for day wear during the 1890s while short sleeves were the sleeve of choice for evening. Three-quarter length sleeves with fullness behind the elbow were more readily seen after the turn of the century. The bodice is sewn mostly by machine with some hand finishing which was typical for the time.
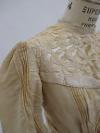
What makes this bodice unusual is the large number of pin tucks that run across the front and back of it. Not only do the sleeves have pin tucks, but the pin tucks run into the armpit of the sleeve. Also, the asymmetrical floral design of the cutwork is breathtaking. Lastly the closure method is interesting. The under bodice closes center front, while the exterior yoke closes to the left shoulder while the lower center front decorative placket cover closes with hooks underneath the pin tucks on the left side.
In its current state, the bodice measures 38" at the bust level and 27.75" at the waist. The sleeve length, shoulder point to cuff hem, is 16", while the cuff’s circumference is 11 inches. Around the armhole, or armscye, of the bodice measures 17.5". As for bodice lengths, the back measures 13", while the front measures 15". The neck measures 14.25" around.
Bodice Exterior
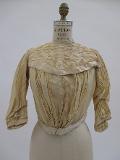
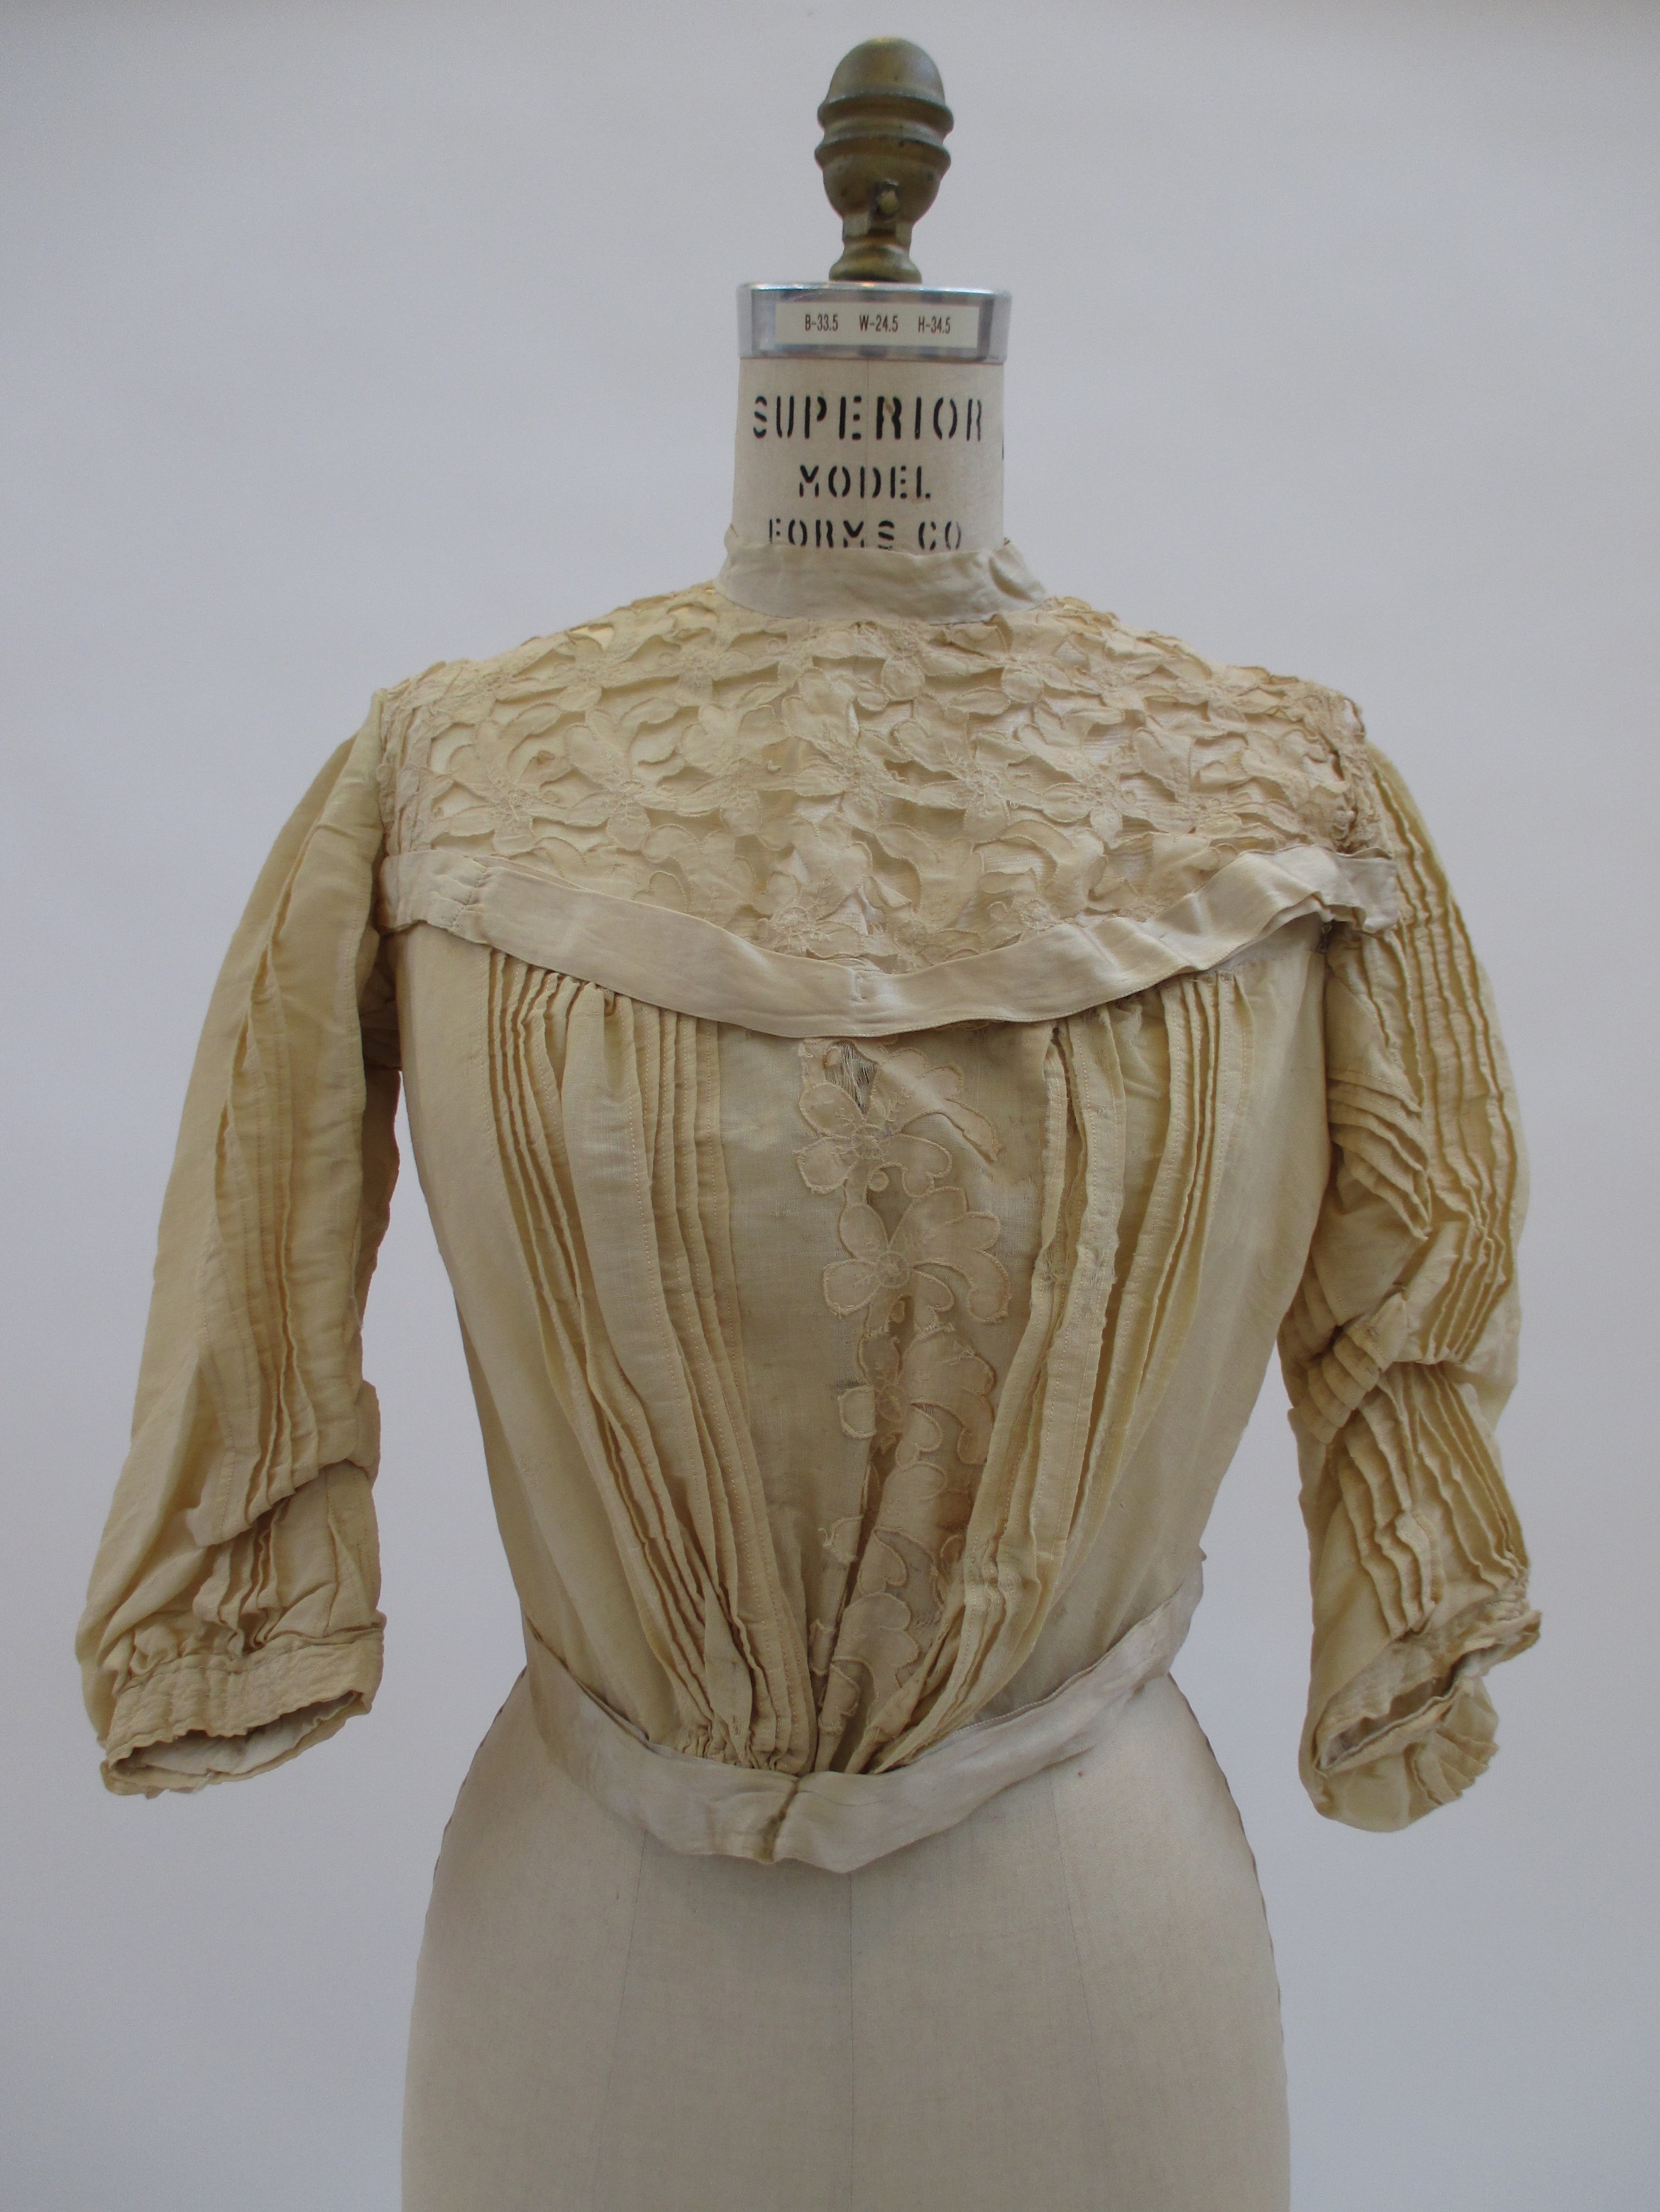
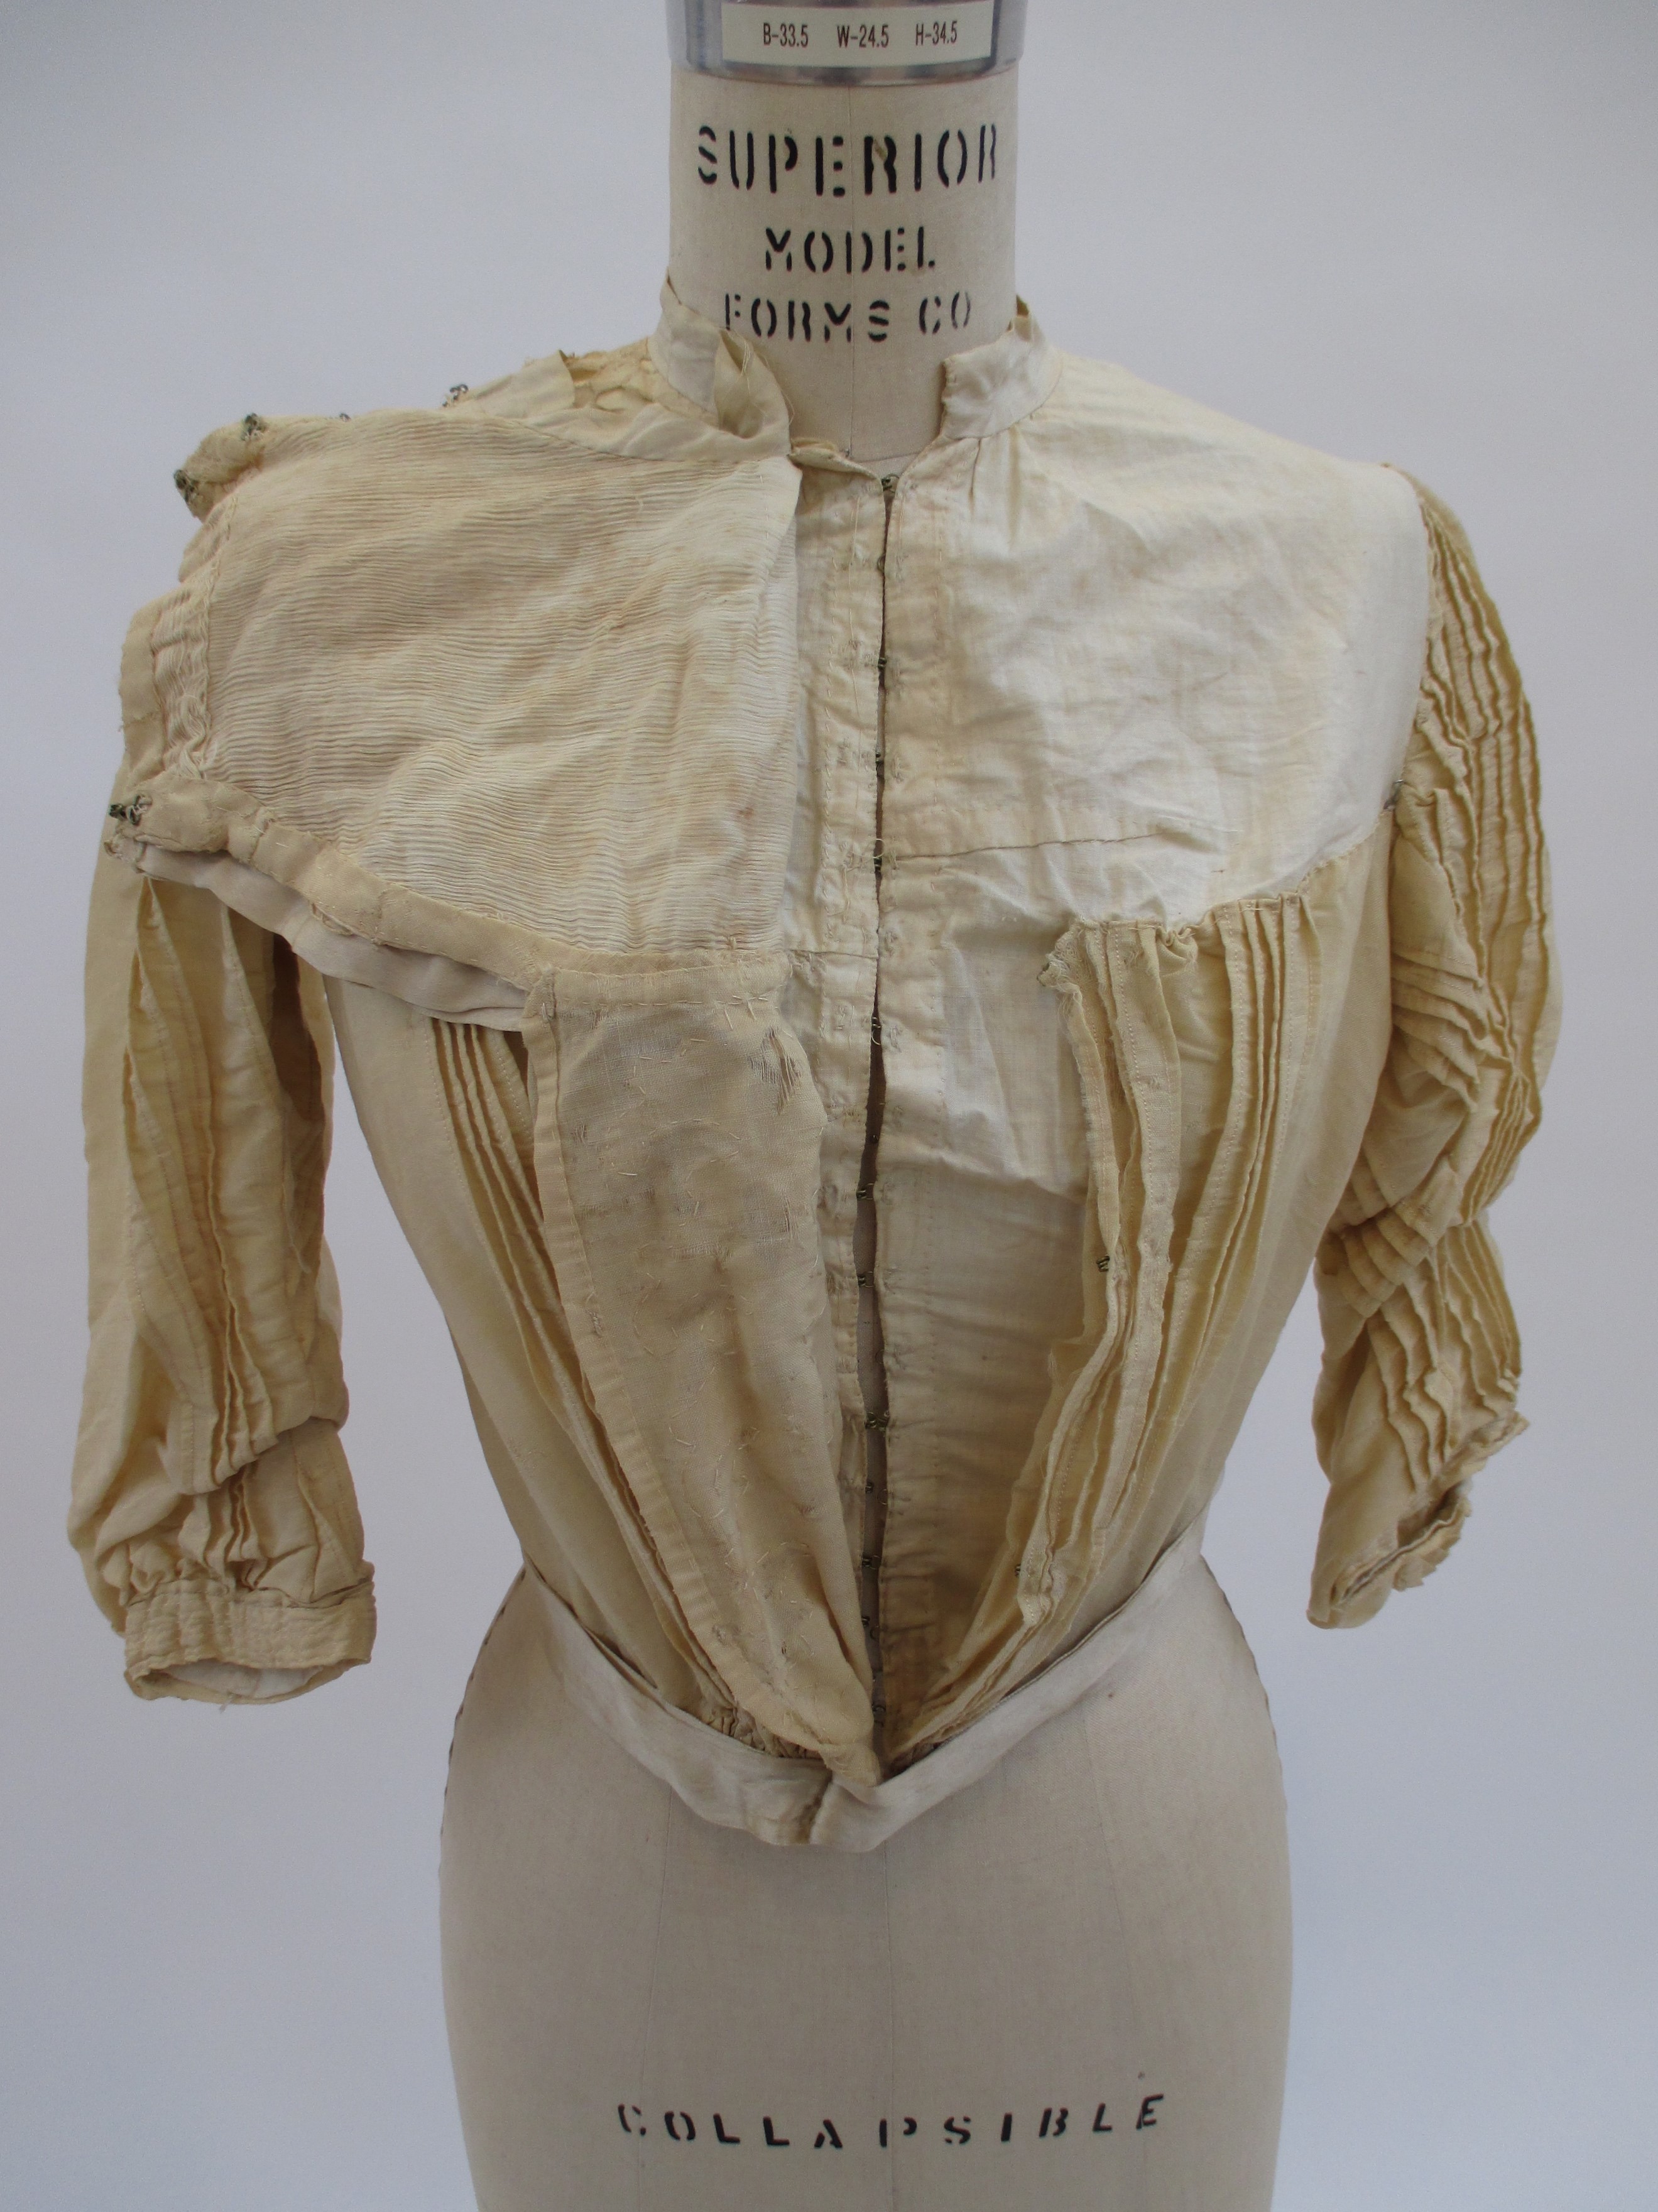
Figure 1: Front Bodice |
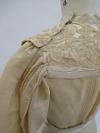
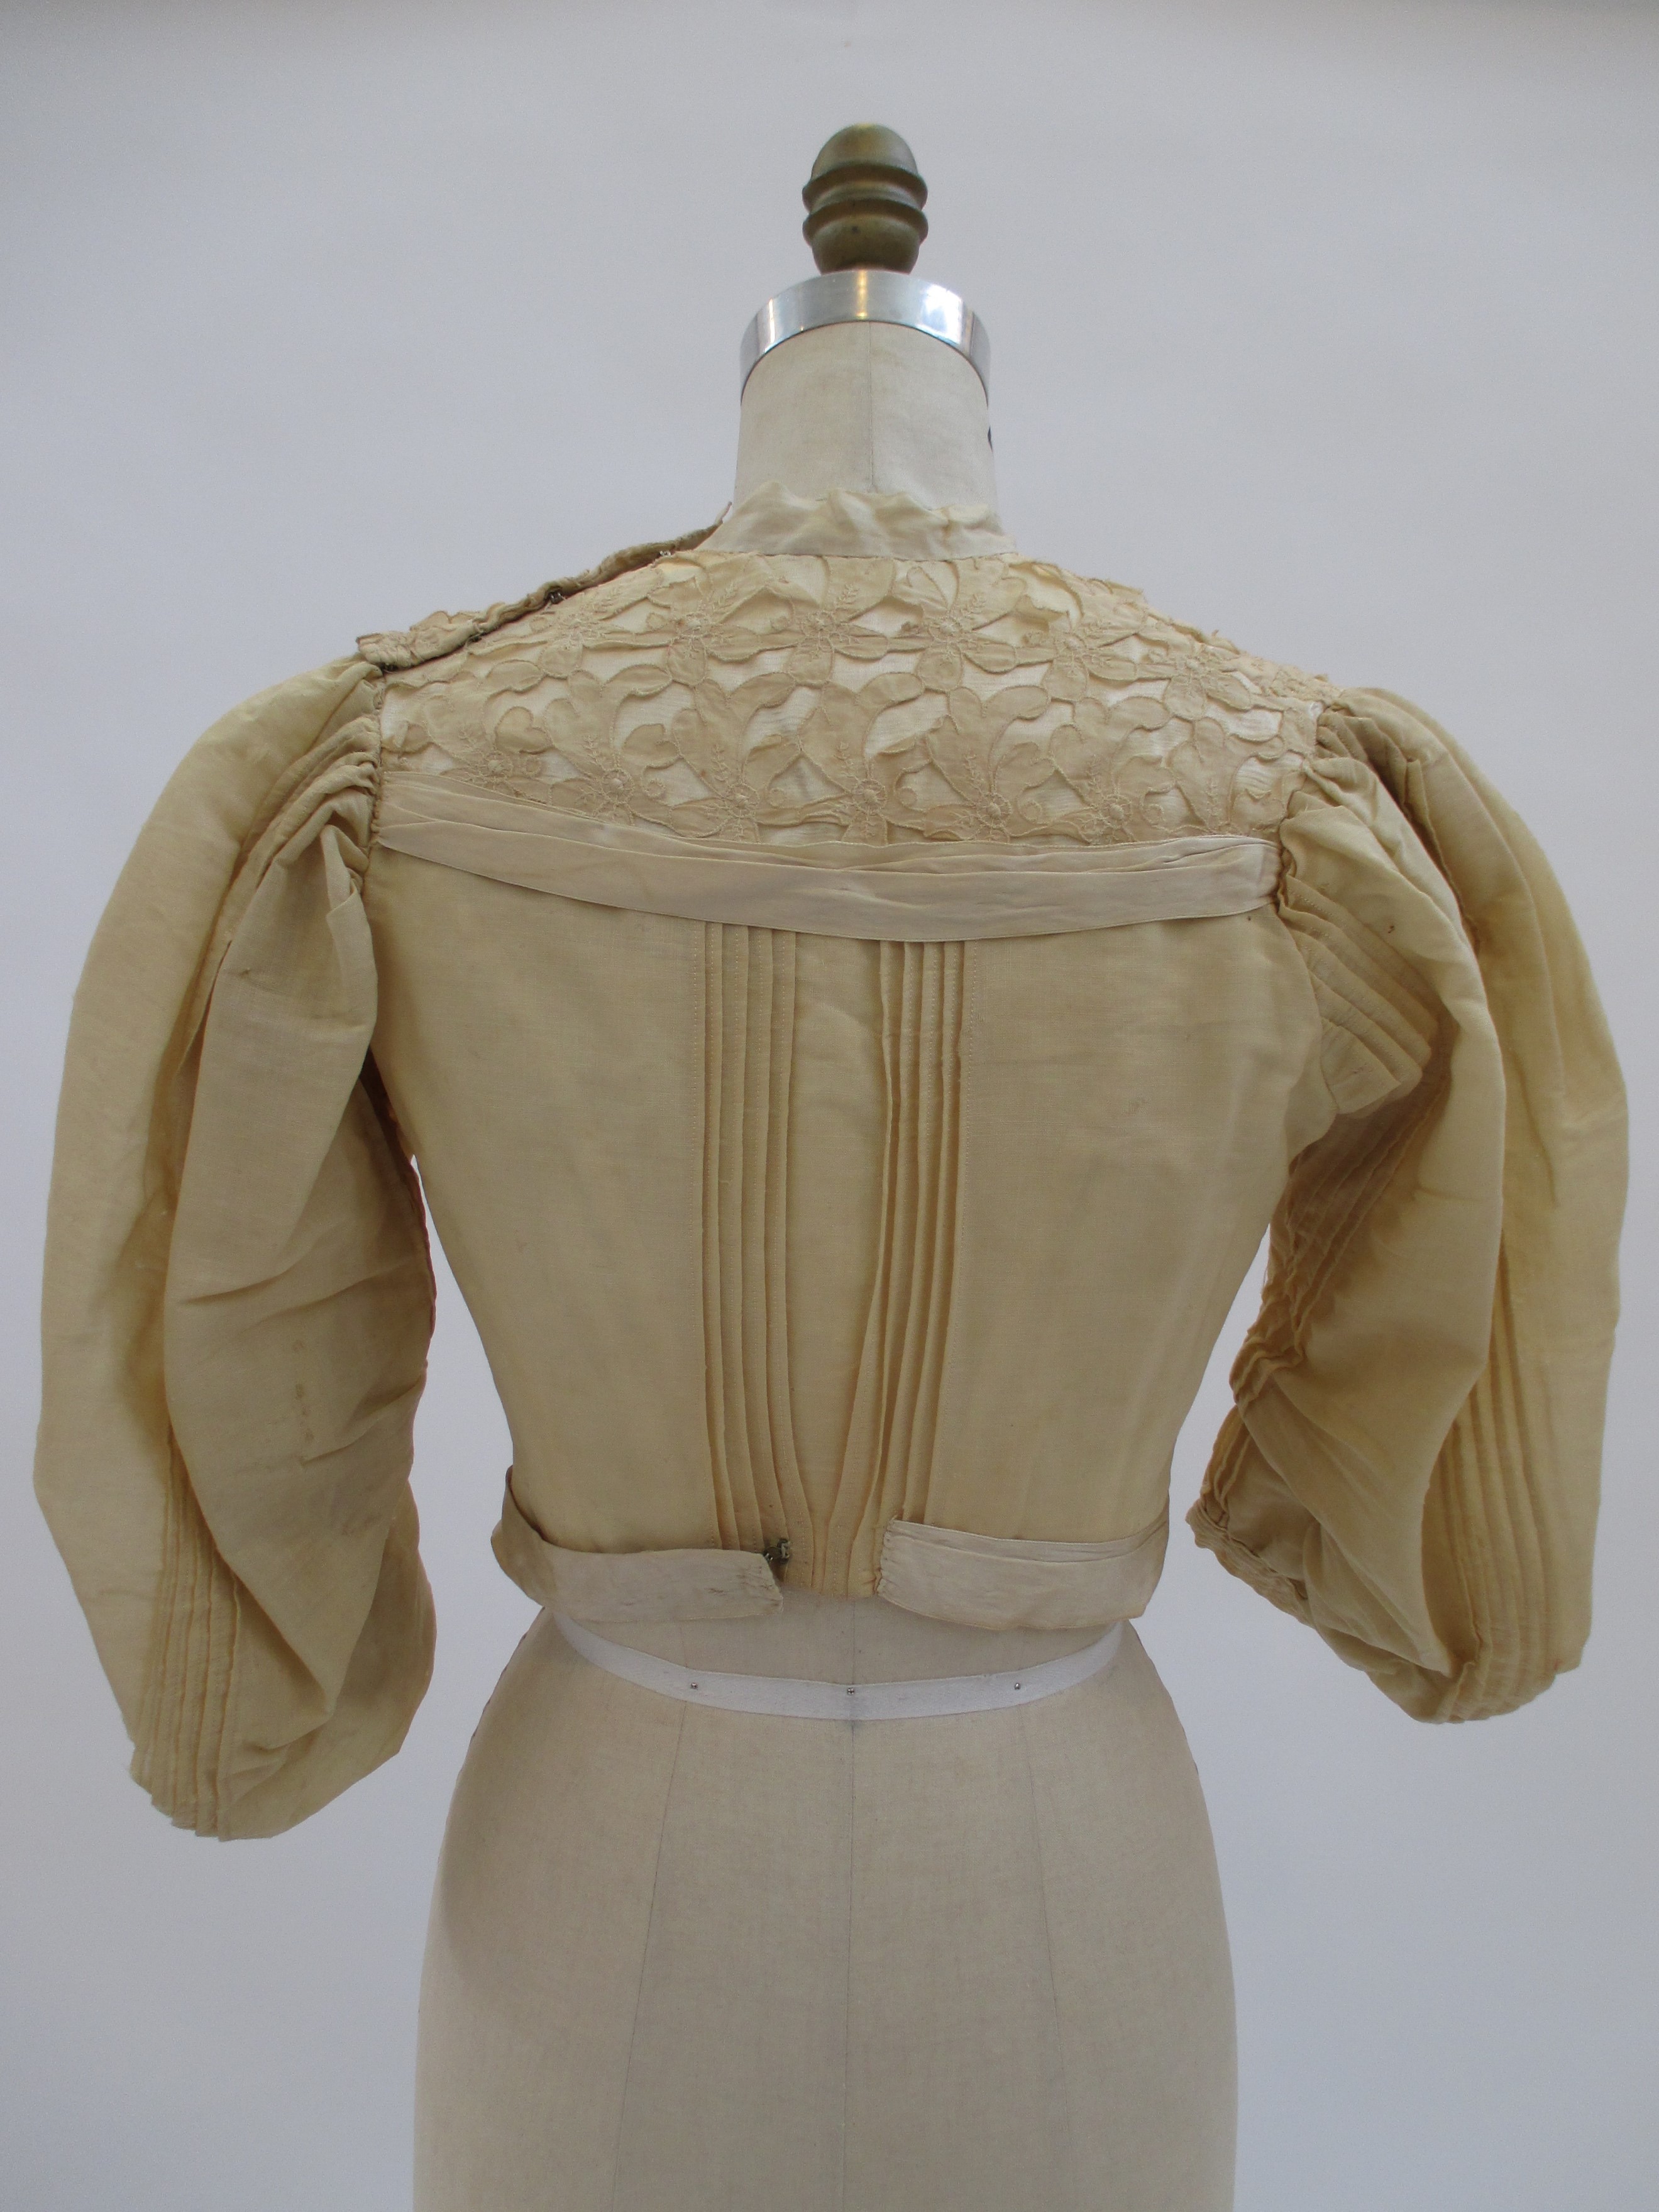
Figure 2: Back Bodice |
 |
 |
Across the upper portion of the bodice, the front yoke (measuring 14.75" across the lower edge of the front) stretches from armscye to armscye. Down center front, from the neck edge to bottom yoke edge, it measures 6", curving downward 2" from its original attachment points at the armscyes (see figure 1). With the shoulder seam set further back than modern standards, the yoke measure 6.75" long on either side along the armscye. Constructed of cotton cutwork and crepe silk, the front yoke is not cut in one piece; there is a 1" strip pieced along both armscye (see figure 13). Because it appears that the strip is pieced and the is grain different, the main yoke crepe appears to be cut on the cross grain and the additional section appears to cut on the straight grain, it could be hypothesized that the original fabric was too narrow to cover the entire yoke without seaming. It is unclear whether this piecing was due to the cutwork width or the crepe width. One explanation for this could be that these two strips were taken from the bottom edge of the yoke and rotated to be used for more width. The shoulder seam is 4.5" long and angles to the back. Seamed into the right armscye, neck, and shoulder, the yoke remains independent and unattached across the left side of the body. On the left side, the bottom, armscye, and shoulder edges are self-bias bound and finished at 0.5" (see Figure 13).
The back yoke measures 4.5" from the center back neck to the bottom edge, while from armscye to armscye it measures 11". While the front had a pieced-on section, the back is cut in one, seamed into the collar, shoulders, and armscye. The hem is covered by the turned under edge of the bodice wool. At the bottom edge, the last 1/2" of the yoke is covered by a decorative pleated ribbon.
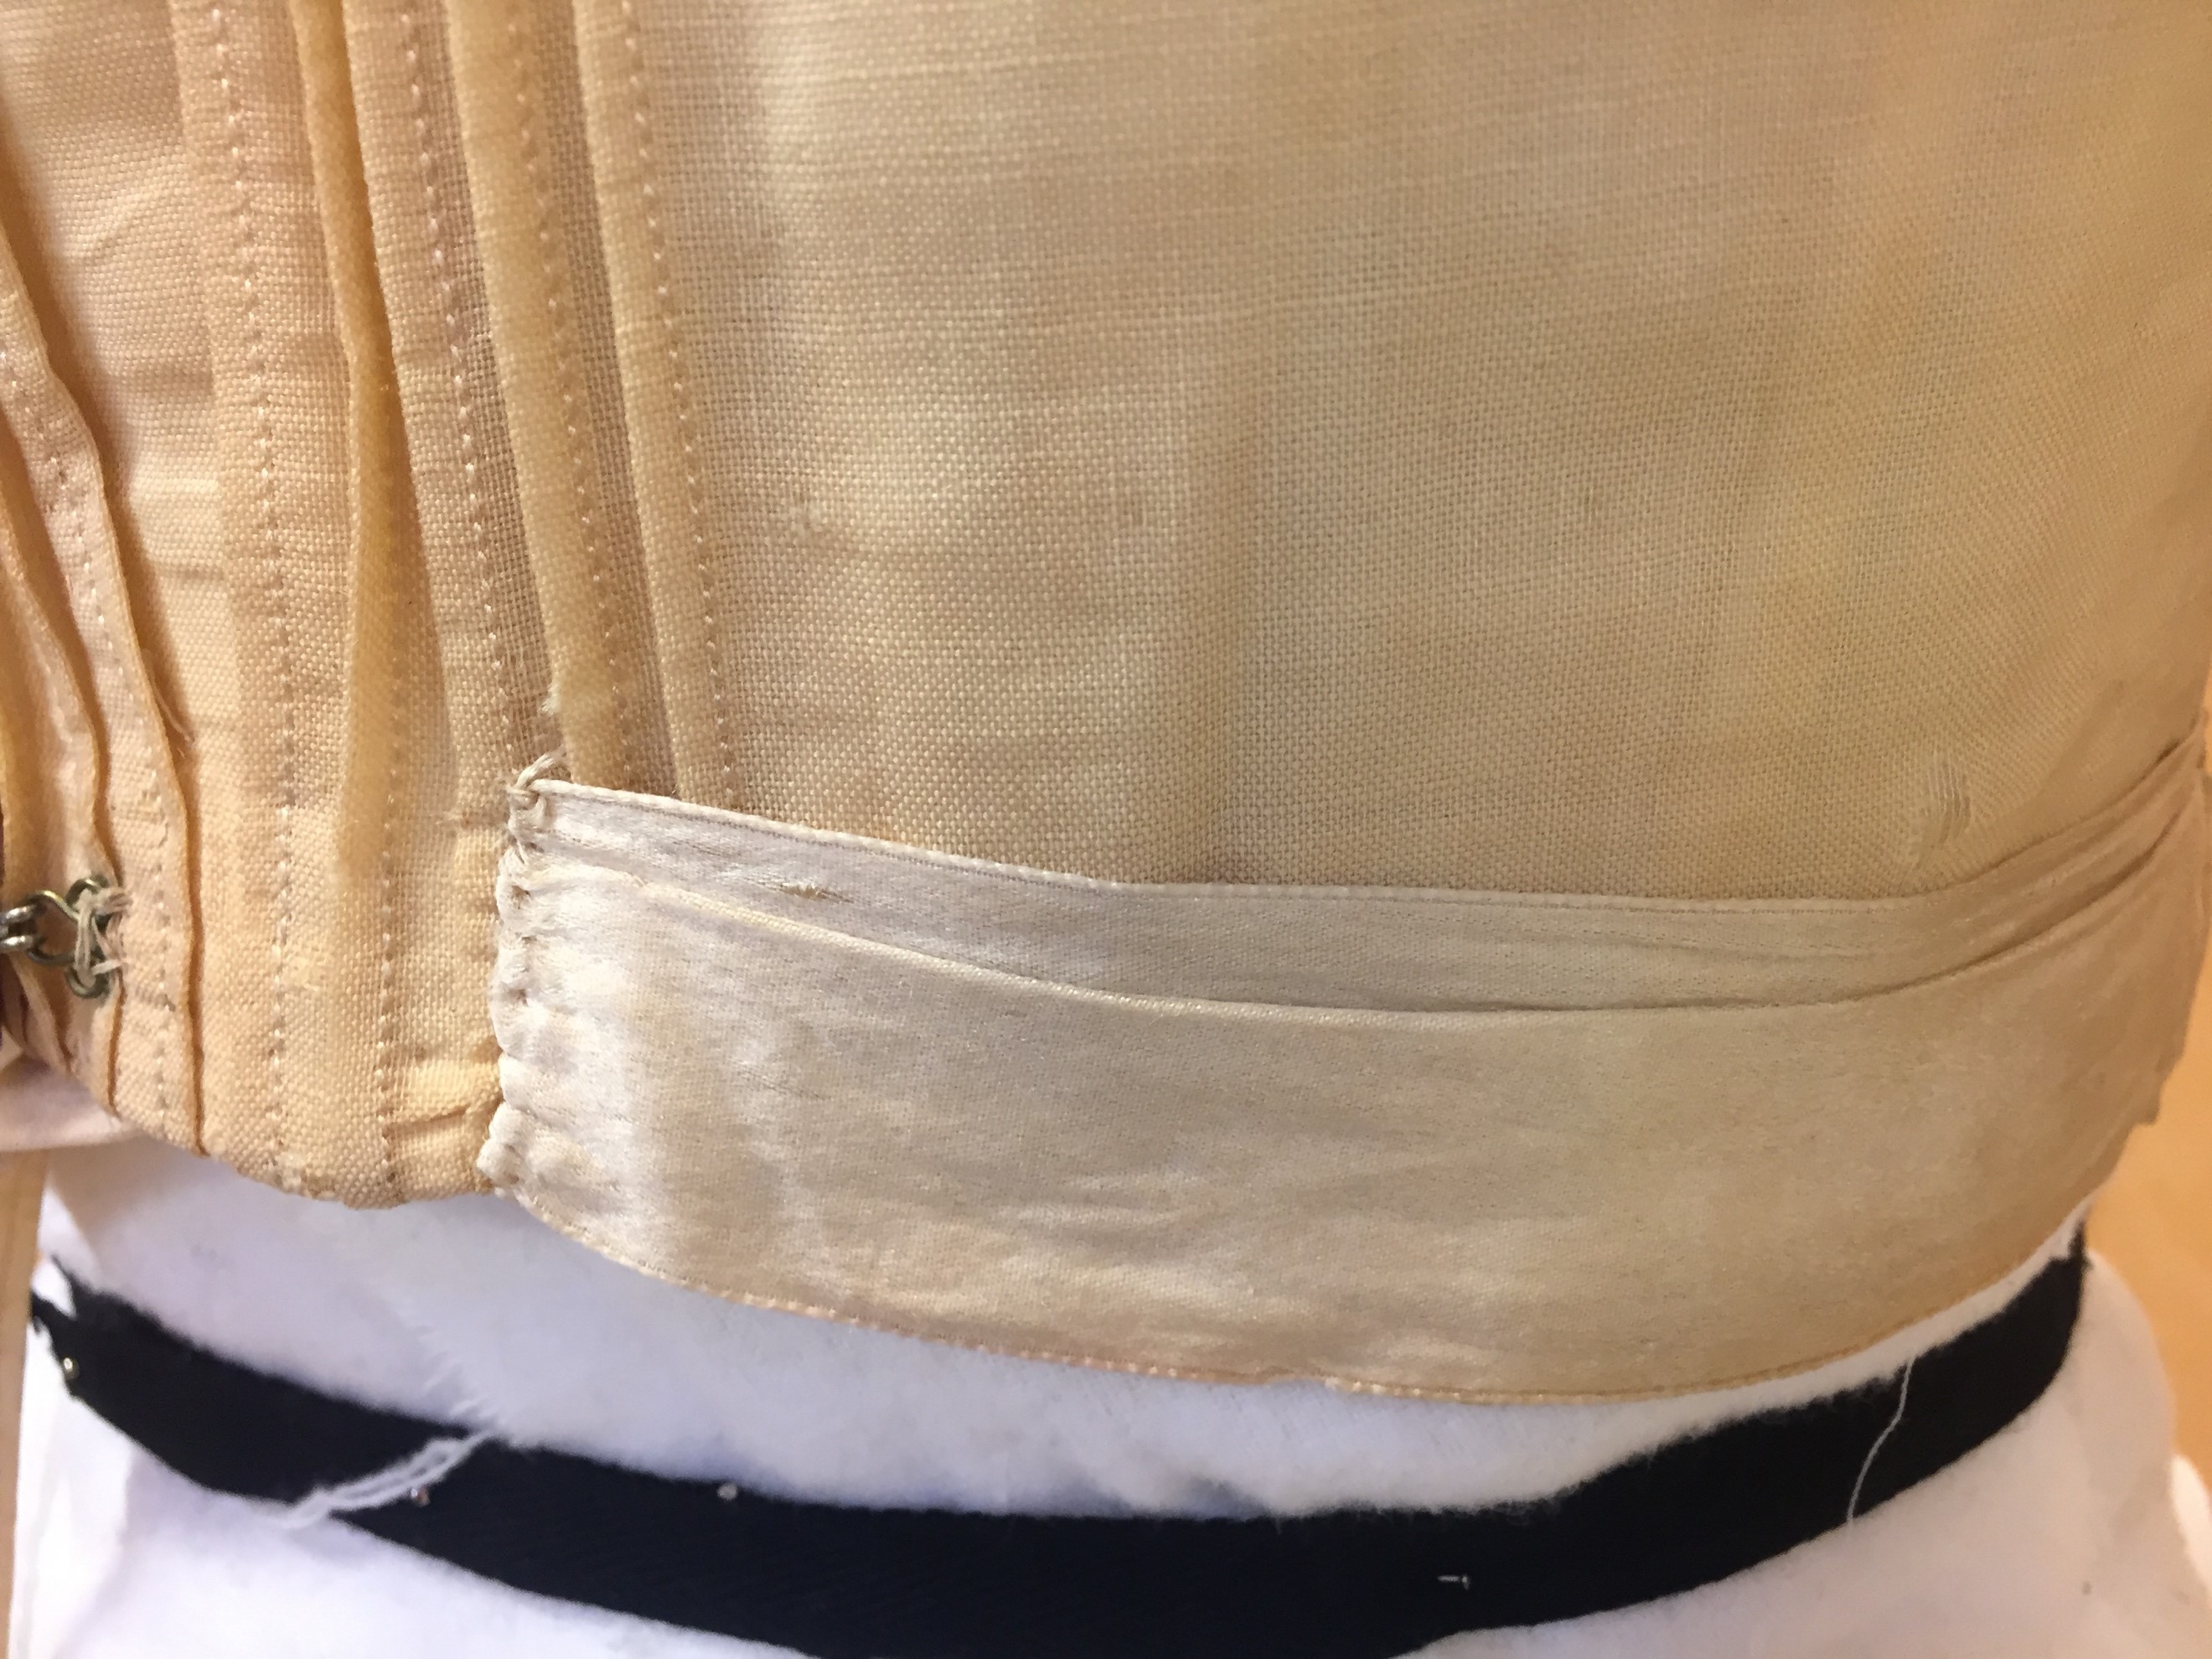
The lower bodice, constructed from a wool / linen blend, is attached to the understructure at the yoke line; at that point, the top edge is turned under and seamed on with a tiny running stitch. While the bottom edge is attached to the understructure with a machine stitch, it was finished with 1" wide self-bias inside the bodice. Flat lined by hand, the exterior bodice was attached to the boned under bodice before the side seams were machine stitched together. Jean Hunnisett, on page 144 of Period Costume of Stage & Screen, explains this followed construction methods used during the 1890s with "the back of the bodice mounted in with the foundation while the front foundation fastened independently down the center." Currently the side seams measure 0.5" and are left raw. The back lower bodice is cut in one piece with two row of pin tucks (eighth inch tucks, 0.5" apart, in two sets of five) with 0.25" space between the two sets at center back. At the waist, slight tucks have been taken by pulling the pin tucks a little closer and hand stitching them invisibly; and at the waistline the middle space is reduced down to match the tuck spacing (see Figure 2). The front sections are cut on the straight grain along center front but the fullness within the panels rotates the side seam closer to bias. Similar to the back, the front has two rows of pin tucks on either side of center front, though these have 2.5” between the two sets. The outer set of tucks starts 3” in from the armscye at the yoke level line and the inner set of tucks ends 2” before center front (see Figure 1). Along the middle space at the yoke line, the 2.5" is gathered down to 1". Along the waist, the outer band of tucks starts 7" in from the side seams and the entire tucked section is gathered down to 1.25". This gathering seems to be controlled with two or maybe three rows of gathering stitches that are hand sewn with the upper most set being 0.75" up from the bodice hem.
Attached to the lower bodice section along the right-hand side, the decorative middle section covers the hooks and eyes of the under bodice while allowing for some fullness not present in the other bodice piece. The middle section is a 4" straight grain rectangle. It is sewn smoothly into the yoke, while the waist it gathered down to 0,75" with a hand running stitch (see Figure 1). Along the right side of this section it is stitched on as the last pin tuck is machine stitched. The left edge is finished with a 0.25" double turned proper hem that is hand stitched down with a tiny running stitch.
Underbodice
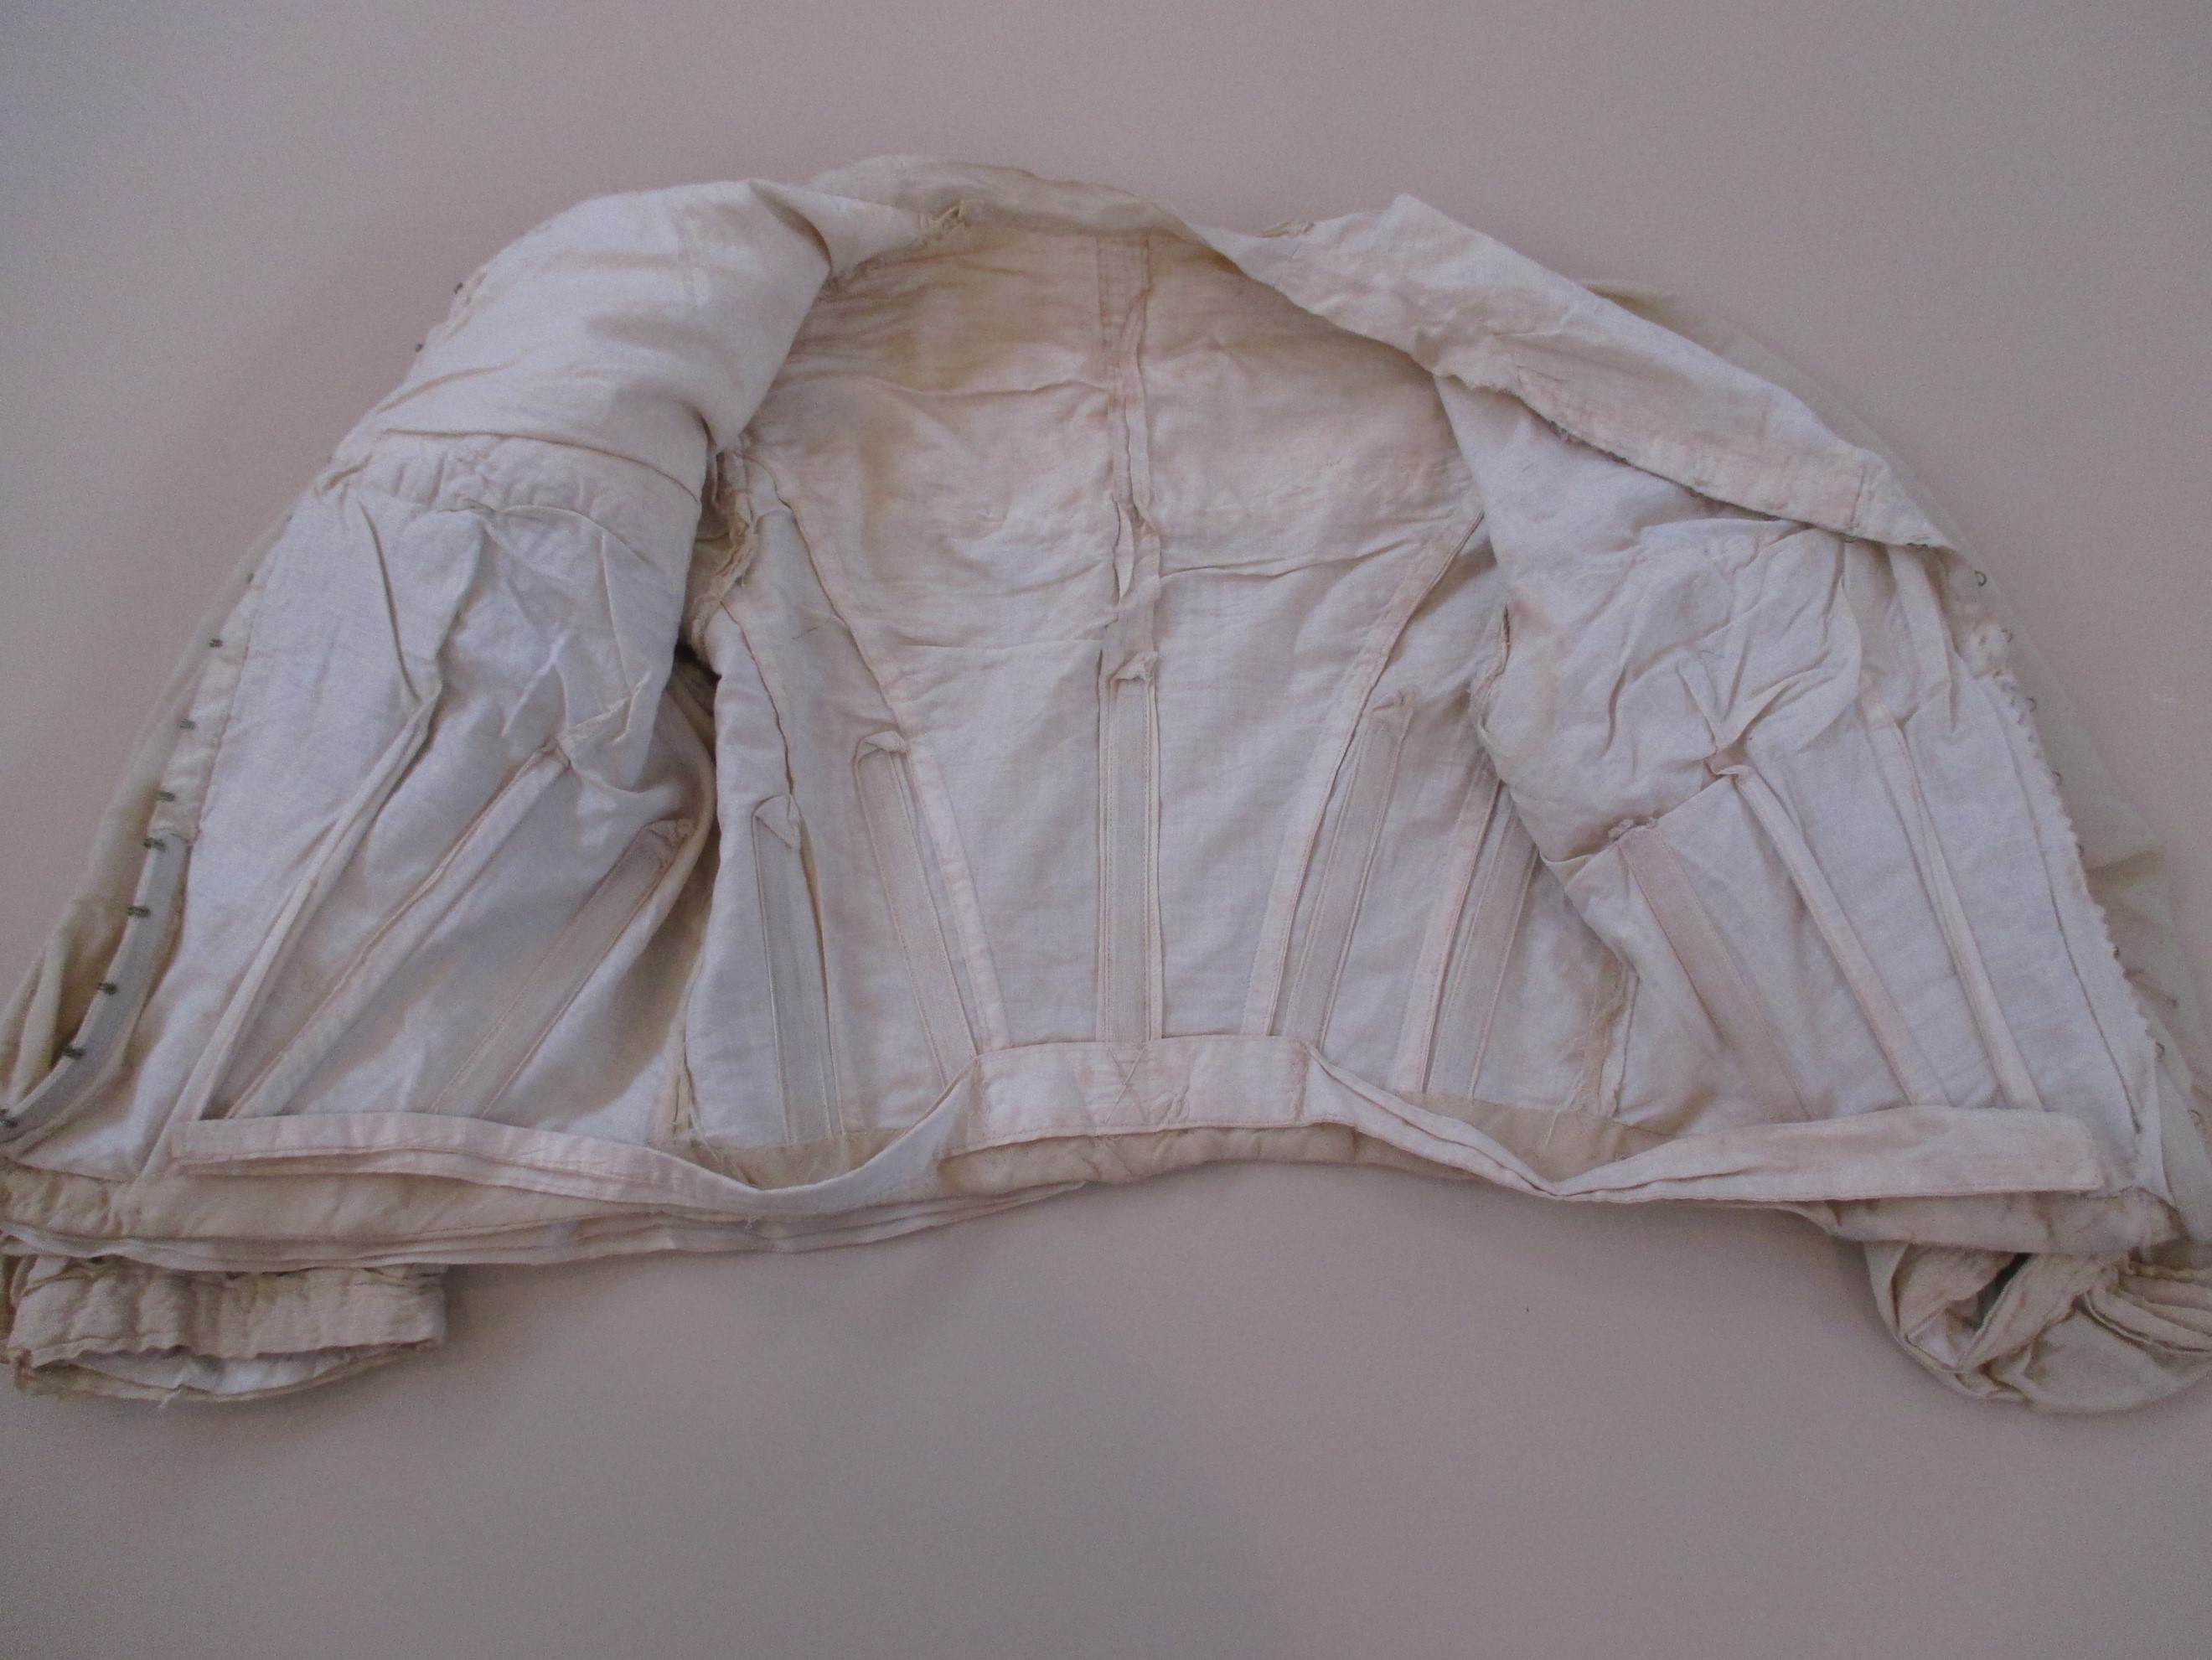
Figure 3: Bodice Interior |
Figure 4: Front Interior |
Figure 5: Back Interior |
 |
 |
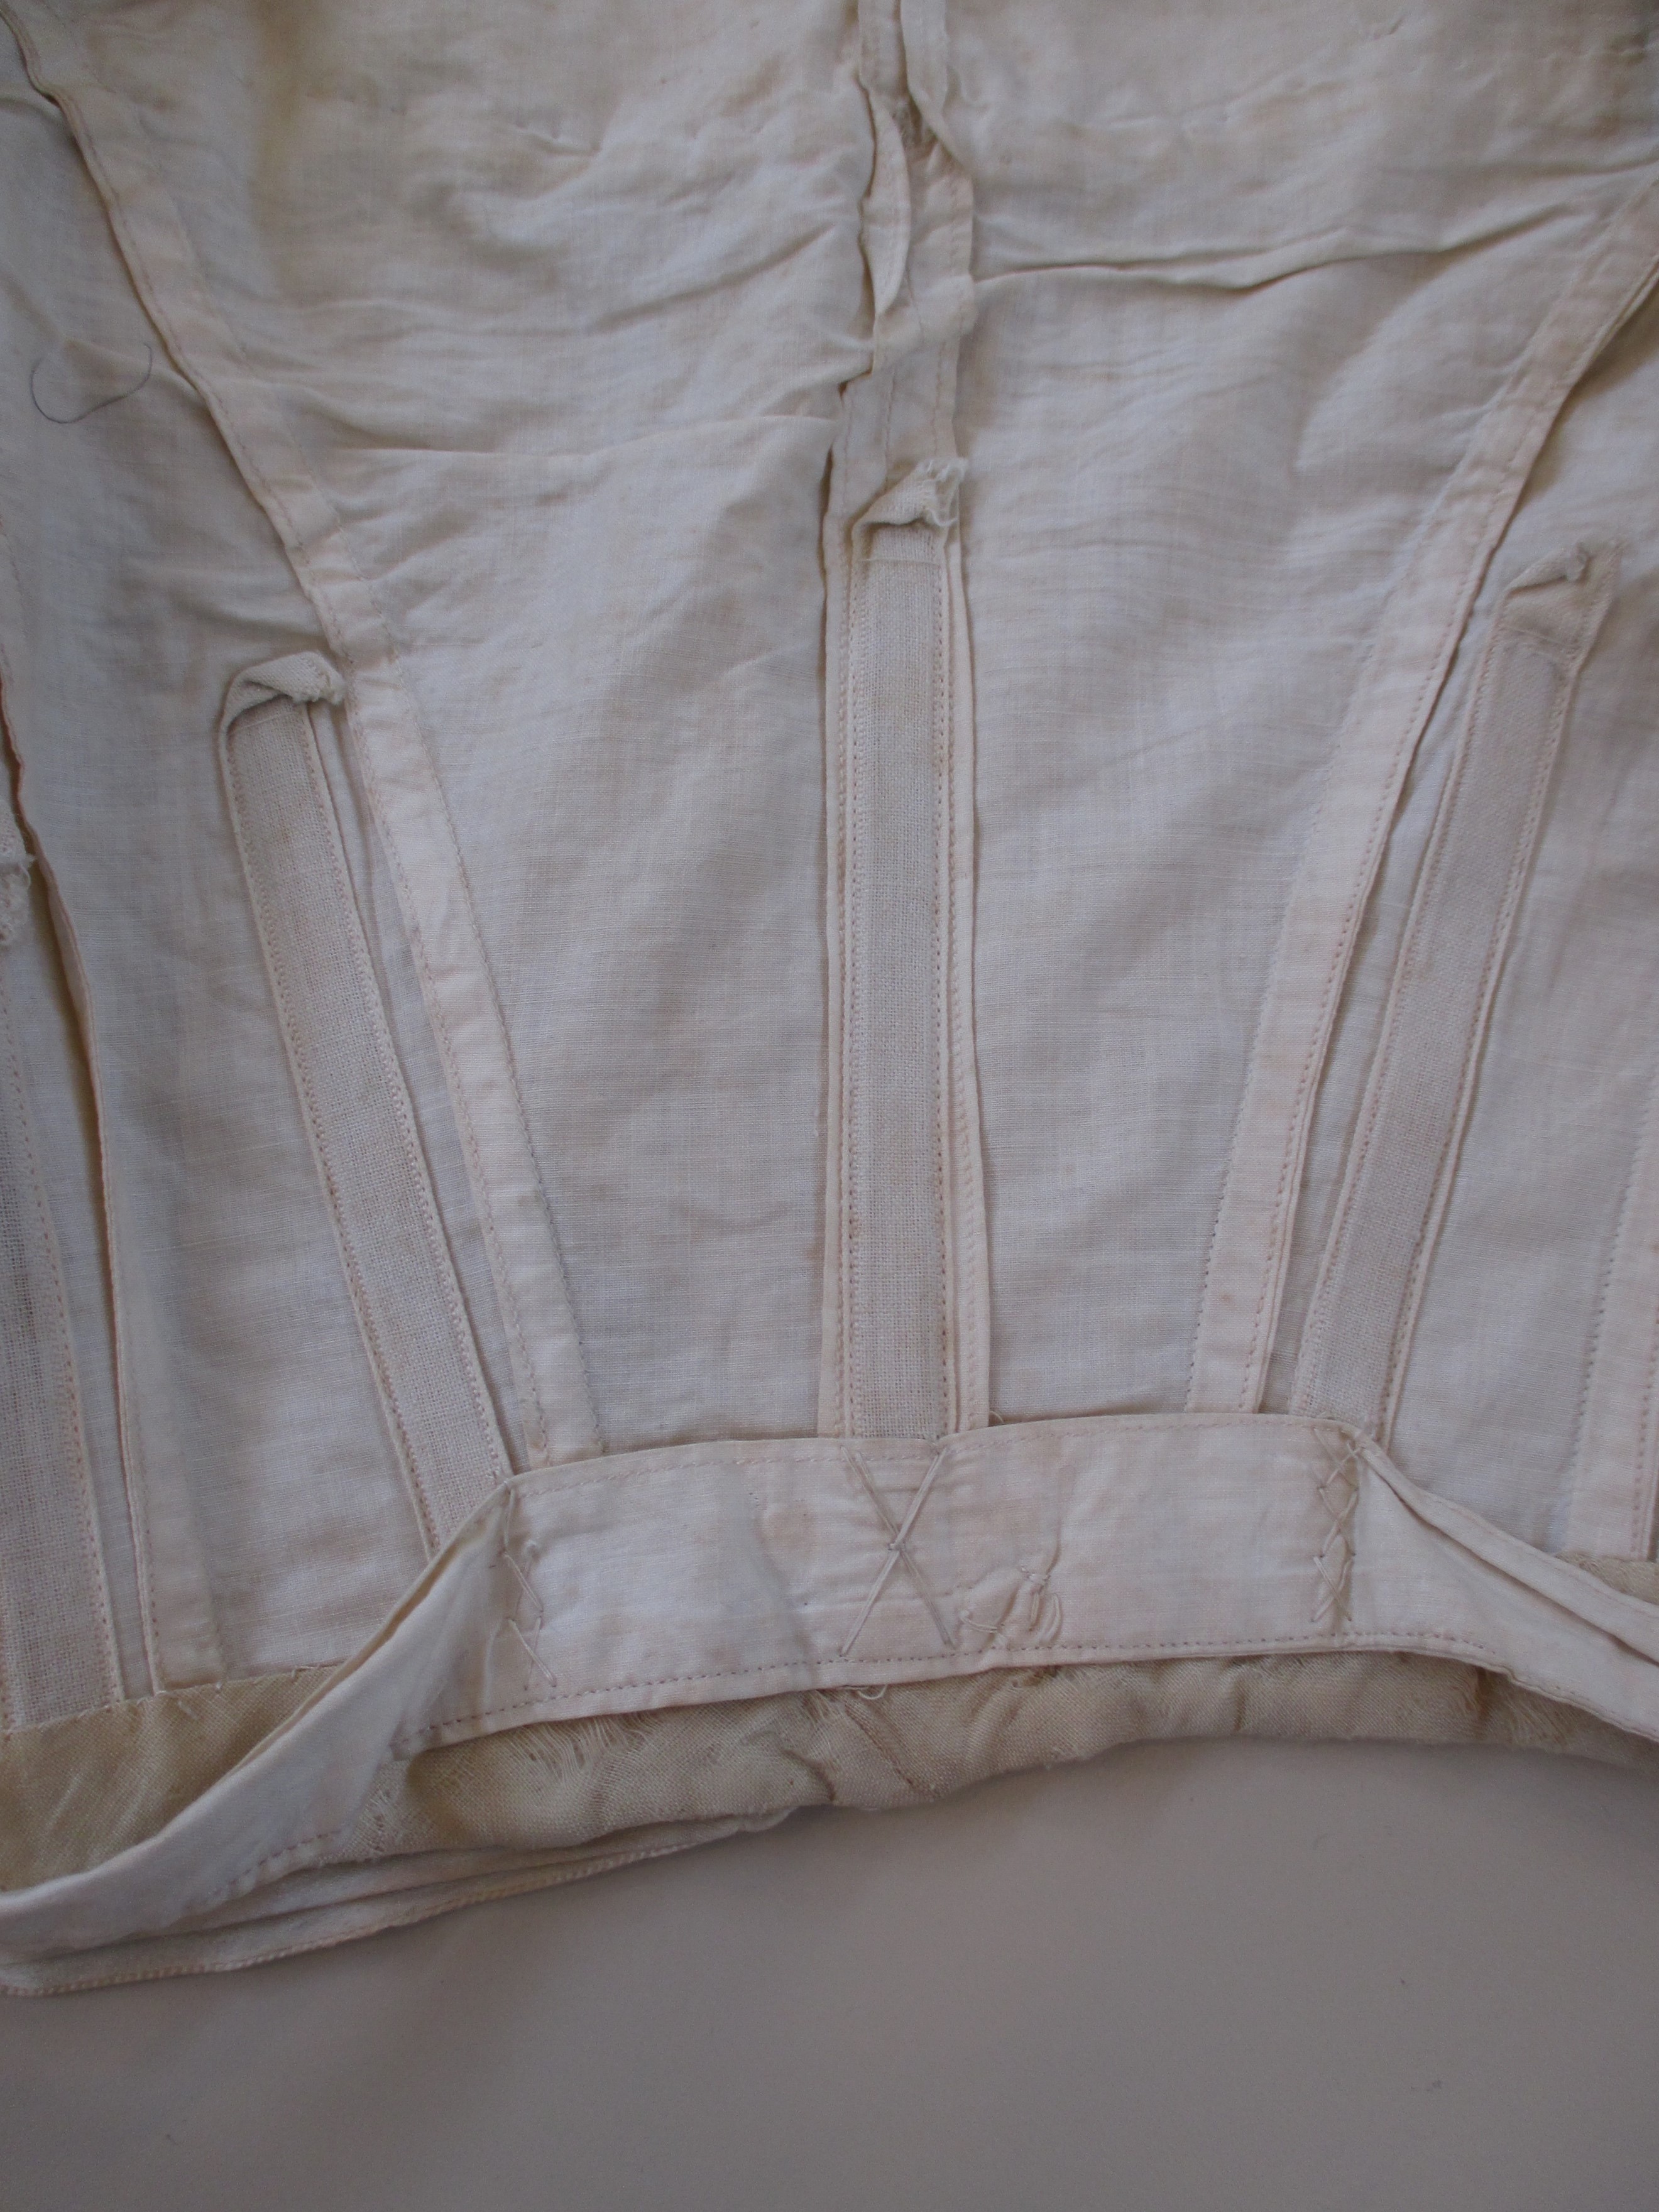 |
The boned glazed cotton broadcloth underbodice front is cut in one piece as is seen often during this period. Center front deviates from straight grain at the yoke level to extend 0.75" out to accommodate a corseted bust. As Douglas Russel explains on page 390 of Costume History and Style, the corsets during the late 1890s and early 1900s "pushed the bust forward." There is a dart to further accommodate the displacement of flesh that is located 0.5 up from where the bottom edge of the yoke attaches; it shapes out a total of 1" and runs out to nothing by 3" from center front. Then there are two under bust darts to draw in the waist. The one closer to center front starts 3.5" from center front. It is 8" long and shapes out 2.25" from the waist. Subsequently, the second dart is spaced 1.375" from the center front darts and runs 8.25" long. Both of these darts are used as channels for bones (see Figure 4). There is an additional 5.5" long bone sewn into a casing 5.25" in from center front on either side of the waist. There is also a 5" long bone inserted in that center front tape on both sides. In totalthere are eight bones within the front of the bodice.
Unlike the front, the back underbodice is constructed of three different straight grain panels per side, for a total of six pieces (see Figure 3). Dissimilar from the exterior bodice, the underbodice contains a center back seam. It is finished with a stitch-turn-stitch finish by machine to 0.75" wide. The two side panels split the waist evenly and curve up into the armhole. These seams are finished to 0.375" using a fake French seam. There are five 0.5" wide bones through the back of the bodice that are applied in casings. There is a 6" long bone applied over the center back seam. Within the side back panels on either side of center back, there is a 5.75" long bone that is set 0.5" in from the side back seam. Then on either side of the side back panel there are side-side back panels tht have a 5" bone set .05" into the panel (see Figure 5). So, in total the bodice has 13 whale bones that are 0.5" wide with five of those in the back of the bodice.
Sleeves
Figure 6: Sleeve Profile |
Figure 7: Tucks on Front Seam |
Figure 8: Sleeve Cuff |
 |
 |
 |
The sleeves were constructed with a two-piece undersleeve and a one-piece over sleeve. The front sleeve seam of the undersleeve is in line with the over sleeve seam; it is seamed into the armscye with that front seam 1.25" below where the front yoke intersects (see Figure 7). When the bodice is on the dress form, the sleeves reach just past the waist, which indicates that they probably reached just below the elbow. Inside the bodice, it is visible that the undersleeve has no gathers at the cuff or gathering at the sleeve cap and wrist, but has minimal fullness, about 1.25" at the cap. The undersleeve has 0.5" wide seam allowance along the back seam and a narrow 0.25" seam along the front (see the section labeled alterations below for additional explanation). At the armscye, the seam allowance is left unfinished at 0.25" long.
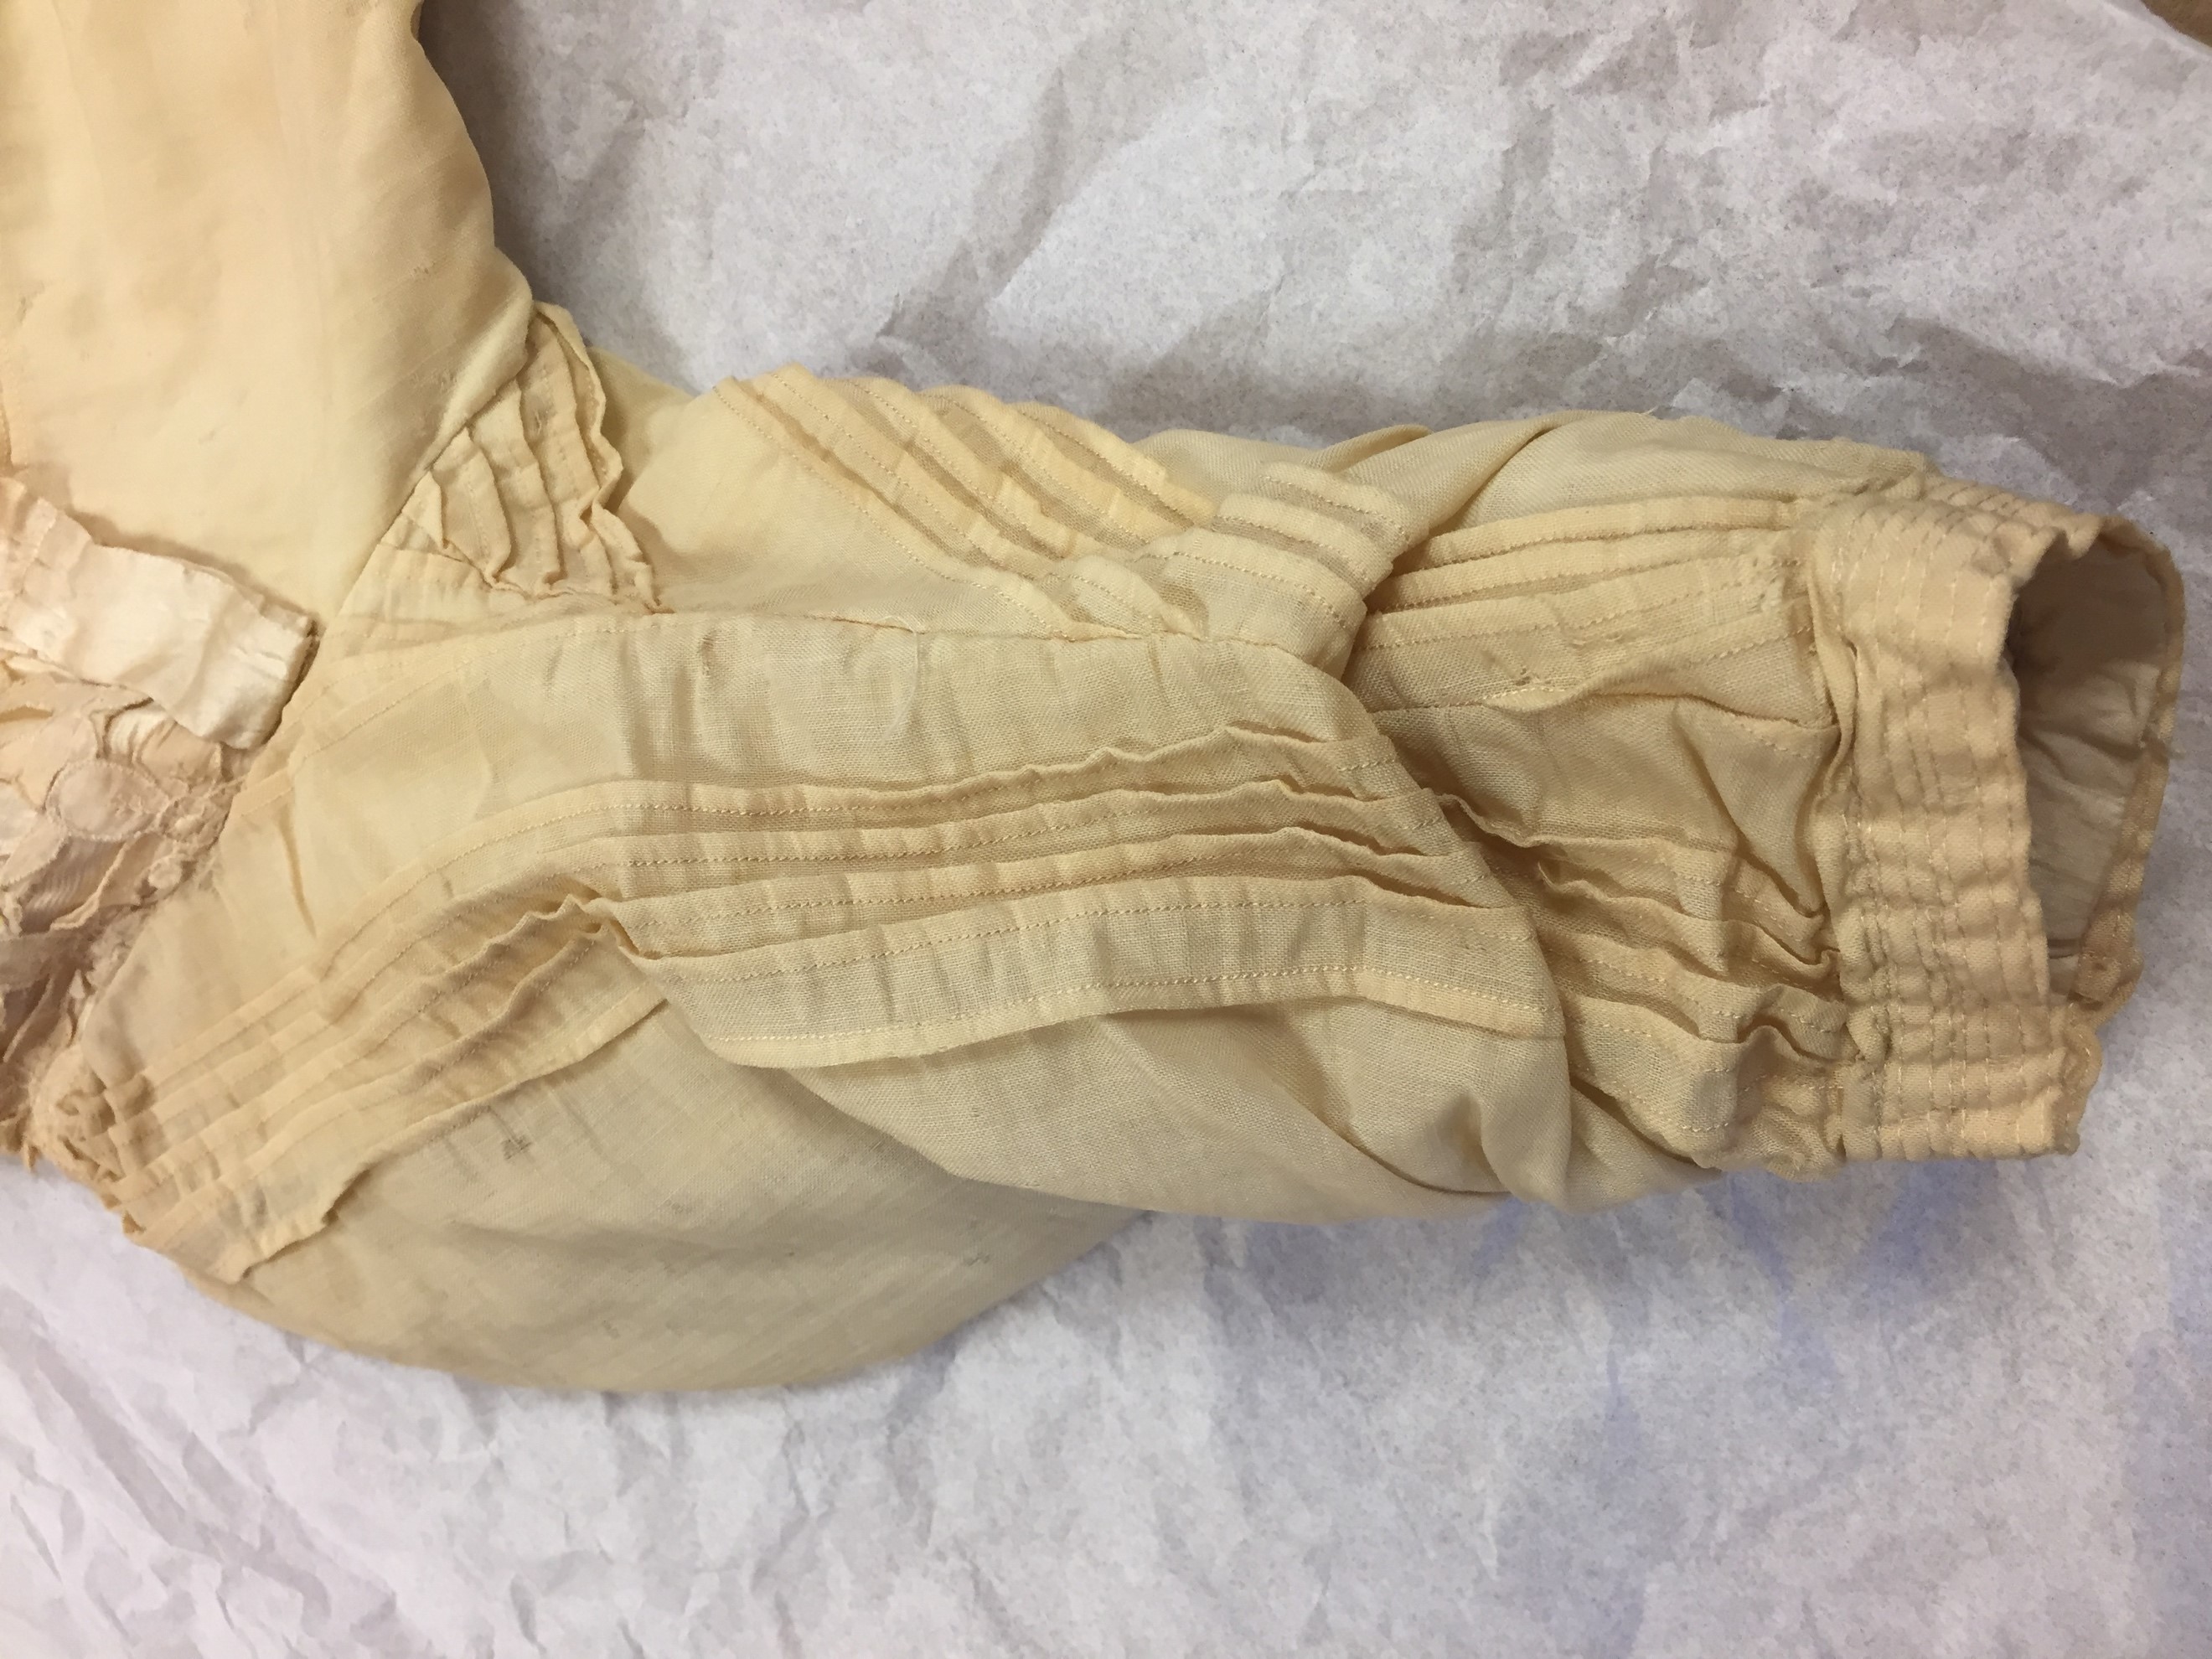
From the outside, the over sleeve’s gathers start 1" in front beyond where the center of the shoulder would be and continue to 2 1/4" past the back-shoulder seam. Between that distance and knowing how big the sleeve cap is by referring the pin tuck spacing, the fullness ratio is about 2.5 times fullness in the exterior sleeve cap. There is also a tuck to control the over sleeve’s fullness 4" up from the cuff along the front seam (see Figure 6).
Similar to the bodice, the sleeves have clusters of pin tucks. Splitting the invisible center line down the sleeve, there are two sections of five sets of 0.125" pin tucks with 0.5" space in between each tuck. The first cluster starts in the middle of the shoulder while the second section is centered from the shoulder seam (see Figure 6). There is another section of five pin tucks coming from the back armscye even with the yoke and started to running into the underarm seam 6.5" above the hem (see Figure 7). The next section comes out from the underarm where the traditional underarm side seam would intersect, 0.5" in front of the bodice’s side seam. Then the last set of pin tucks is a set of four 0.125" tucks with 0.625" in between the tucks. This set starts 1.25" above the front yoke and disappears into the underarm seam.
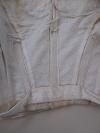
Examining the cuff, the interior and exterior sleeves were finished separately before being stitched together. The sleeve culminates in the hem finished at 11", with the undersleeve finishing with a straight grain strip of broadcloth that binds the hem and finishes at 0.625" wide (see Figure 8). While the over sleeve’s fullness, about 1.5 to 2 times fullness to be exact, is gathered into a 1" band of fashion fabric that creates the exterior cuff. Most of the over sleeve’s fullness is concentrated at the back quarter of the arm. This exterior cuff finishes with a decorative, not functional, 0.75 triangularly pointed overlap (see Figure 8). The decorative cuff is quilted with eight rows of stitching that come to a point within the decorative point and continue back around the cuff. Neither cuff contains any additional structure or interfacing; both cuffs are machine finished and do not include any closures. To make two separate cuffs function as one, they are stitched together with a machine stitch slightly hidden by the quilting threads.
Collar
Figure 9: Collar |
Figure 10: Collar Under Yoke |
 |
 |
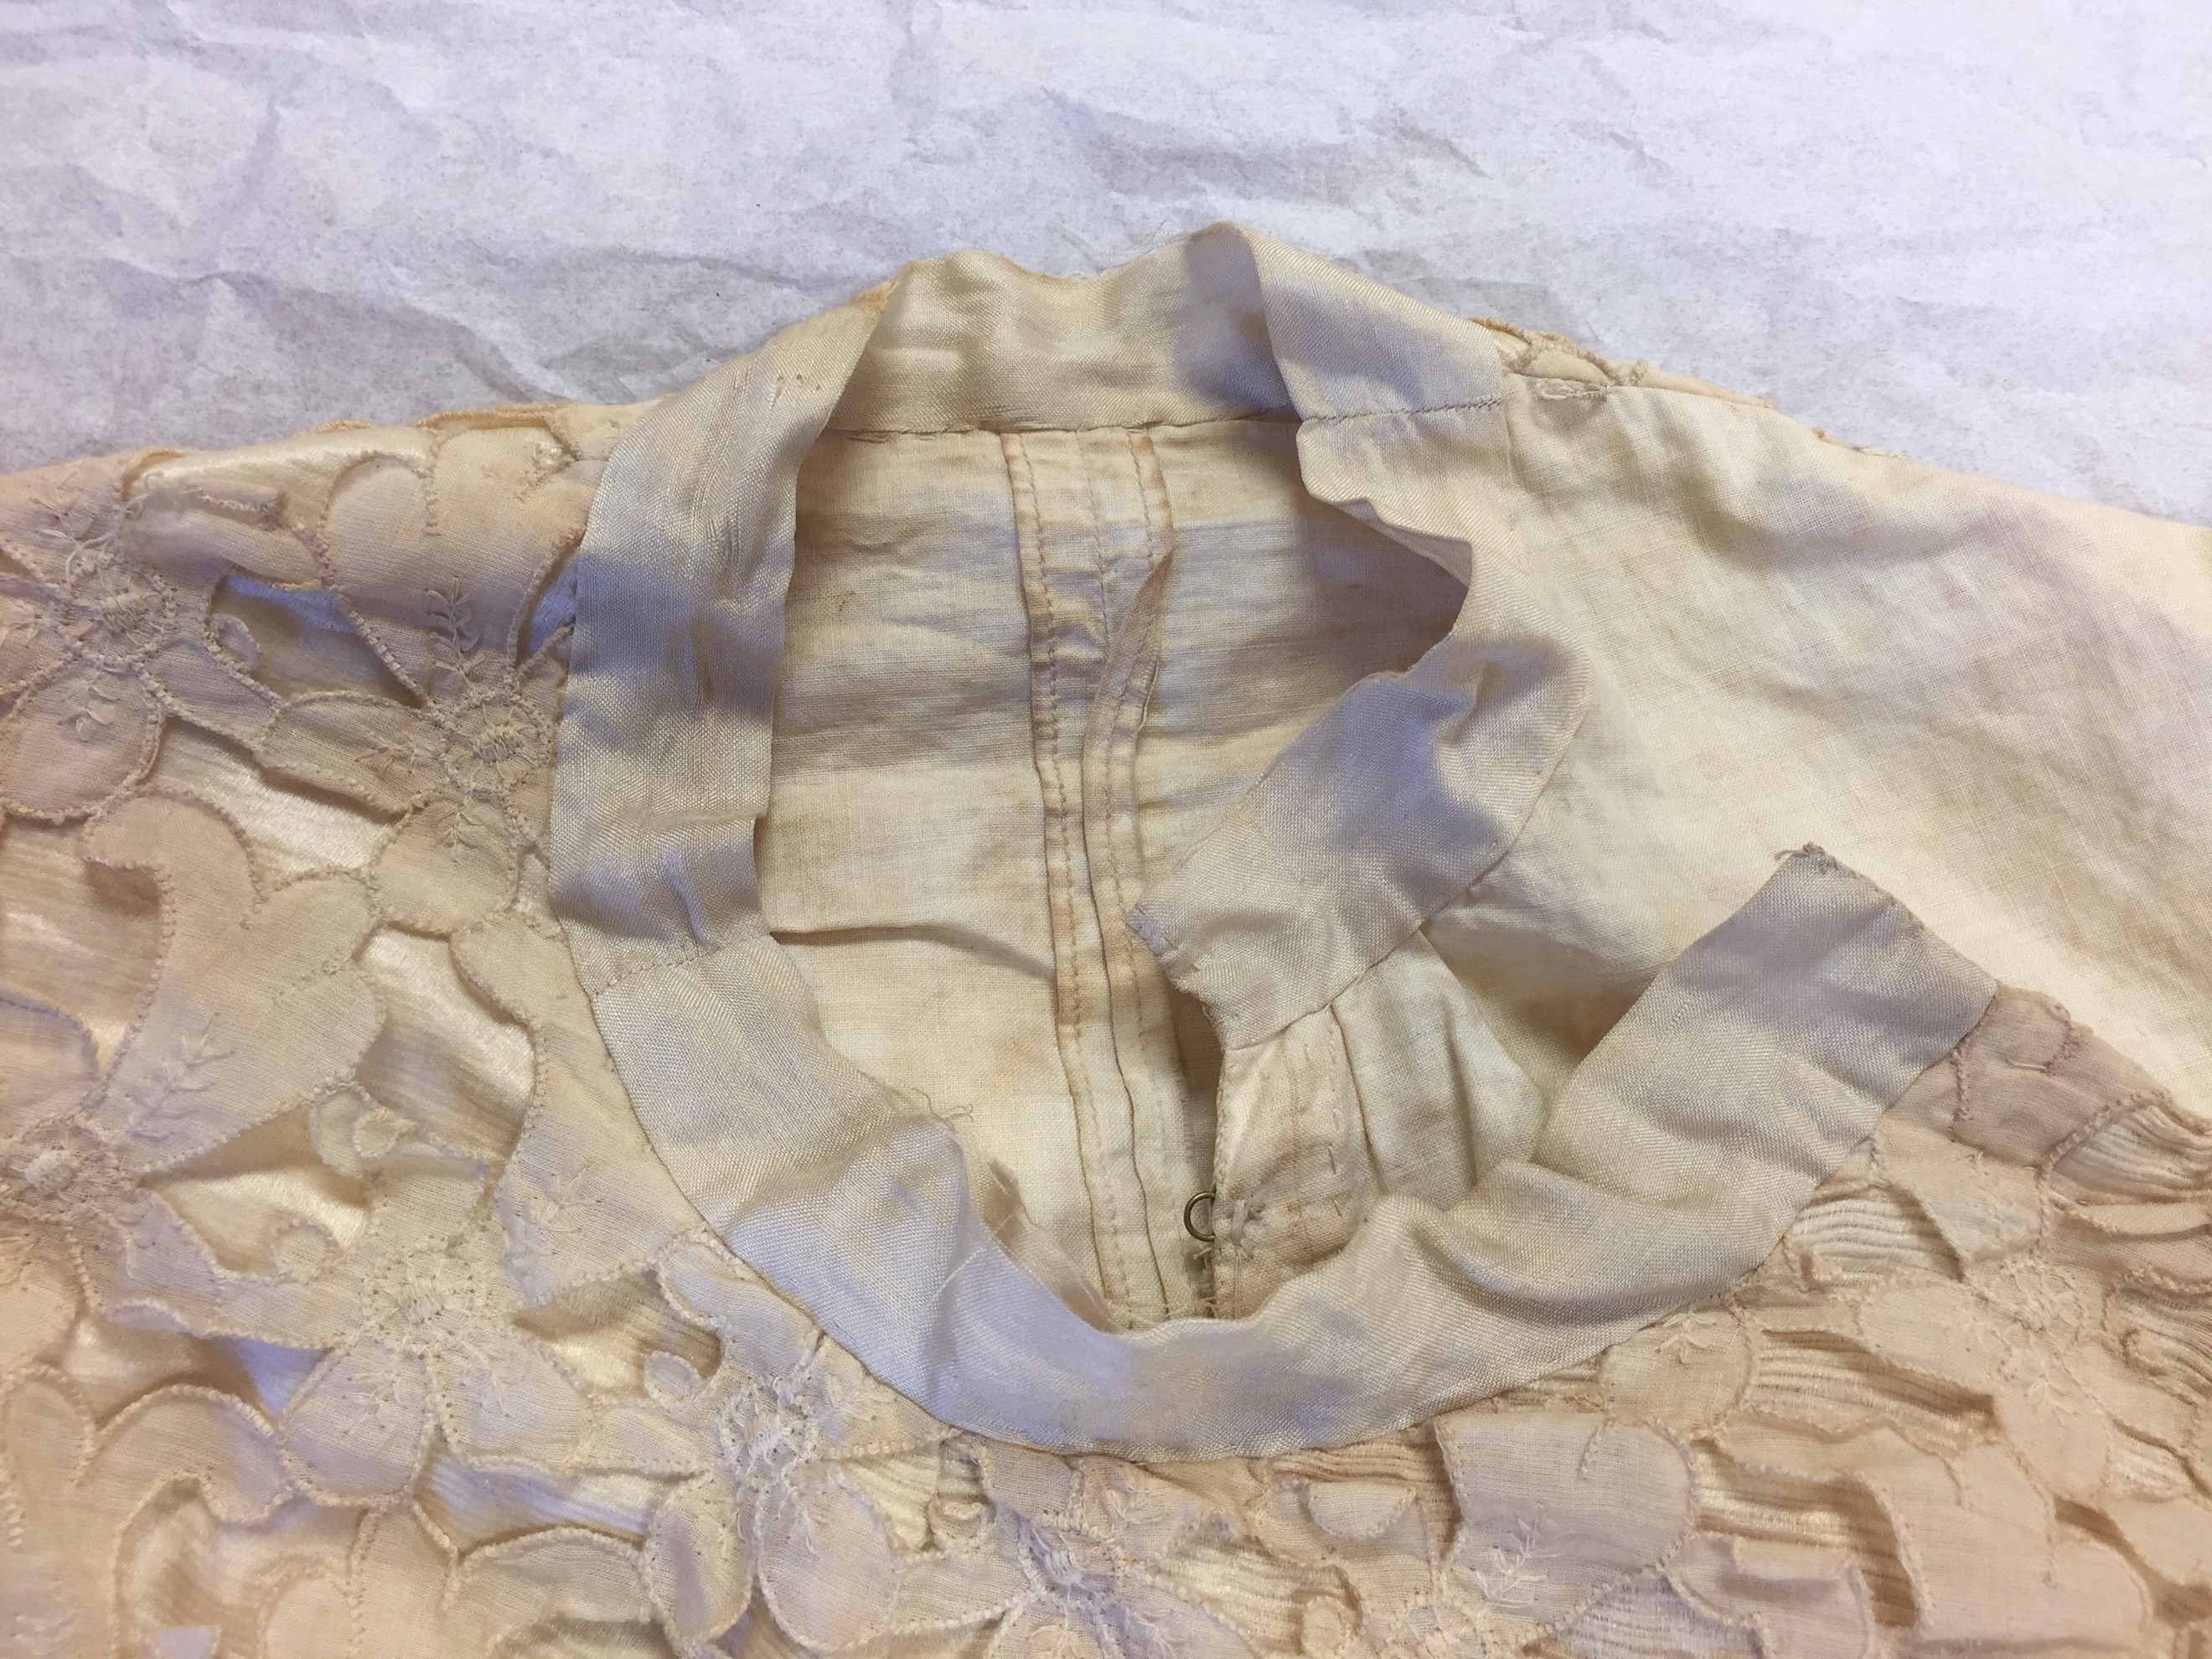
Contrasting what appears as a traditional collar that opens center front with the bodice closures, this collar wraps the neck 1.25 times (see Figure 9). The collar starts along the left side of the underbodice center front placket and continues around the neck past the right side of center front, where it is no longer attached to the under bodice but only to the yoke (see Figure 10). This section covers the collar piece that is attached to the under bodice and is secured in place when the yoke is closed. The collar appears to be either a thin 2" ribbon; the texture and plain weave is similar to China silk. The edges where it attaches to the bodice are not turned under, rather it is a strip of ribbon and not a strip of material yardage because of the clean finished edge. It appears to be hand slip-stitched to both the exterior and interior with no additional interfacing. Pieced together, this was most likely scrap materials, because there is a seam in line with the left shoulder seam while the other seam is made 2.25" from the right shoulder seam into the back panel. Both of these seams were machine stitched before the collar was sewn in place. The two ends of the ribbon are finished by hand with a tiny whip stitch.
Bodice Closures and Functioning
Figure 11: Center Front Closure |
Figure 12: Underbodice Closure |
 |
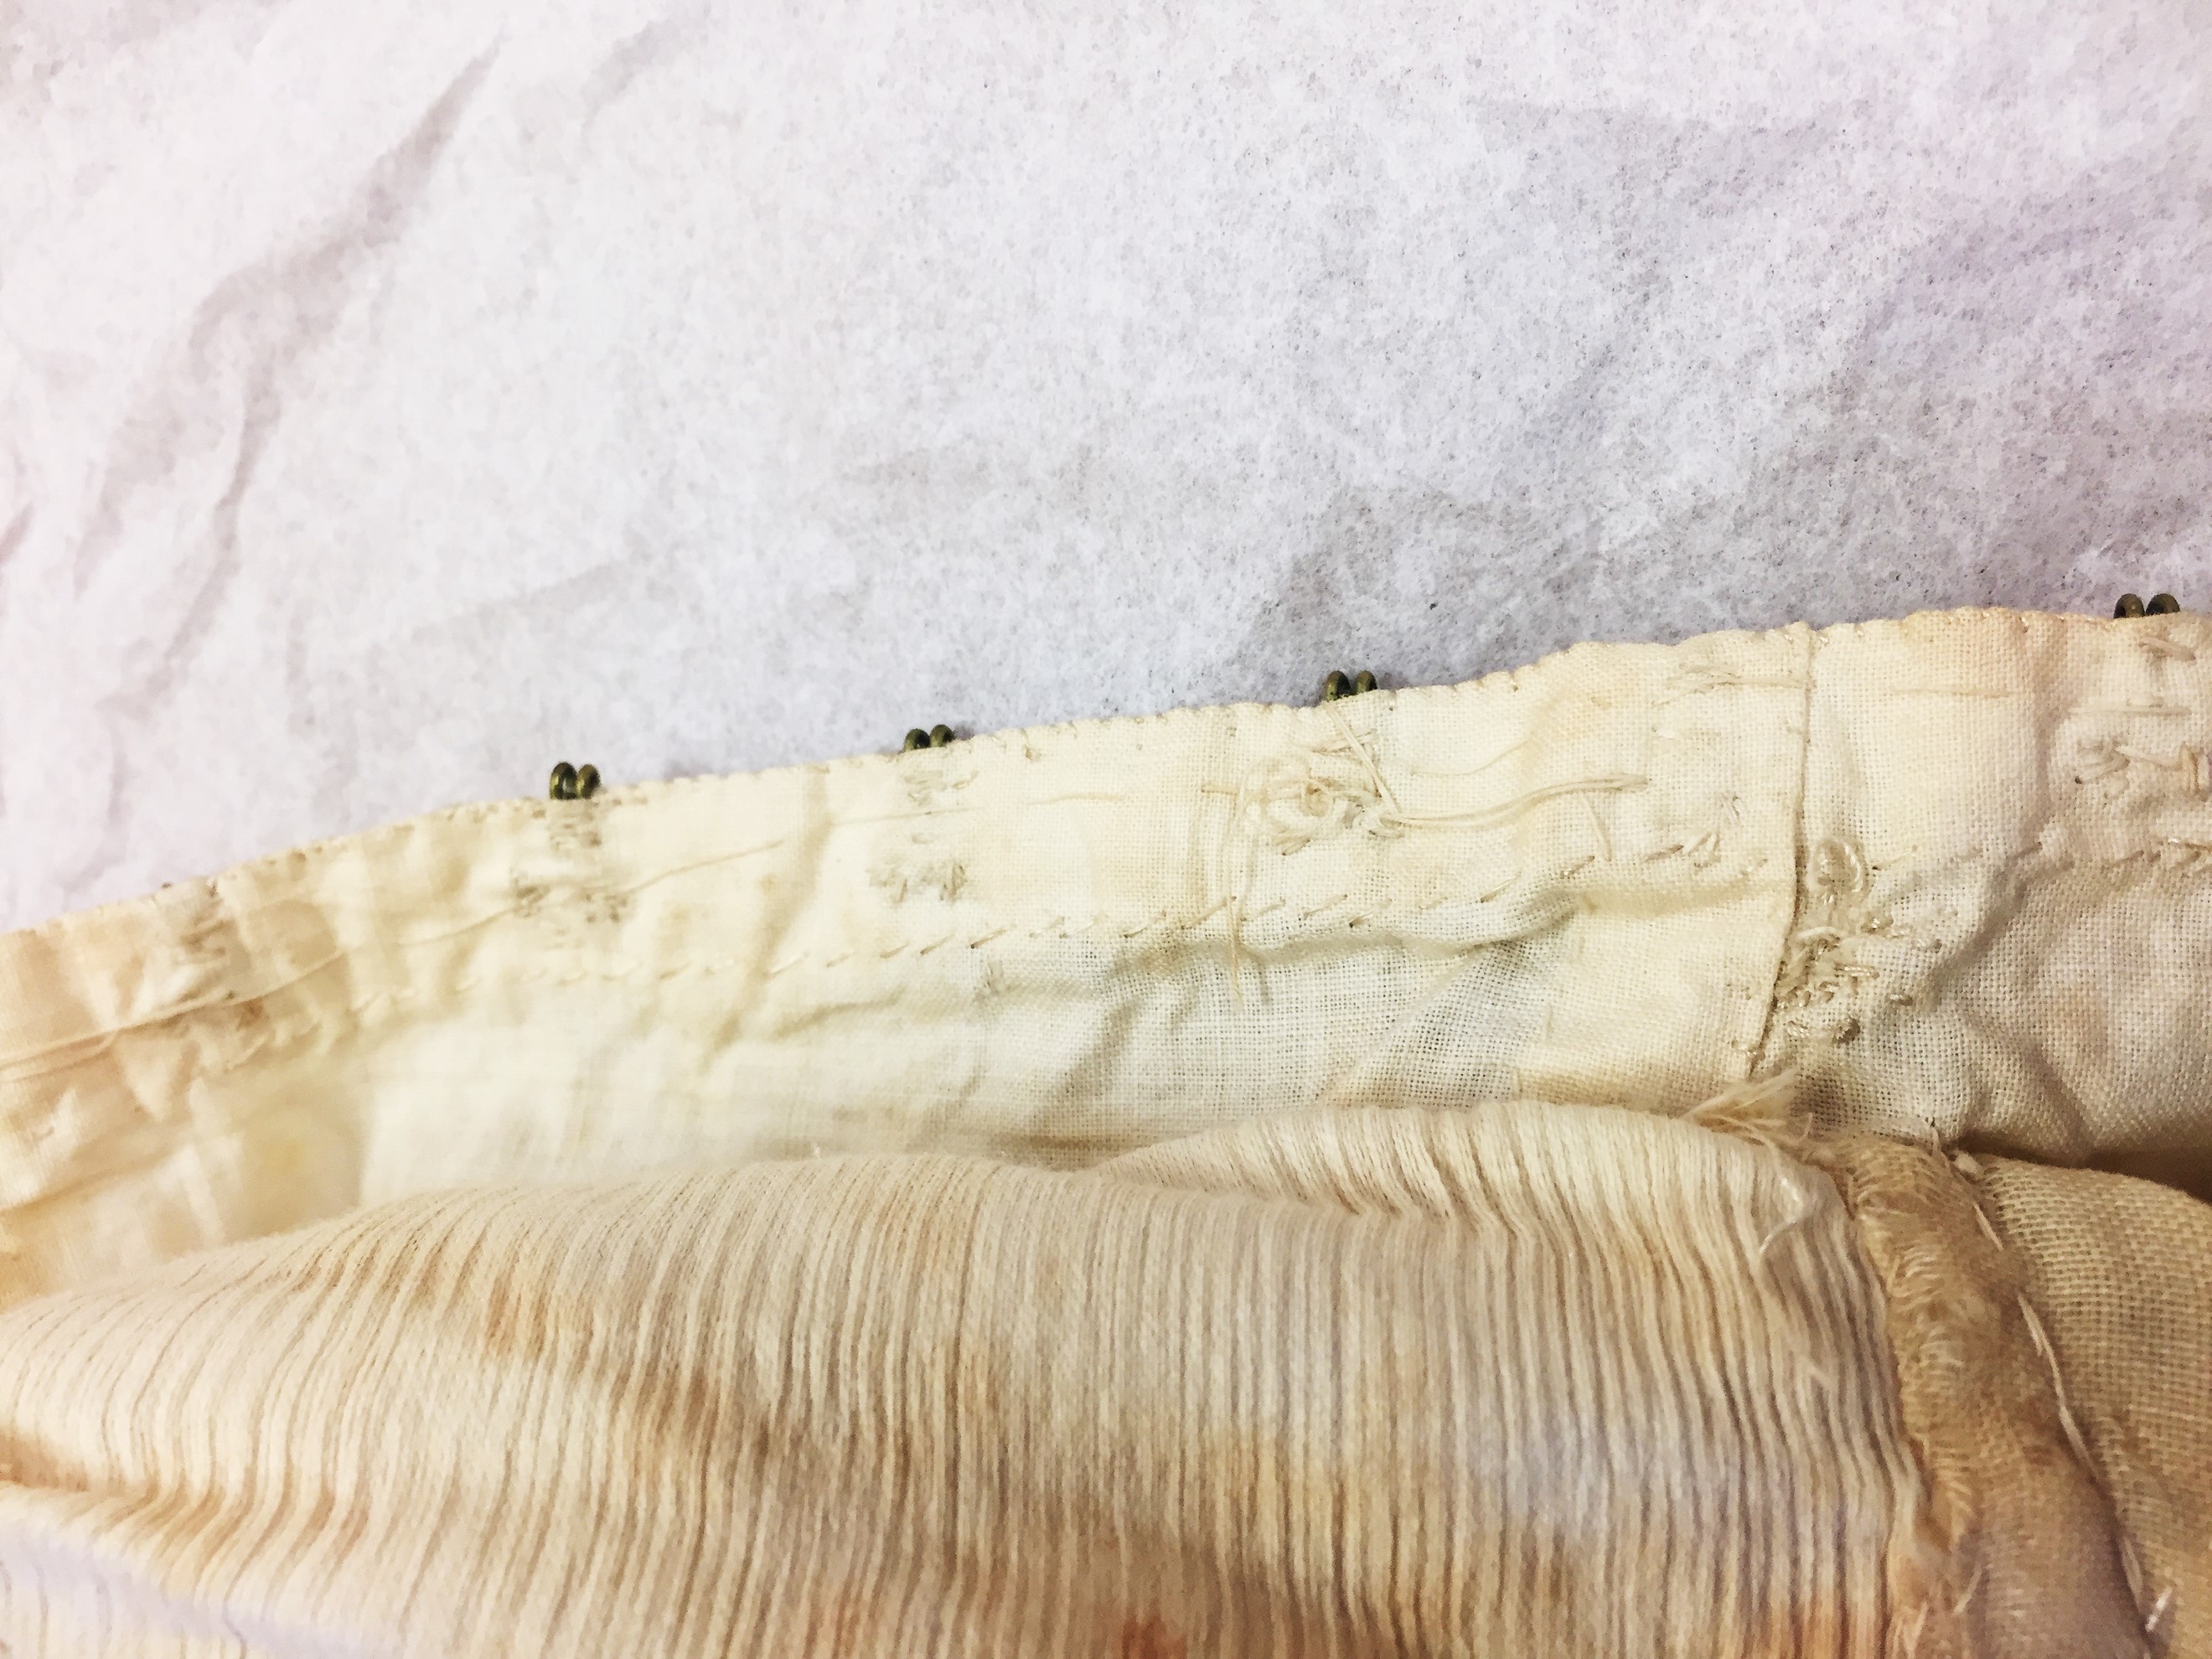 |
Figure 13: Shoulder Closure |
Figure 14: Detail: Yoke Closure |
 |
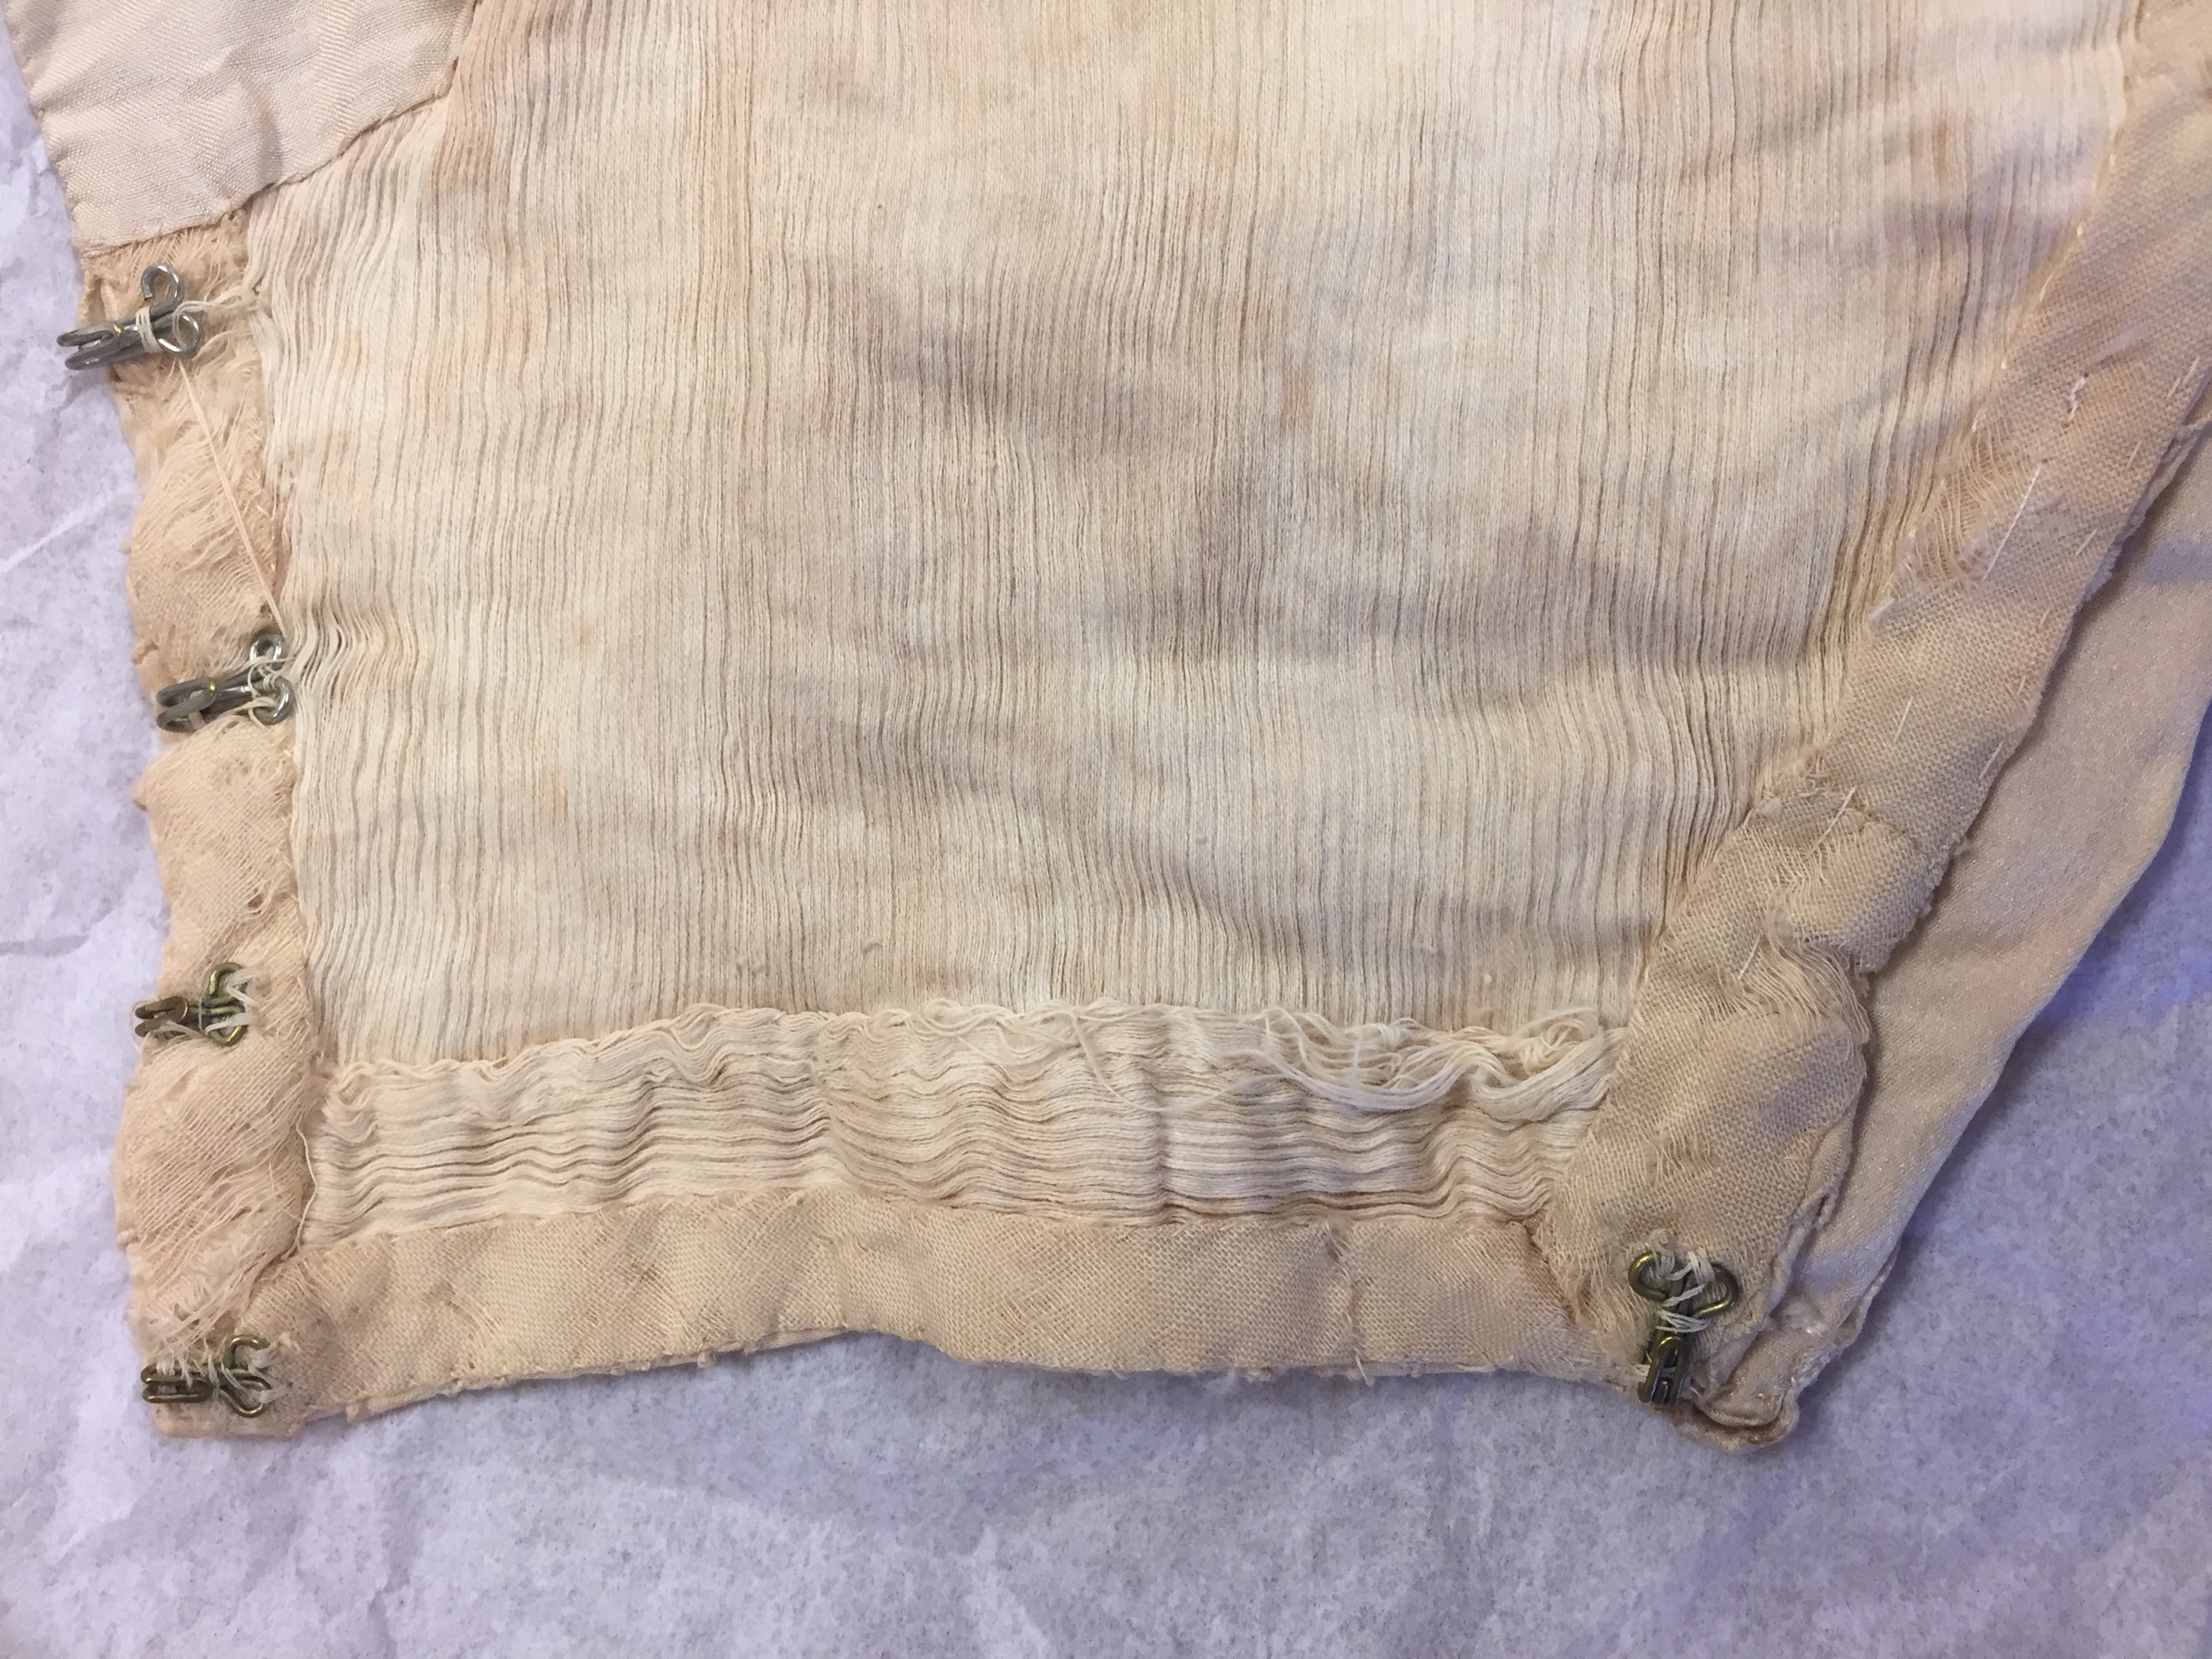 |
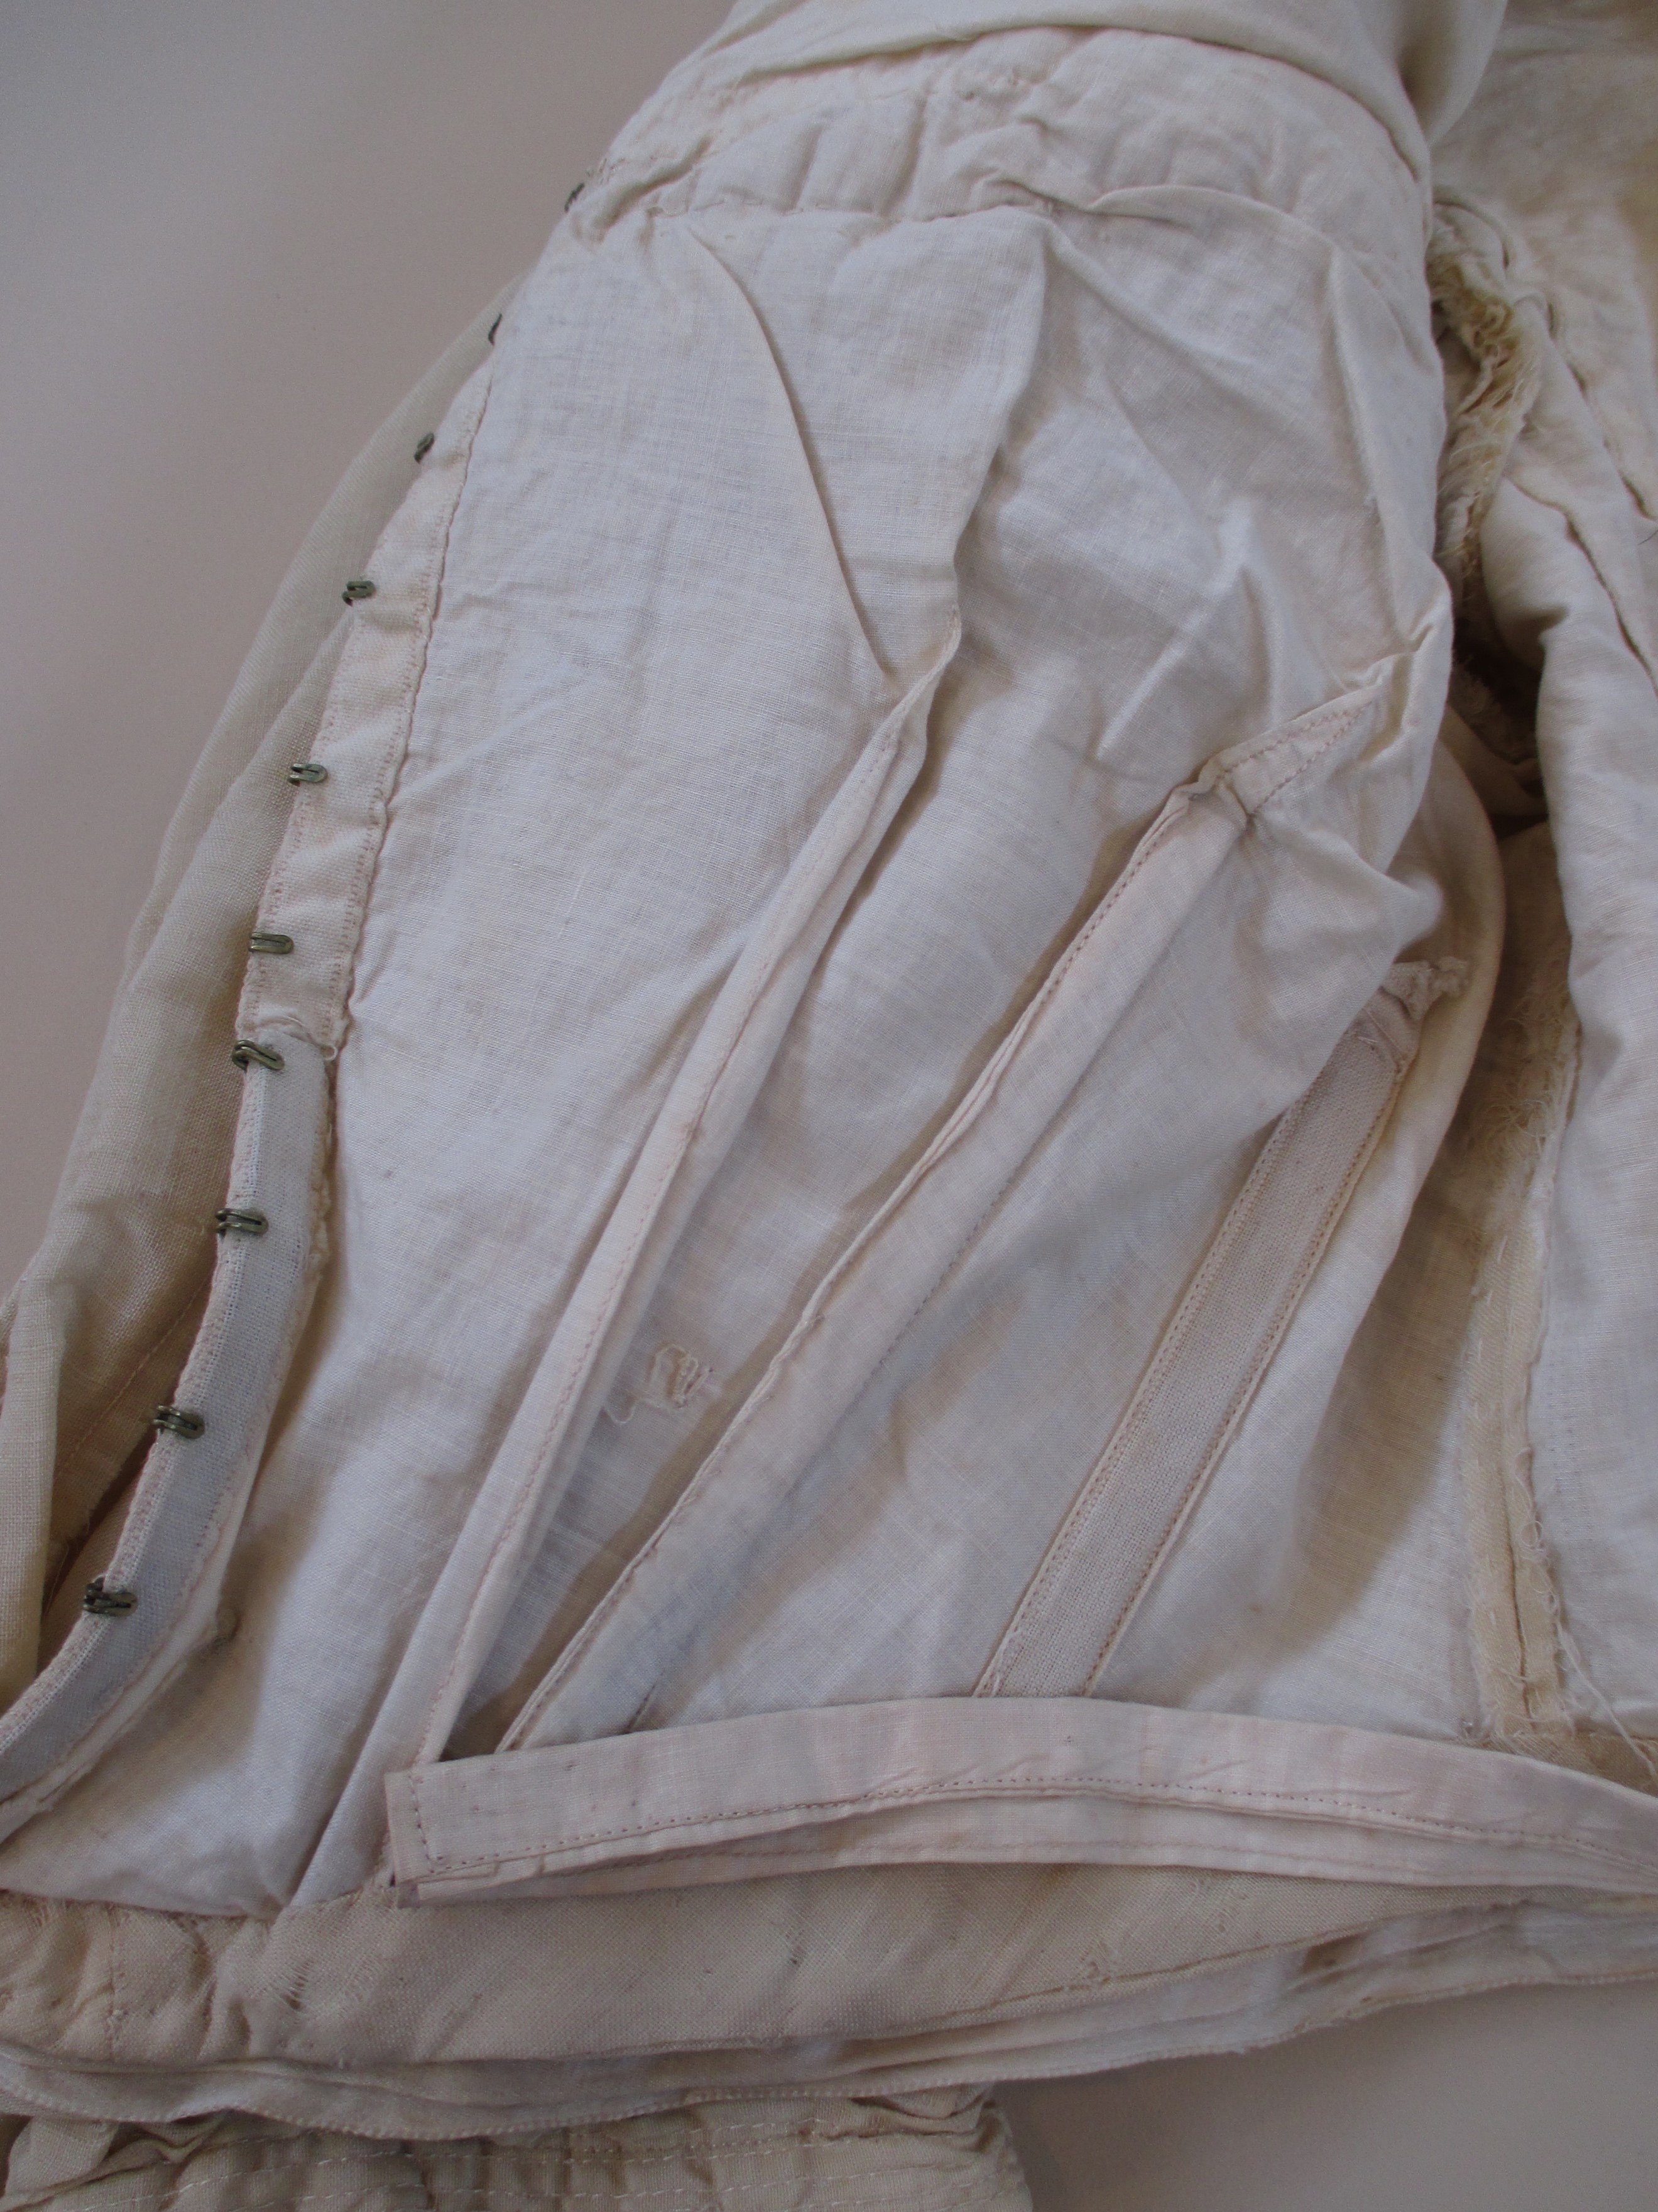
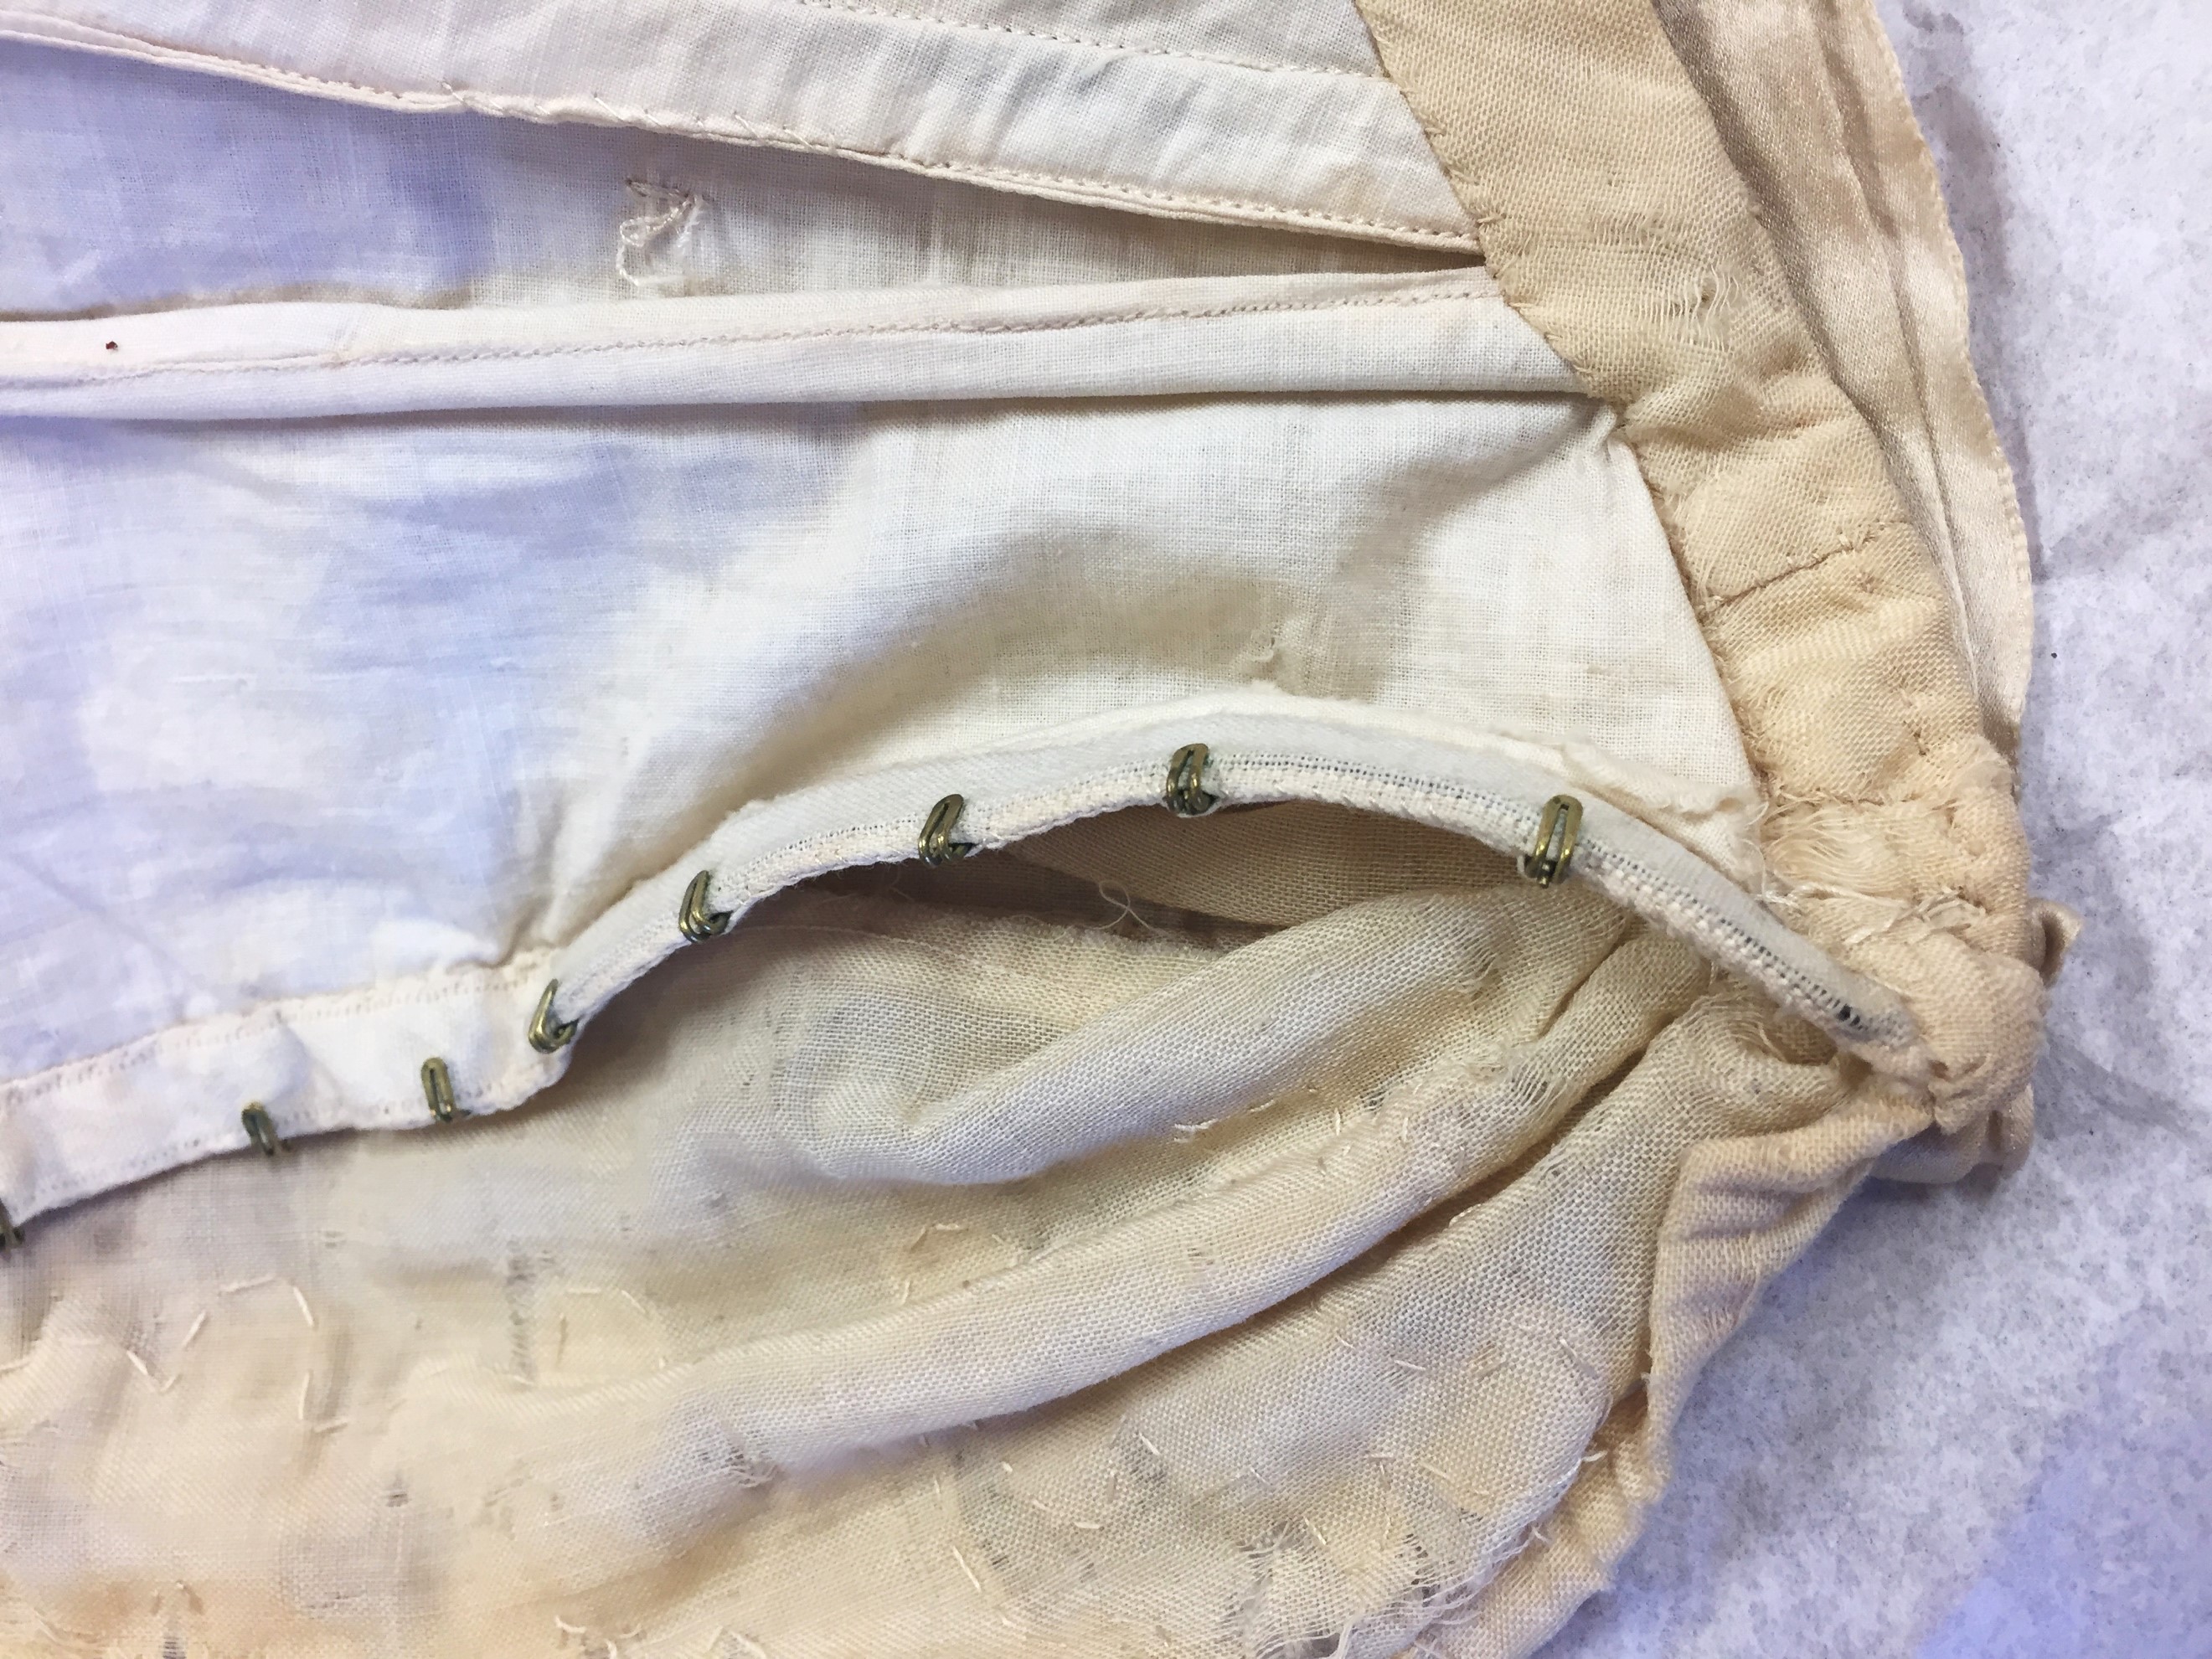
Starting inward and working to the outer most closures, the underbodice has a 1” wide waist tape cut from two straight grain strips of the cotton broadcloth and edge stitched together. This waist tape is attached to the center back bone tape with one large cross stitch, while it is attached to the side back bone tapes with three smaller cross stitches (see Figures 3 and 5). There are holes where at one point it had closures center front but no longer has hooks or bars remaining on the tape. Then there are 16 individual brass hooks and eyes hand sewn down the center front (see Figure 11). Where the hooks and eyes were sewn on, the thread can be seen when the over bodice is open. Also, it is possible to see where they were sewn on using extra-long thread, and instead of cutting the thread in between, after the know was tied they traveled along the exterior to the next hook or loop. Instead of cutting the thread in between, after the knot was tied it traveled along the exterior to the neck hook or loop (see Figure 12). Then the over bodice closes with three hooks and thread bars attaching the center front flange to the main bodice piece under the pin tucks along the left side front. Finally, the yoke section smooths over the armscye and has one hook and bar on the yoke level line. The yoke is then closed with four hooks on the under bodice left shoulder seam with four thread bars (see Figures 13 and 14). The use of hooks and thread bars functioned as a “pliable fastening system let the fabric drape without interference” according to Blanche Payne on page 535 of her book. Lastly, the decorative ribbon that covered the waist is wrapped around the body and fastened. It is stitched around the right side of the bodice to center front. Then it hooks with two brass hooks on the ribbon to a thread bar half of the way around the front and at the side seam. Then there is a metal eye for it to hook closing 1" out from where the other ribbon starts 0.5" from center back.
Decorative Elements
Figure 15: Front Cutwork Lace |
Figure 16: Detail: Interior Flange |
 |
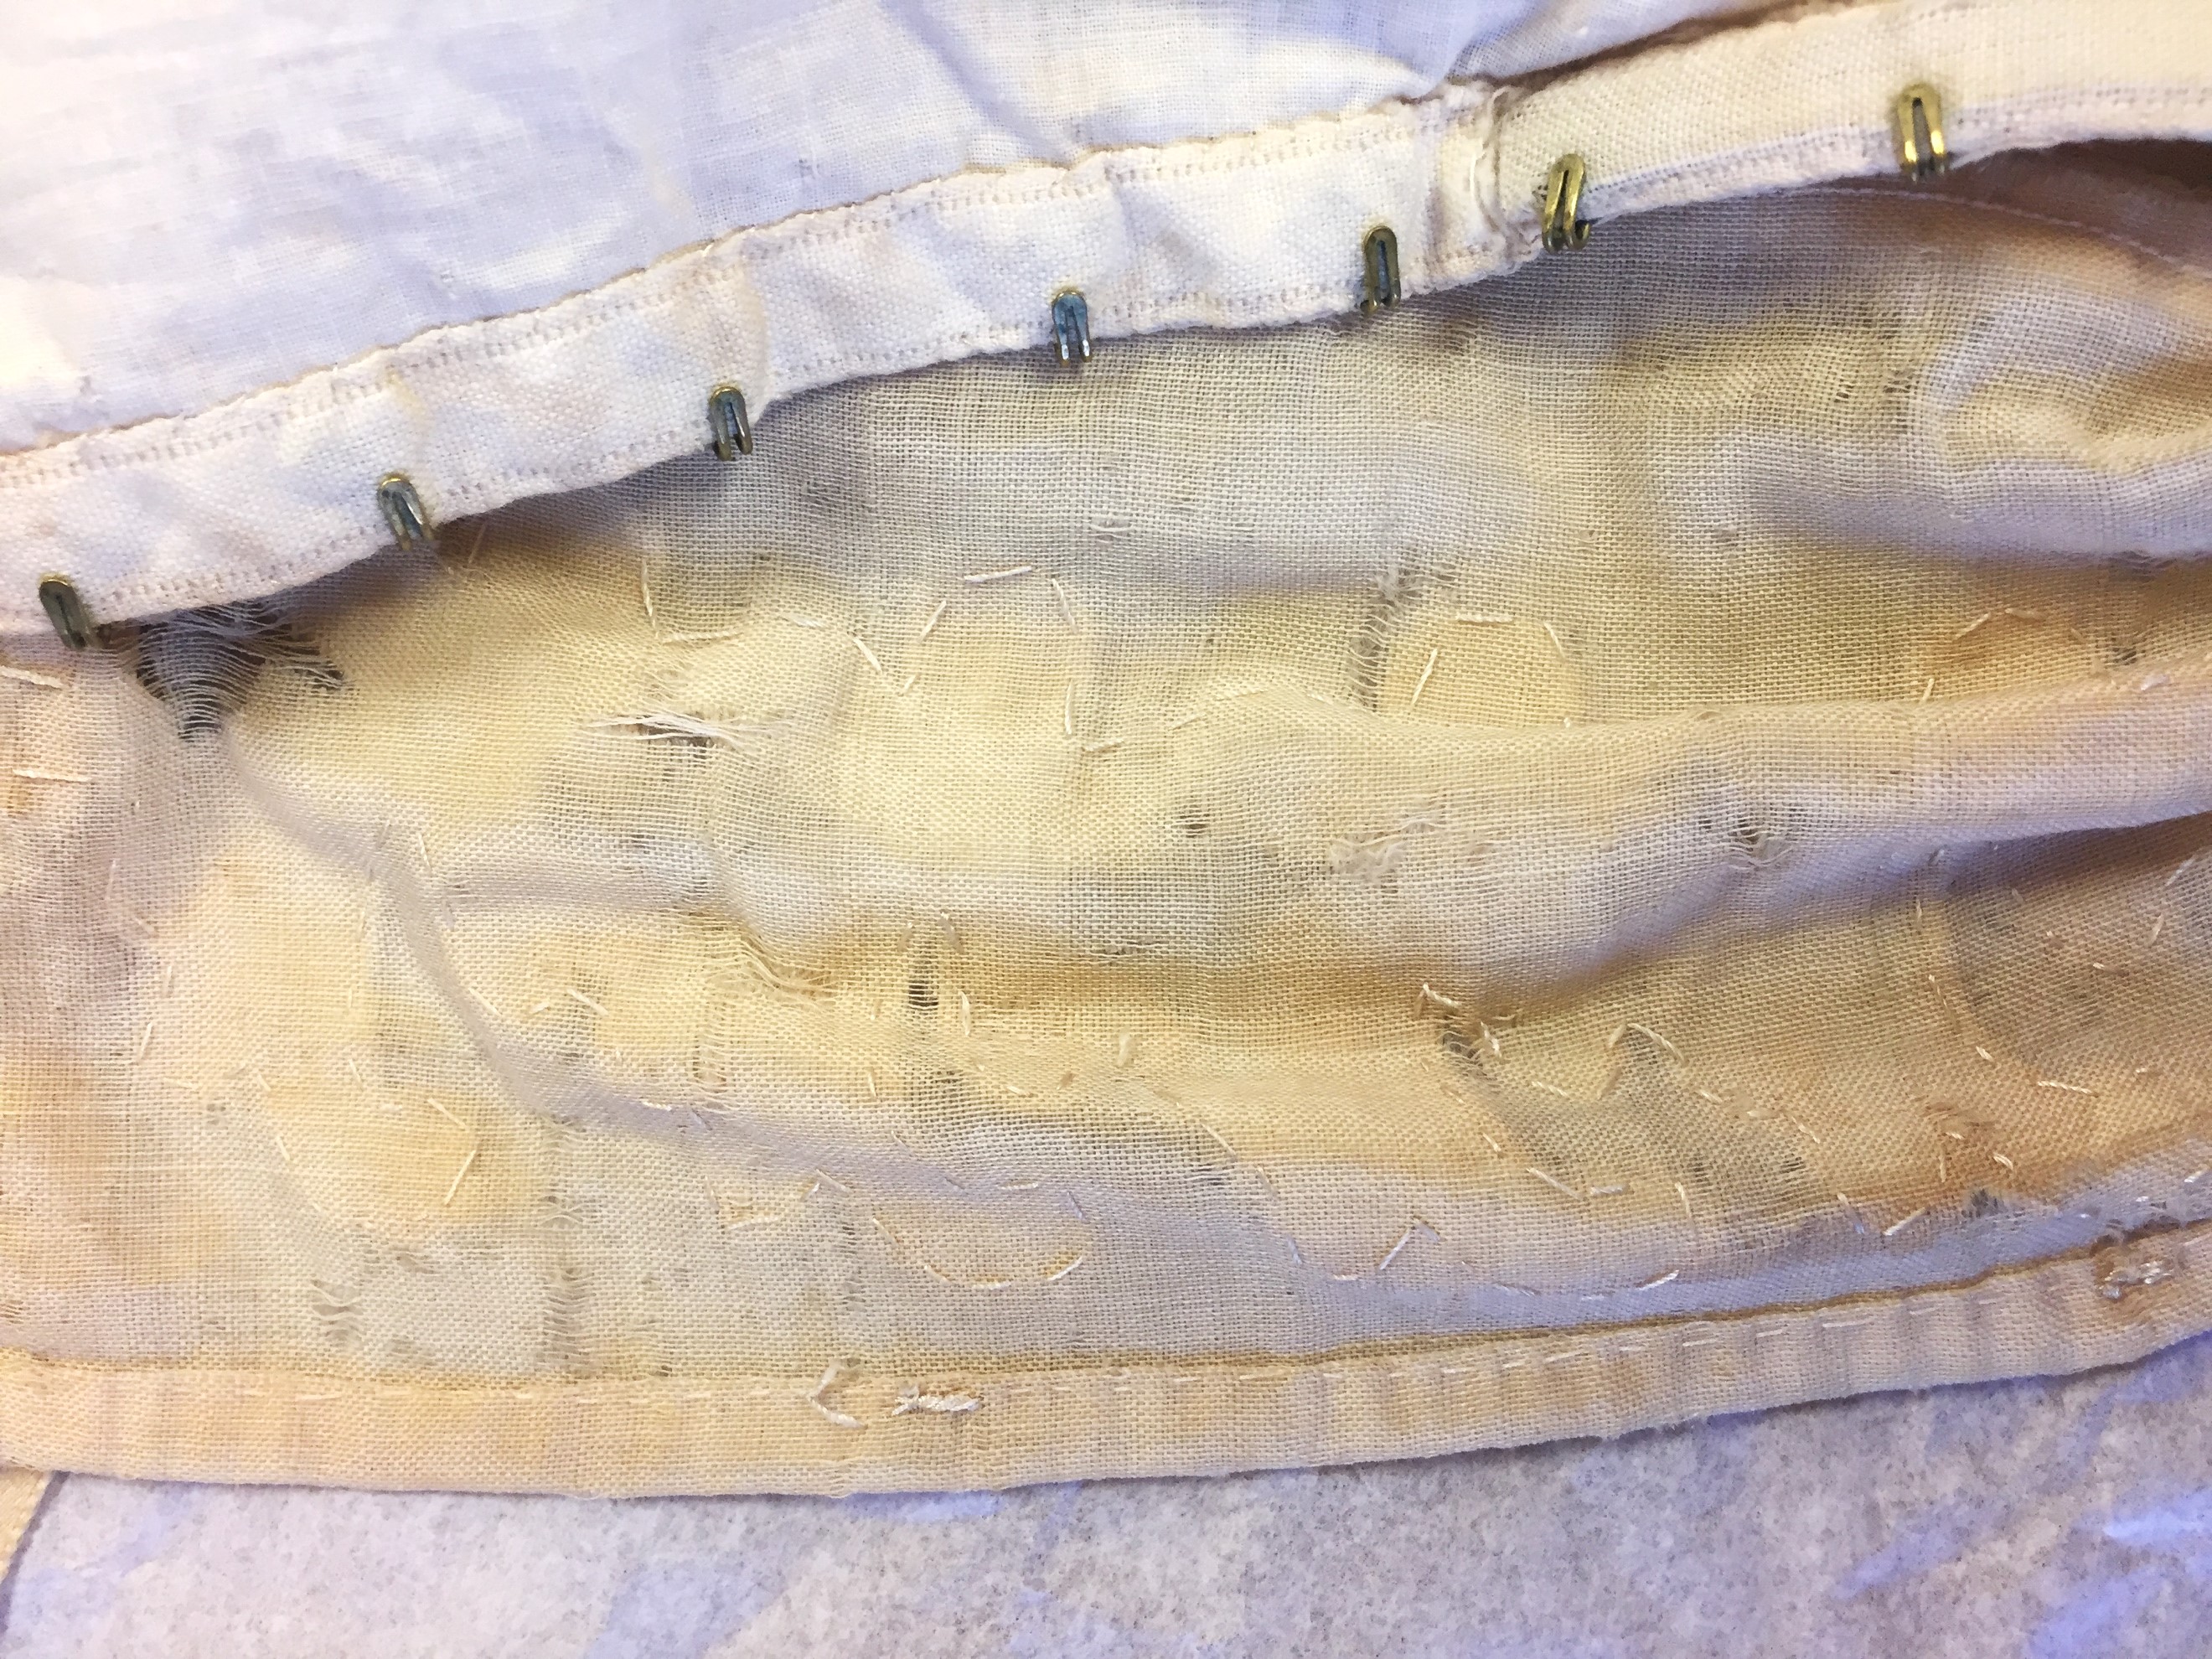 |
Figure 17: Back |
Figure 18: Detail: Pleated Ribbon |
 |
 |
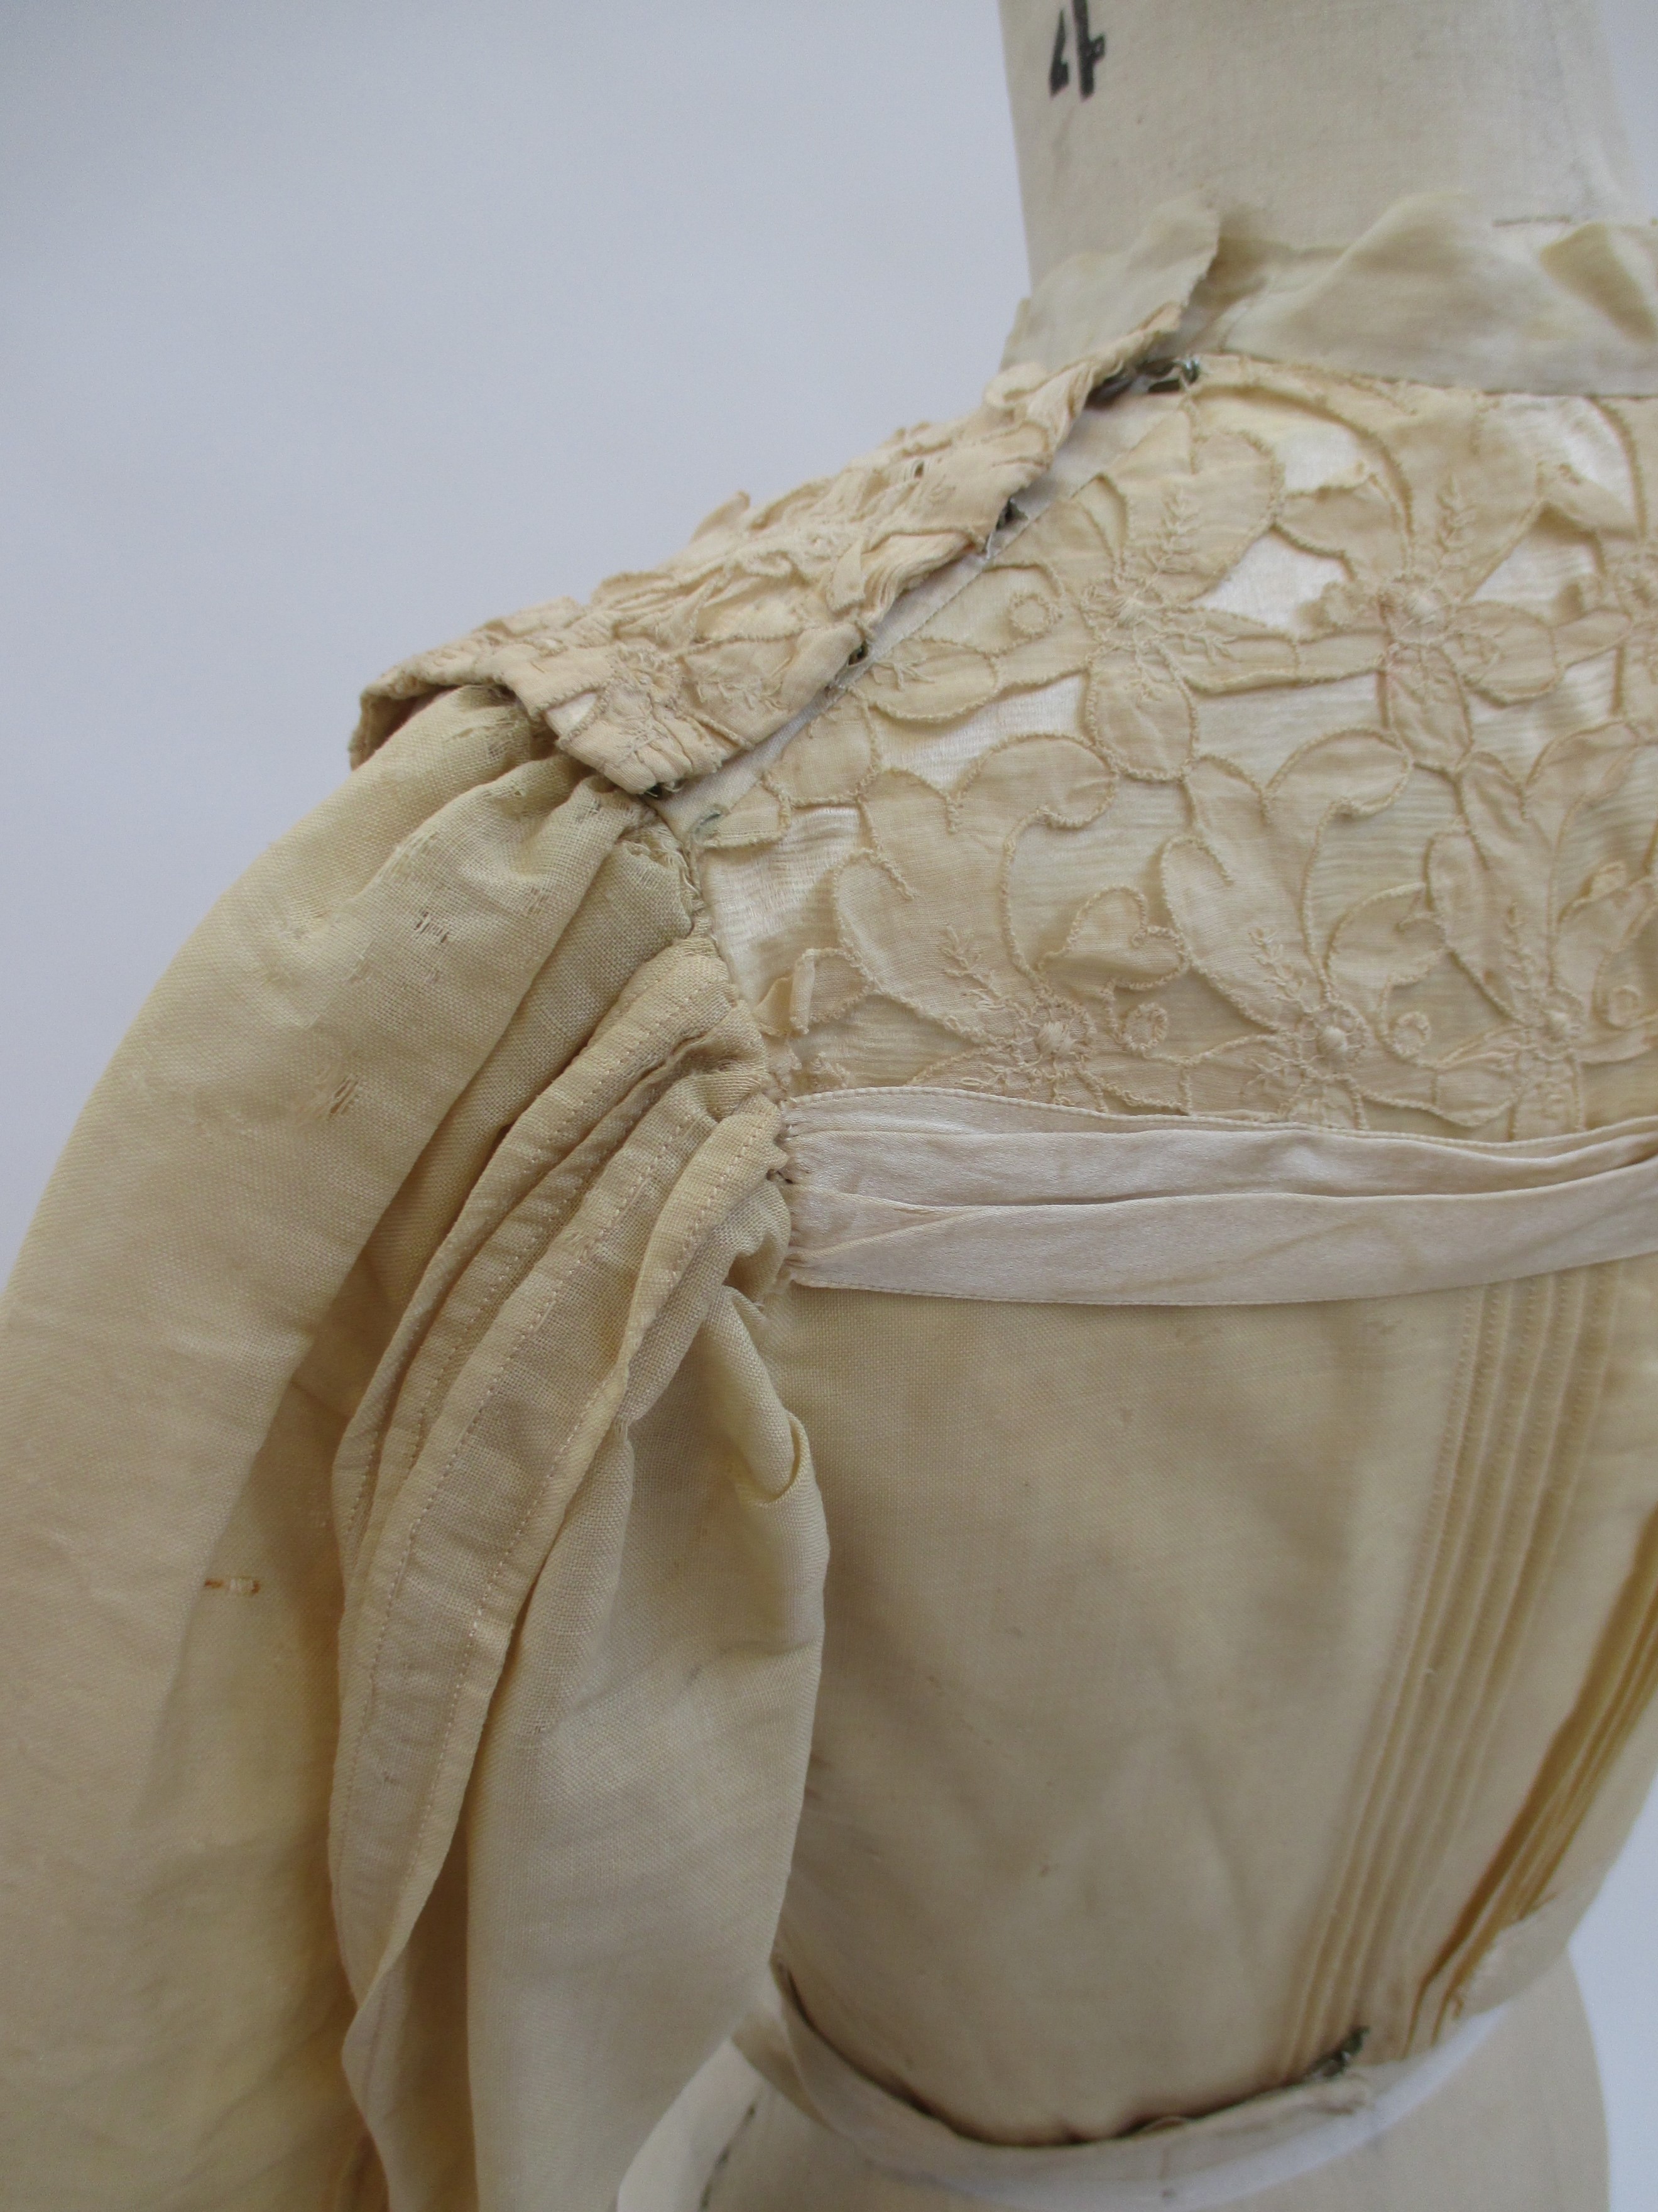
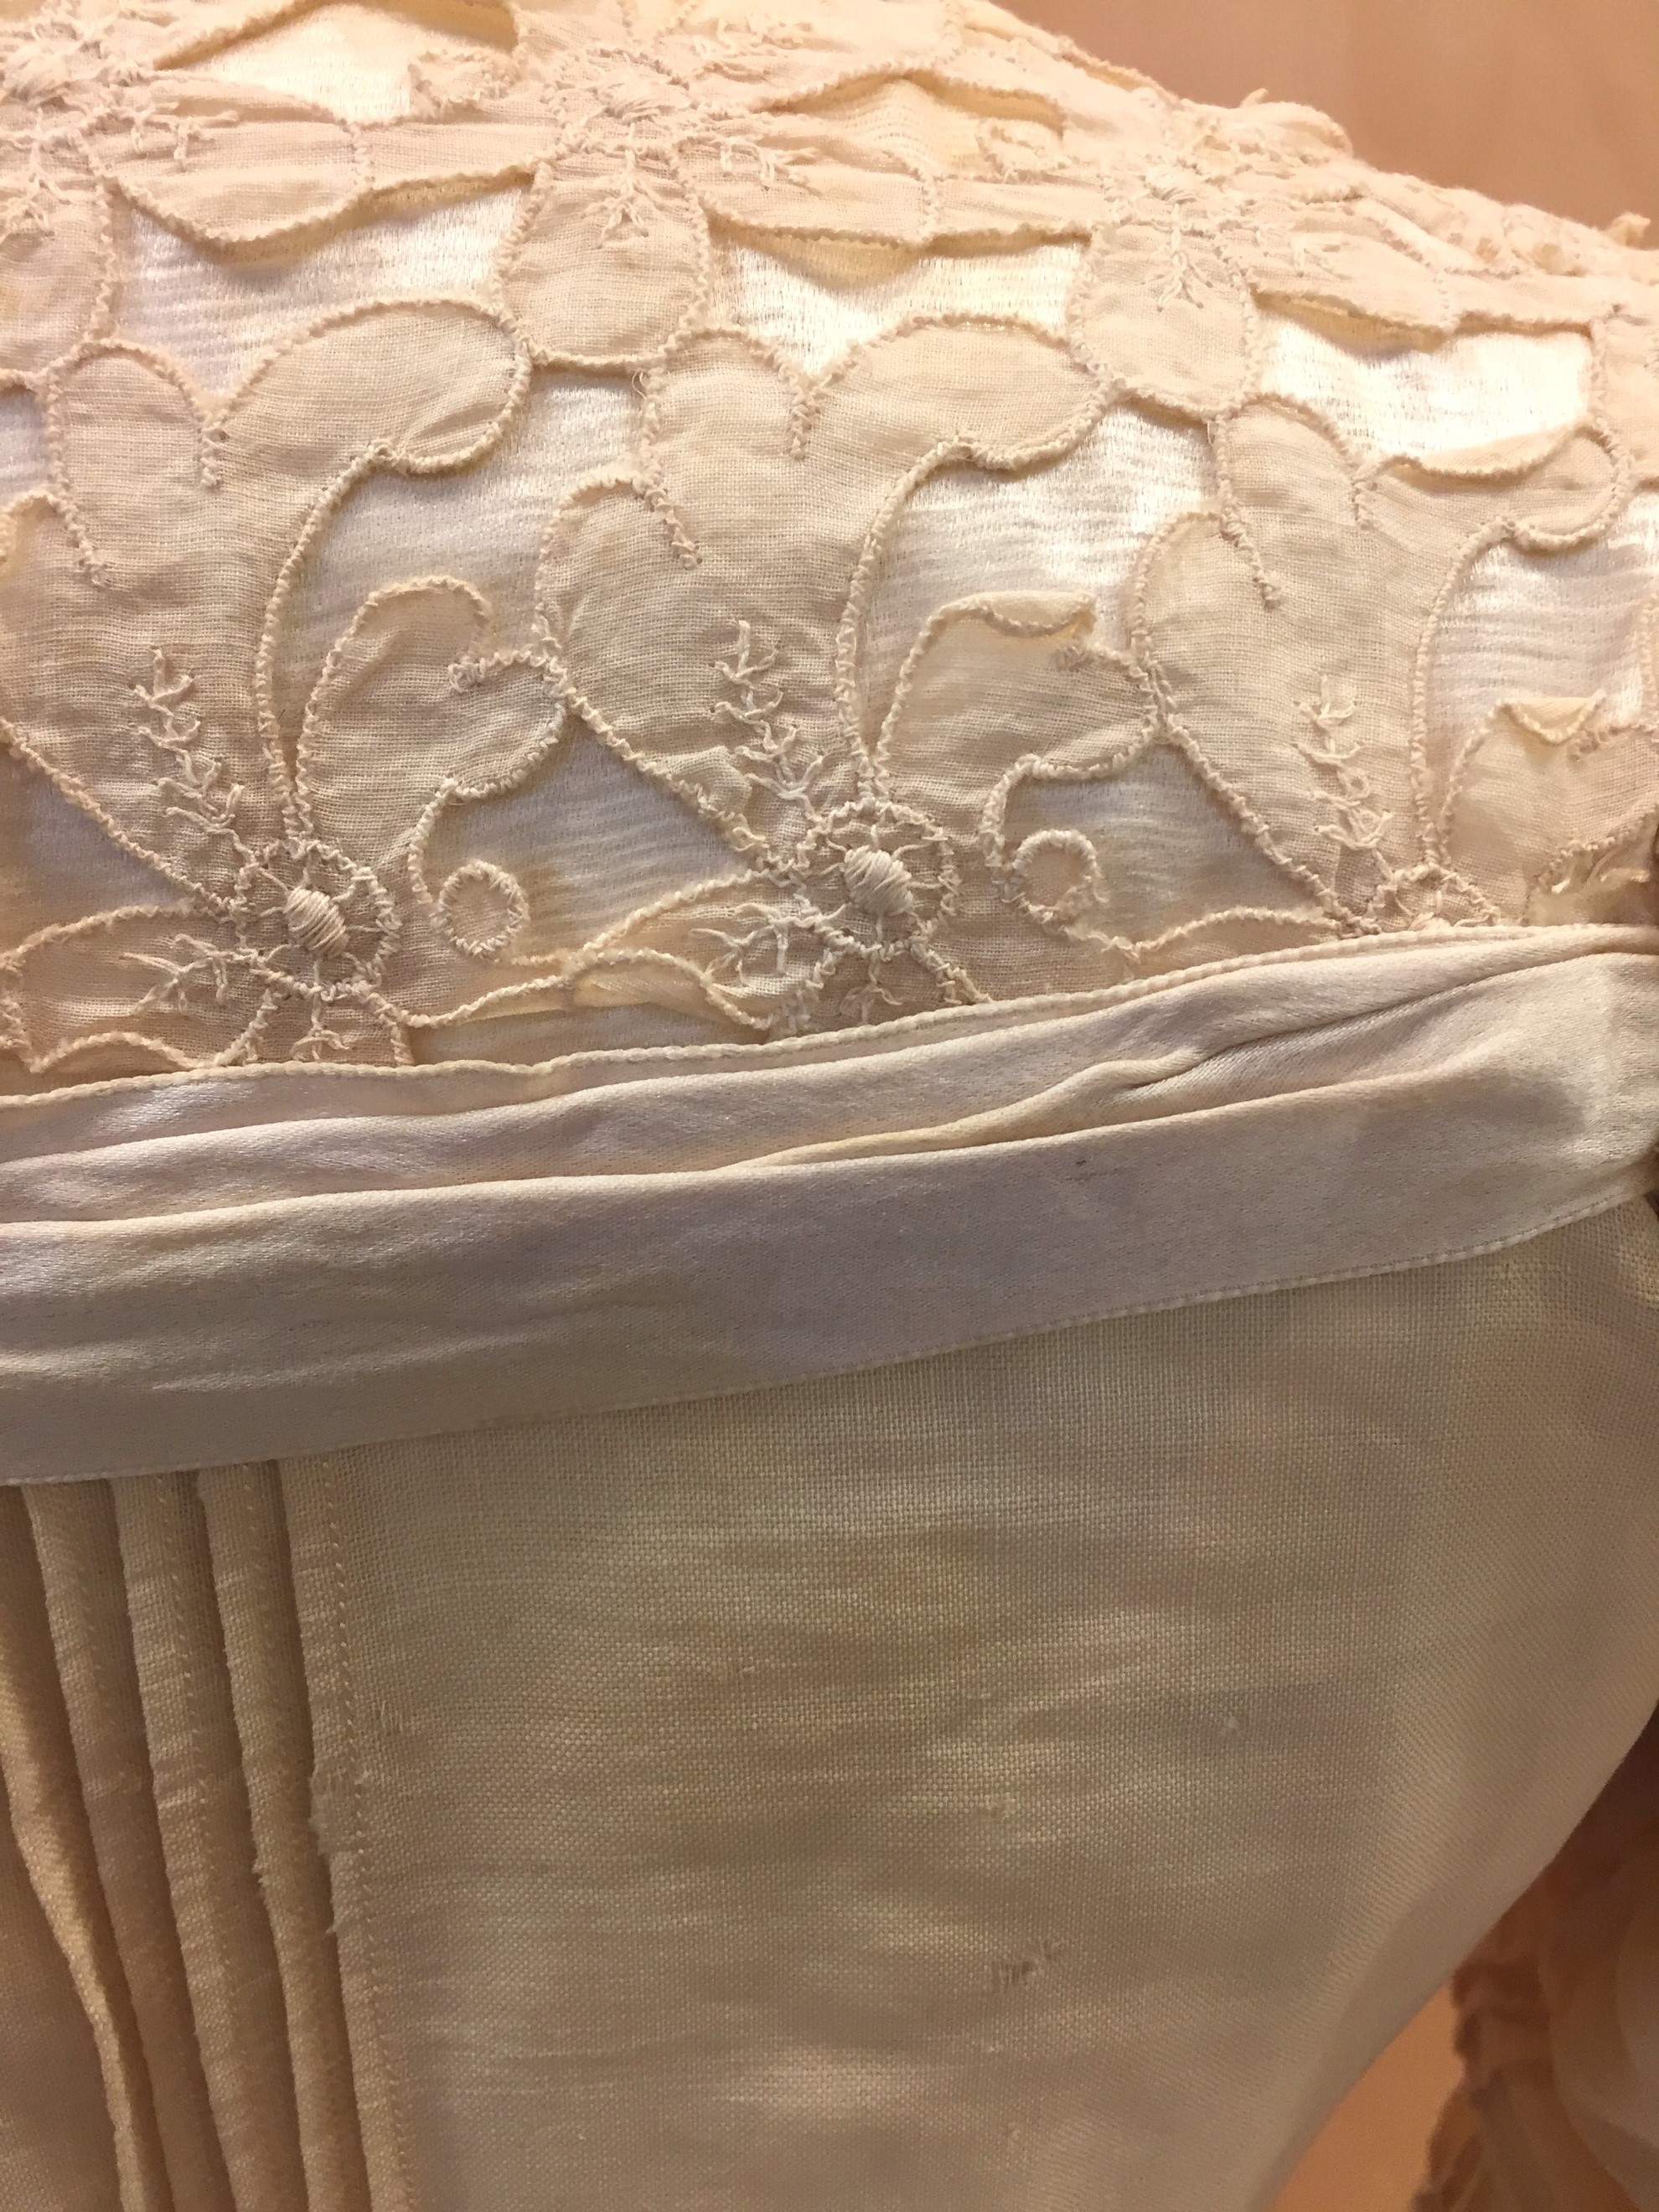
Other than the pin tucks, the first decorative element the eye is drawn to is the cotton lace cutwork (see Figure 15). Looking at the cutwork closely, there is an area along the back-bottom seam line where it is obvious that the cutwork came from a small piece of fabric, possibly made specifically for this project, because part of selvage is visible. Along this 0.25" section of the visible selvage, when the ribbon is pulled back, there is a smooth uncut and unembroidered piece of fabric. Where the floral pattern is cut and embroidered, the pattern measures 1.5" wide by 2.25" tall. These flowers are asymmetrical and contain a small bit of embroidery in the middle of each flower. It appears that this cutwork may have been machine made. Additionally, there is a section of five flowers that have been cut away from the cutwork fabric to create an applique (see Figure 1). This applique is stitched to the front bodice flange with a hand running stitch (see Figure 16).
The other decorative element on the bodice is the pleated ribbon. Covering the seam line of the bodice and yoke, the ribbon runs along both the front and back yokes (see Figures 15, 17, and 18). It is also used along the waist at the bottom of the bodice. All three sections use the same 3” wide ribbon pleated down to 1". While the waist and back yoke ribbons are cut in one piece, the front yoke has a piece that is 2.625" long seamed onto the front right side, indicating this was probably a remnant of ribbon from another project, as can be seen in Figure 15.
Damage
Figure 19: Shredding on Sleeve |
Figure 20: Shredding on Binding |
 |
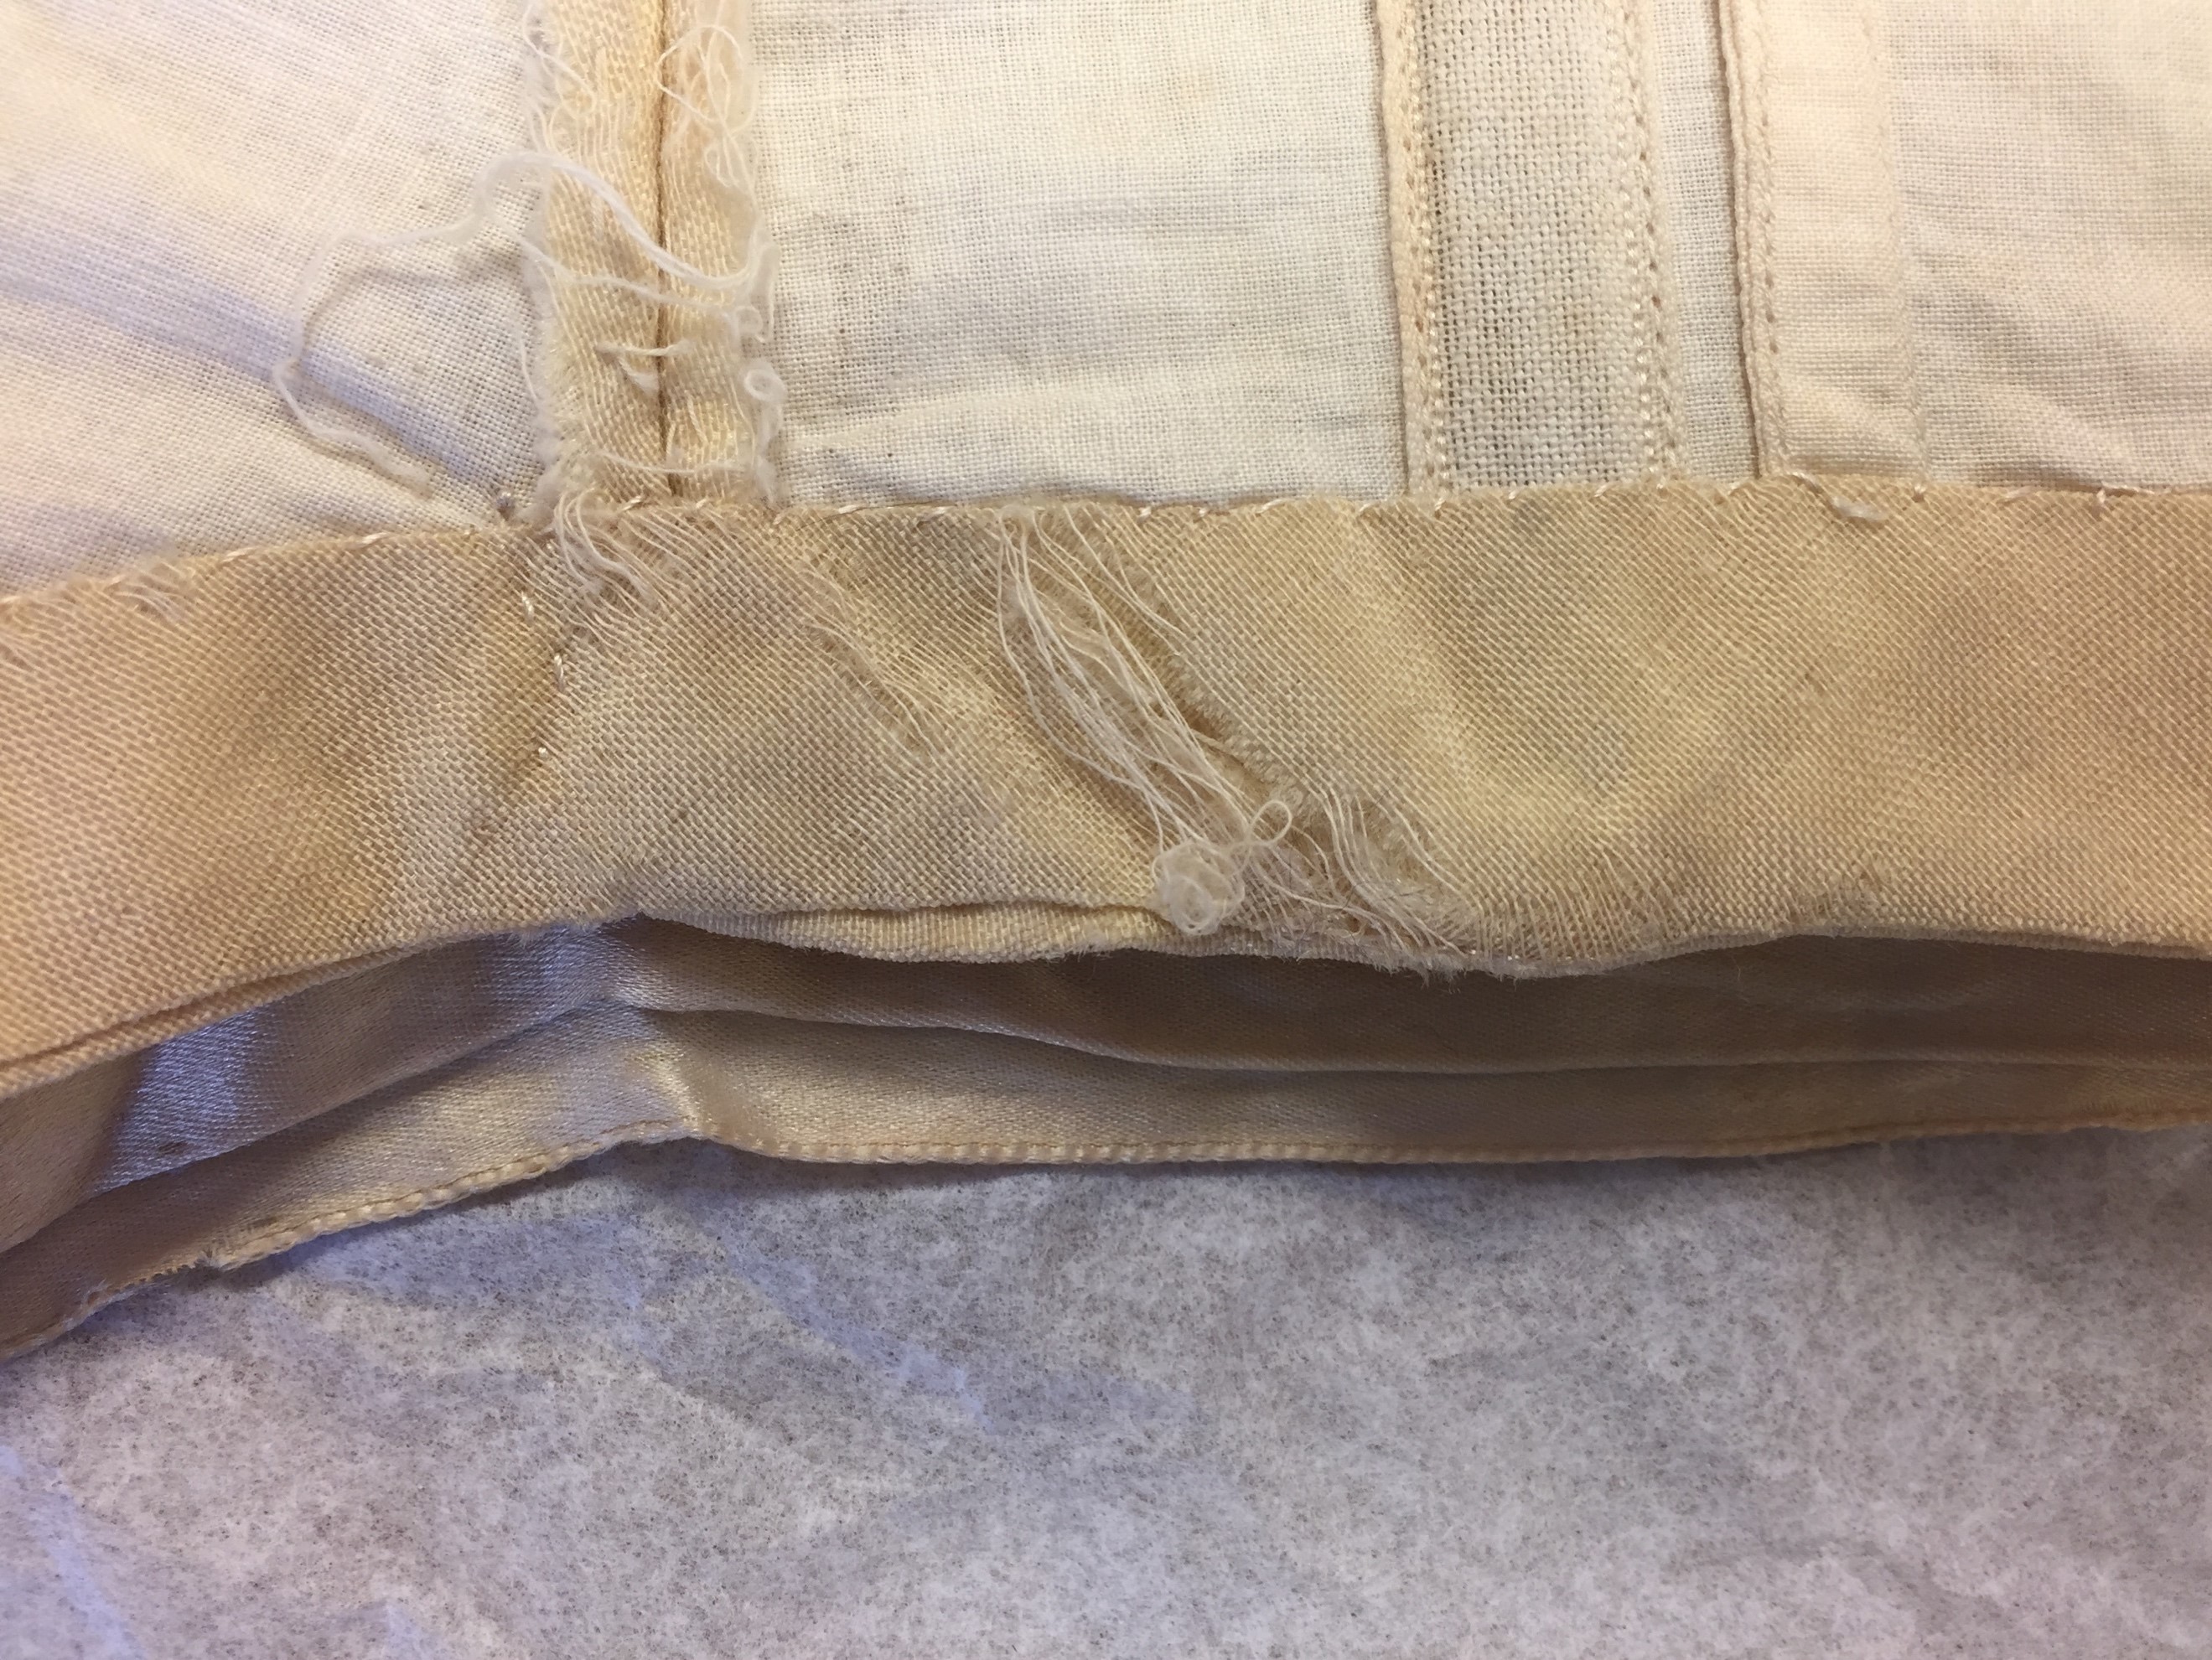 |
Figure 21: Mishappen Bone |
Figure 22: Sweat Stains |
 |
 |
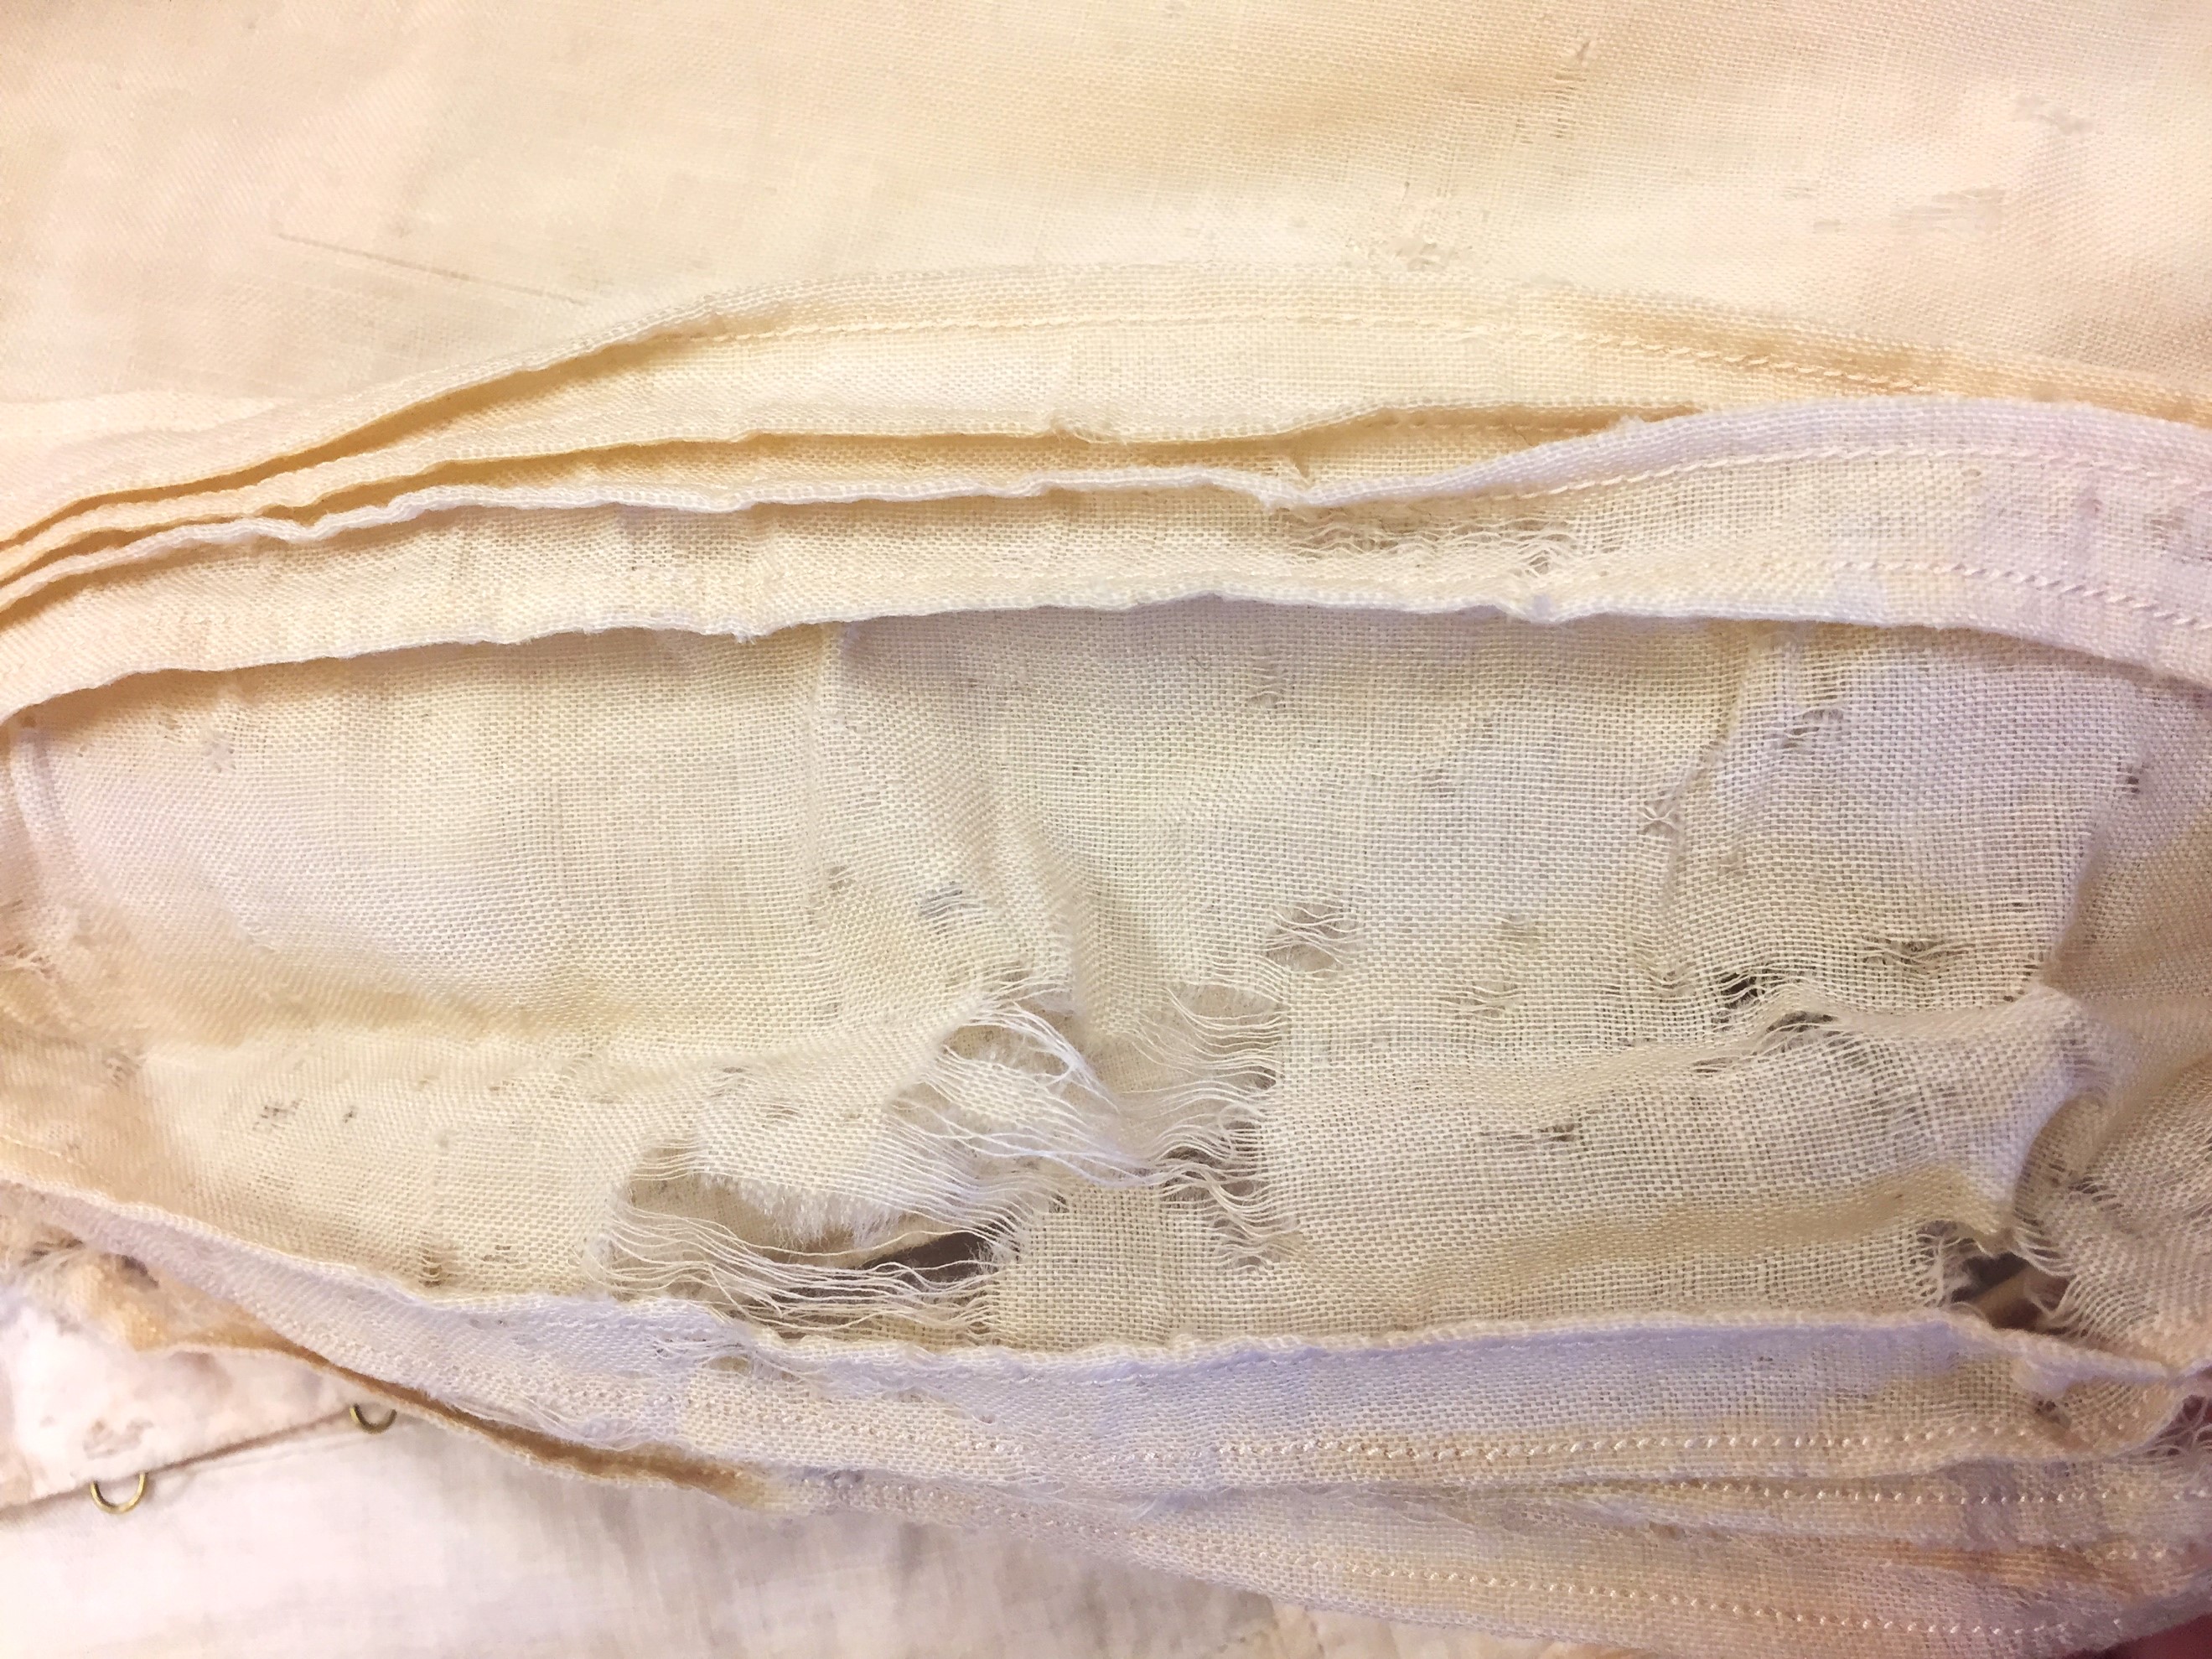
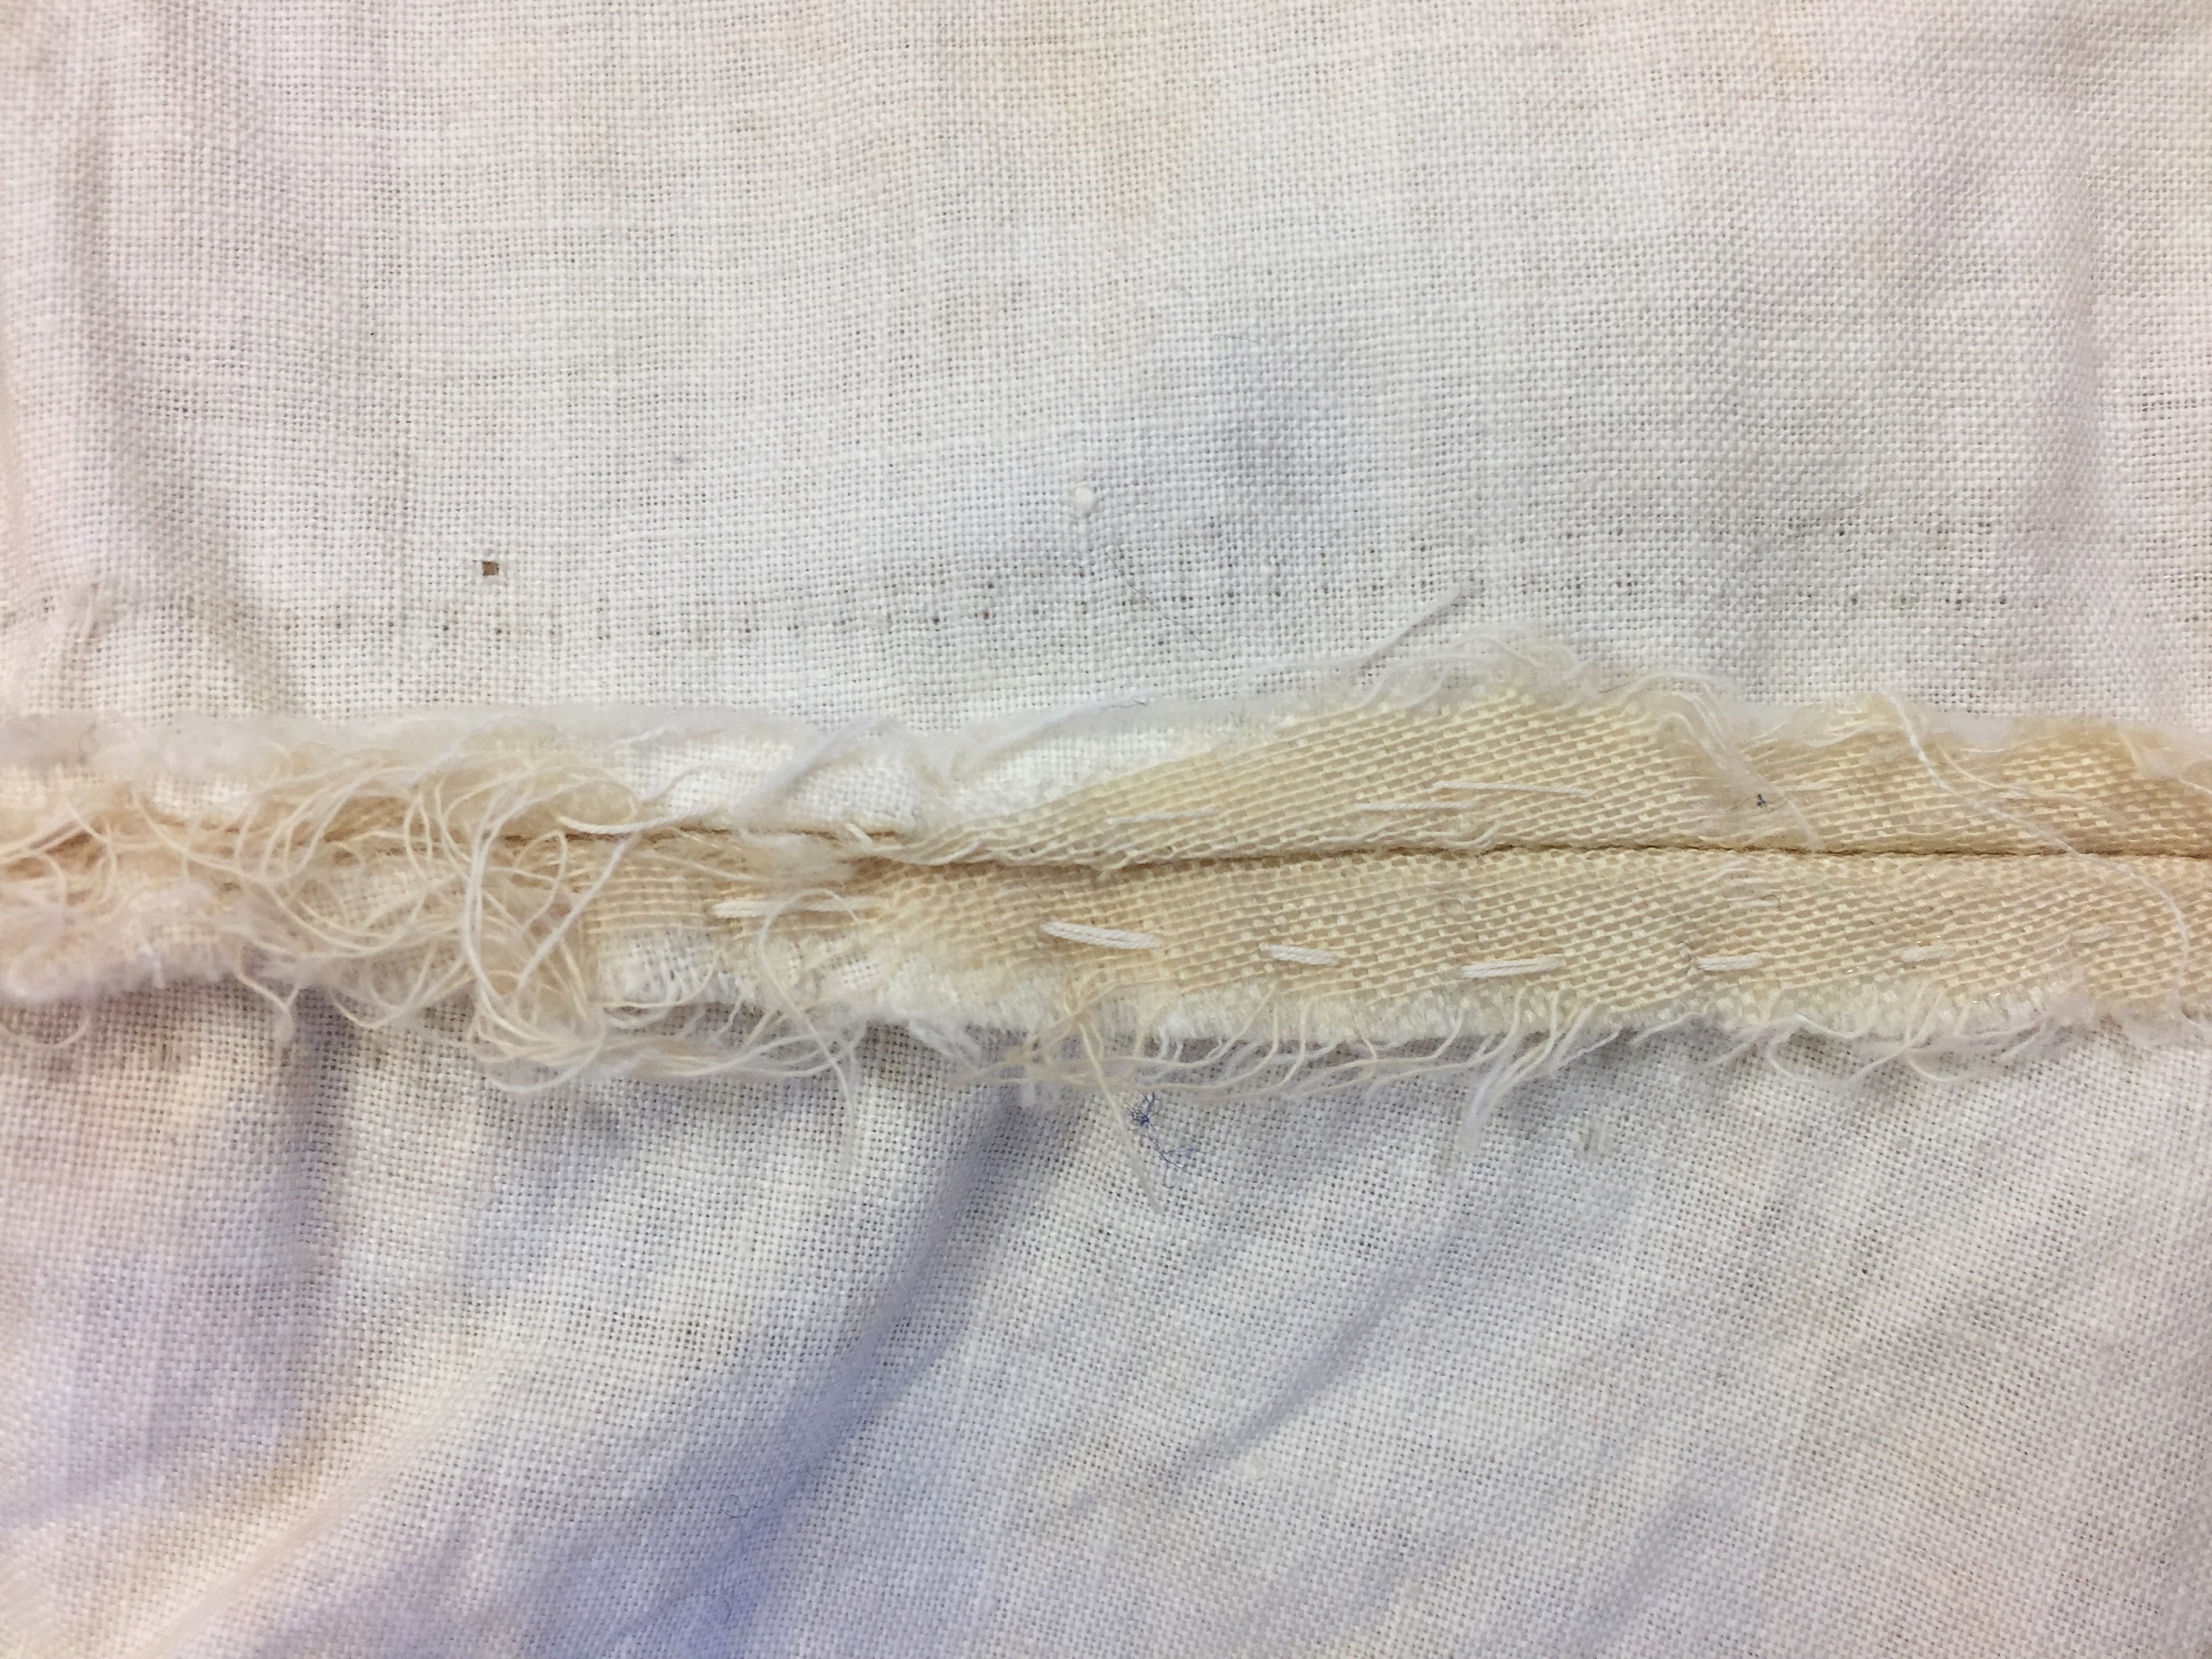
Though the bodice is over a hundred years old, it is still safe to handle. Unlike some of the others withint the Costar Collection, this bodice has only minor shattering and shredding (see Figure 19). This shattering has a U.S. quarter-sized as pictured in Figure 19, and smaller pea-sized sections around the sleeves and bodice. There is also frictional wear and tear along some of the sections of binding at the waist and yoke, as well as a little shredding along the left yoke where the additional piece is seamed (see Figure 20). In addition to the fabric shredding, the whale bones have aged with time. Most visible along center front, both sides of the placket have curved bones rather than flat (see Figure 21).
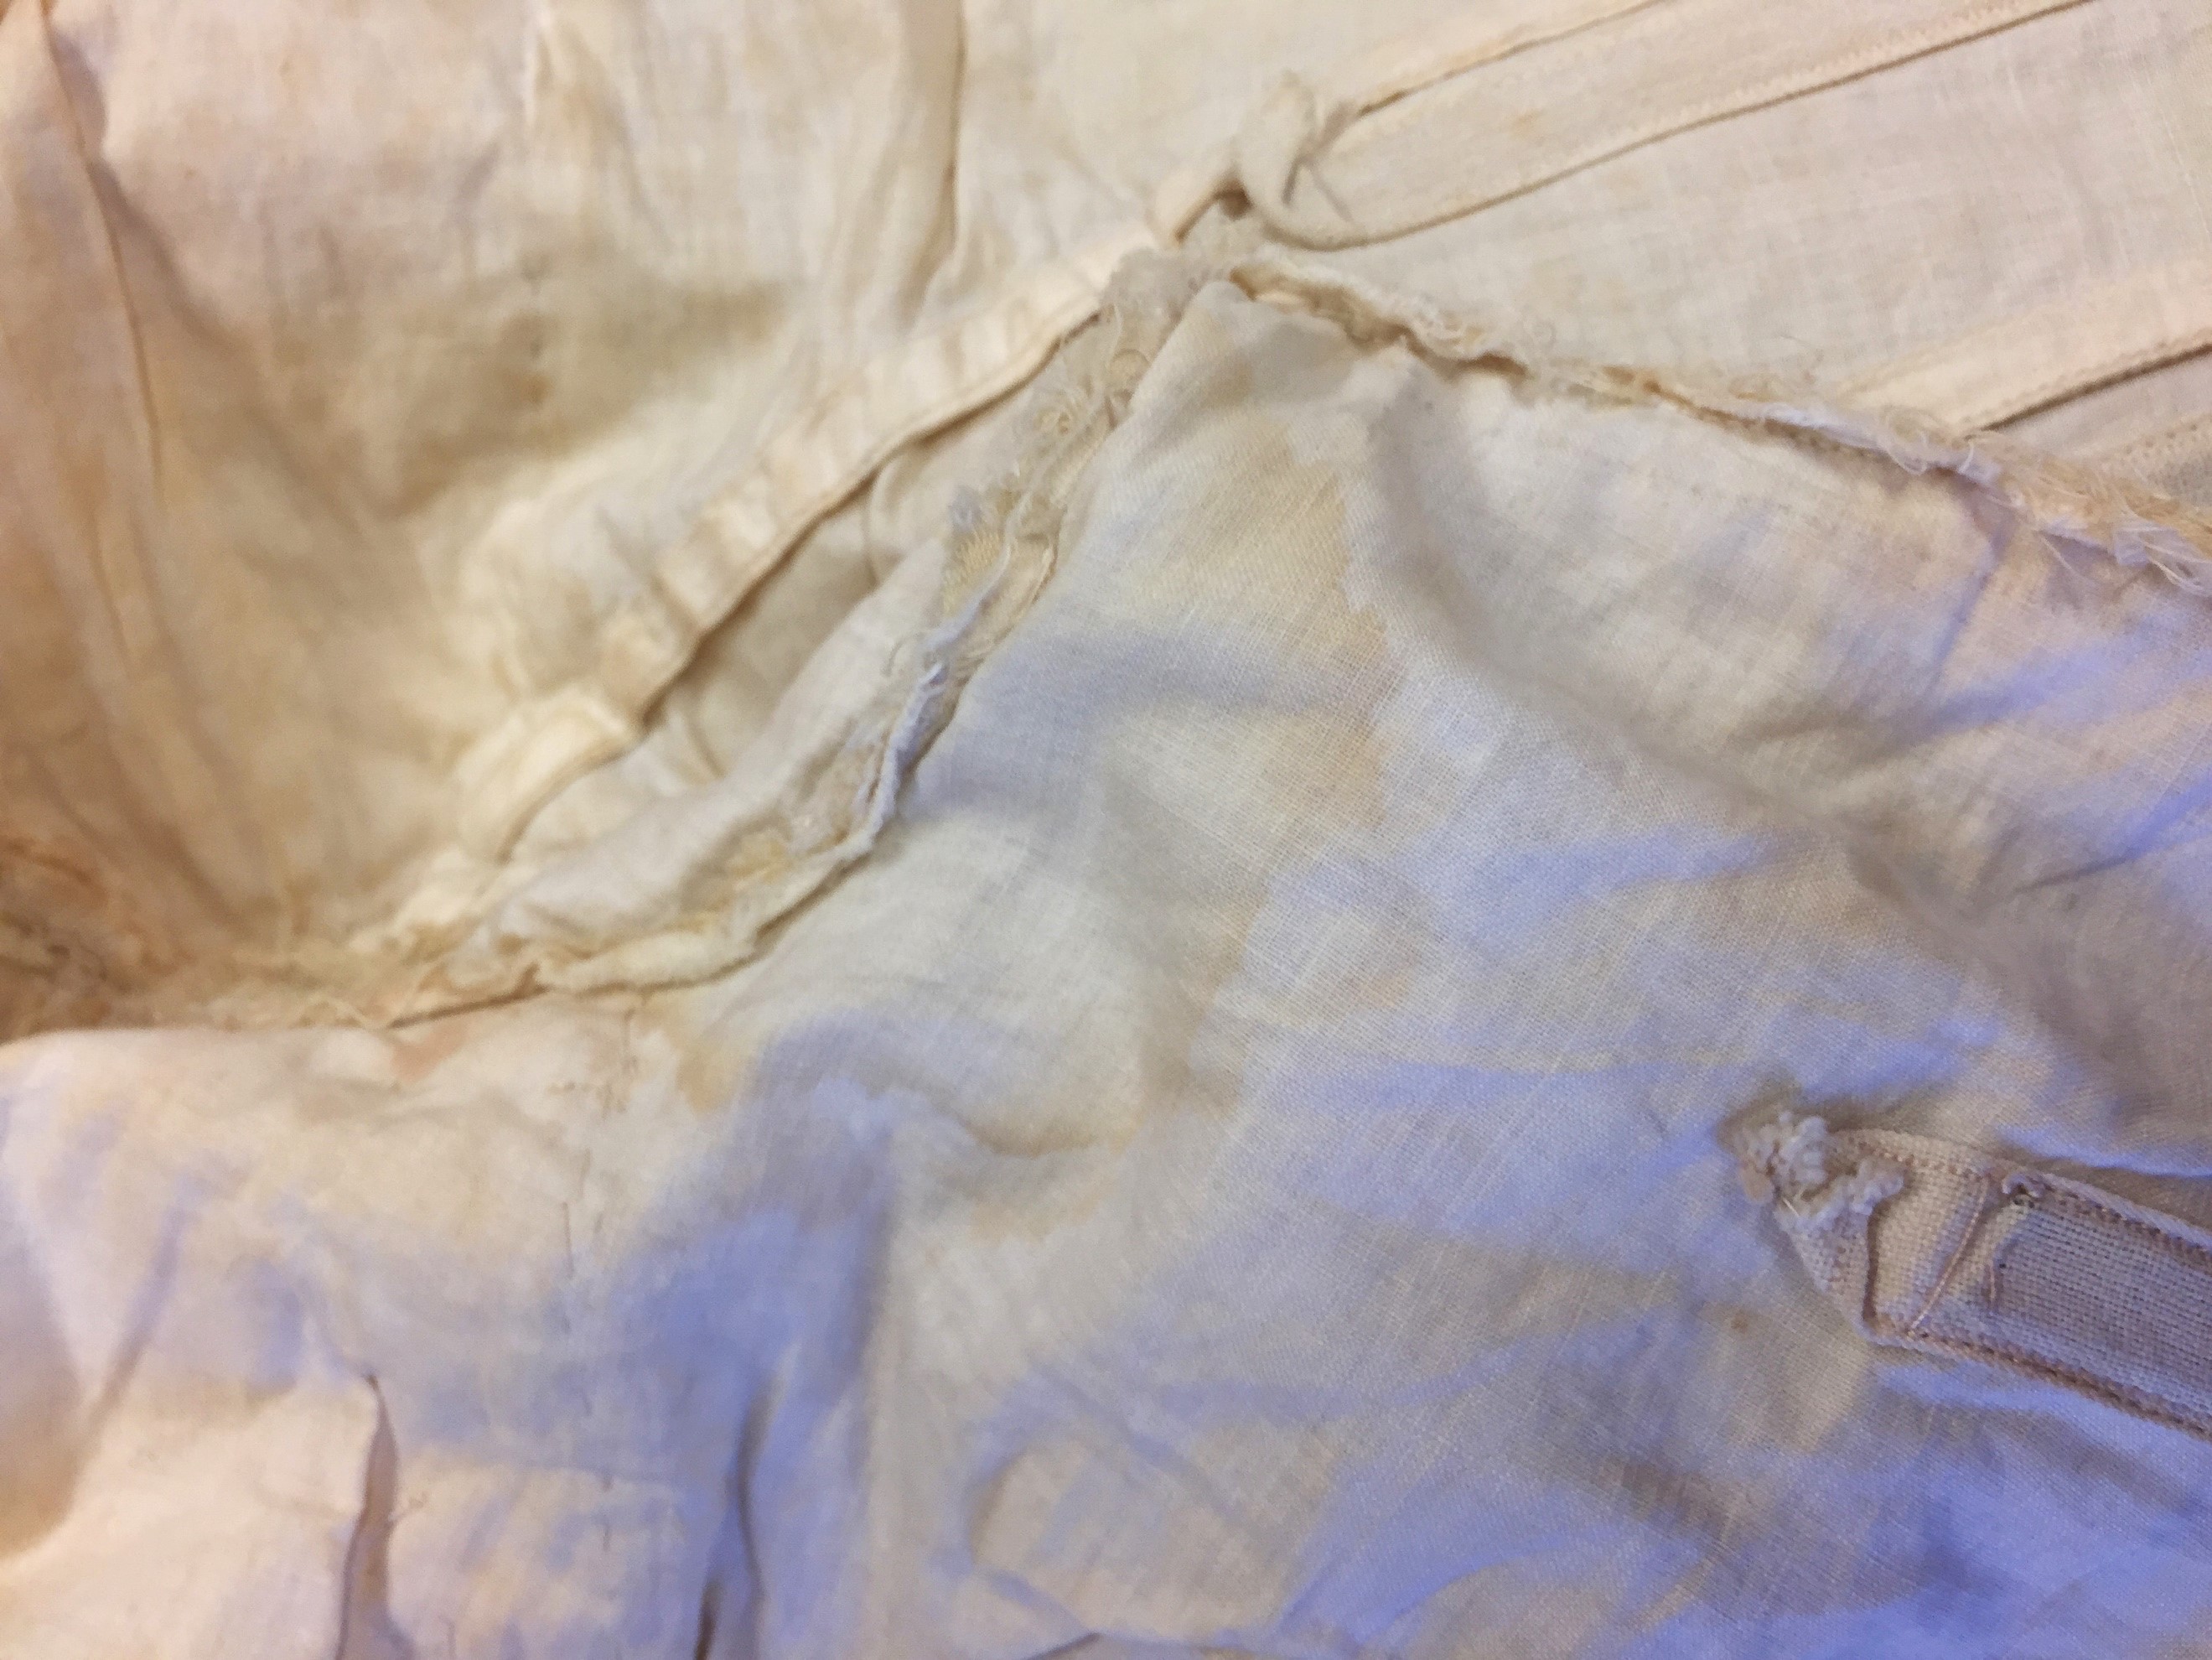
As far as color, there are some areas of aging. Though there does not appear to be any areas of sun bleaching, the bodice as a whole has appeared to yellow with time and soiling. The glazed coating on the cotton broadcloth used for the under bodice and sleeve has slightly aged in a different way as the glaze coating has not held up. There are also sweat stains along the under arms of the bodice (see Figure 22). Additionally, there are a few areas that show yellowing where the underbodice made contact with the wearer's skin, where the corset and camisole did not cover. The ribbon that formed the collar is worn away at the fold in a few places.
Alterations
Figure 23: Repair |
Figure 24: Right side Seam |
Figure 25: Left Side Seam |
 |
 |
 |
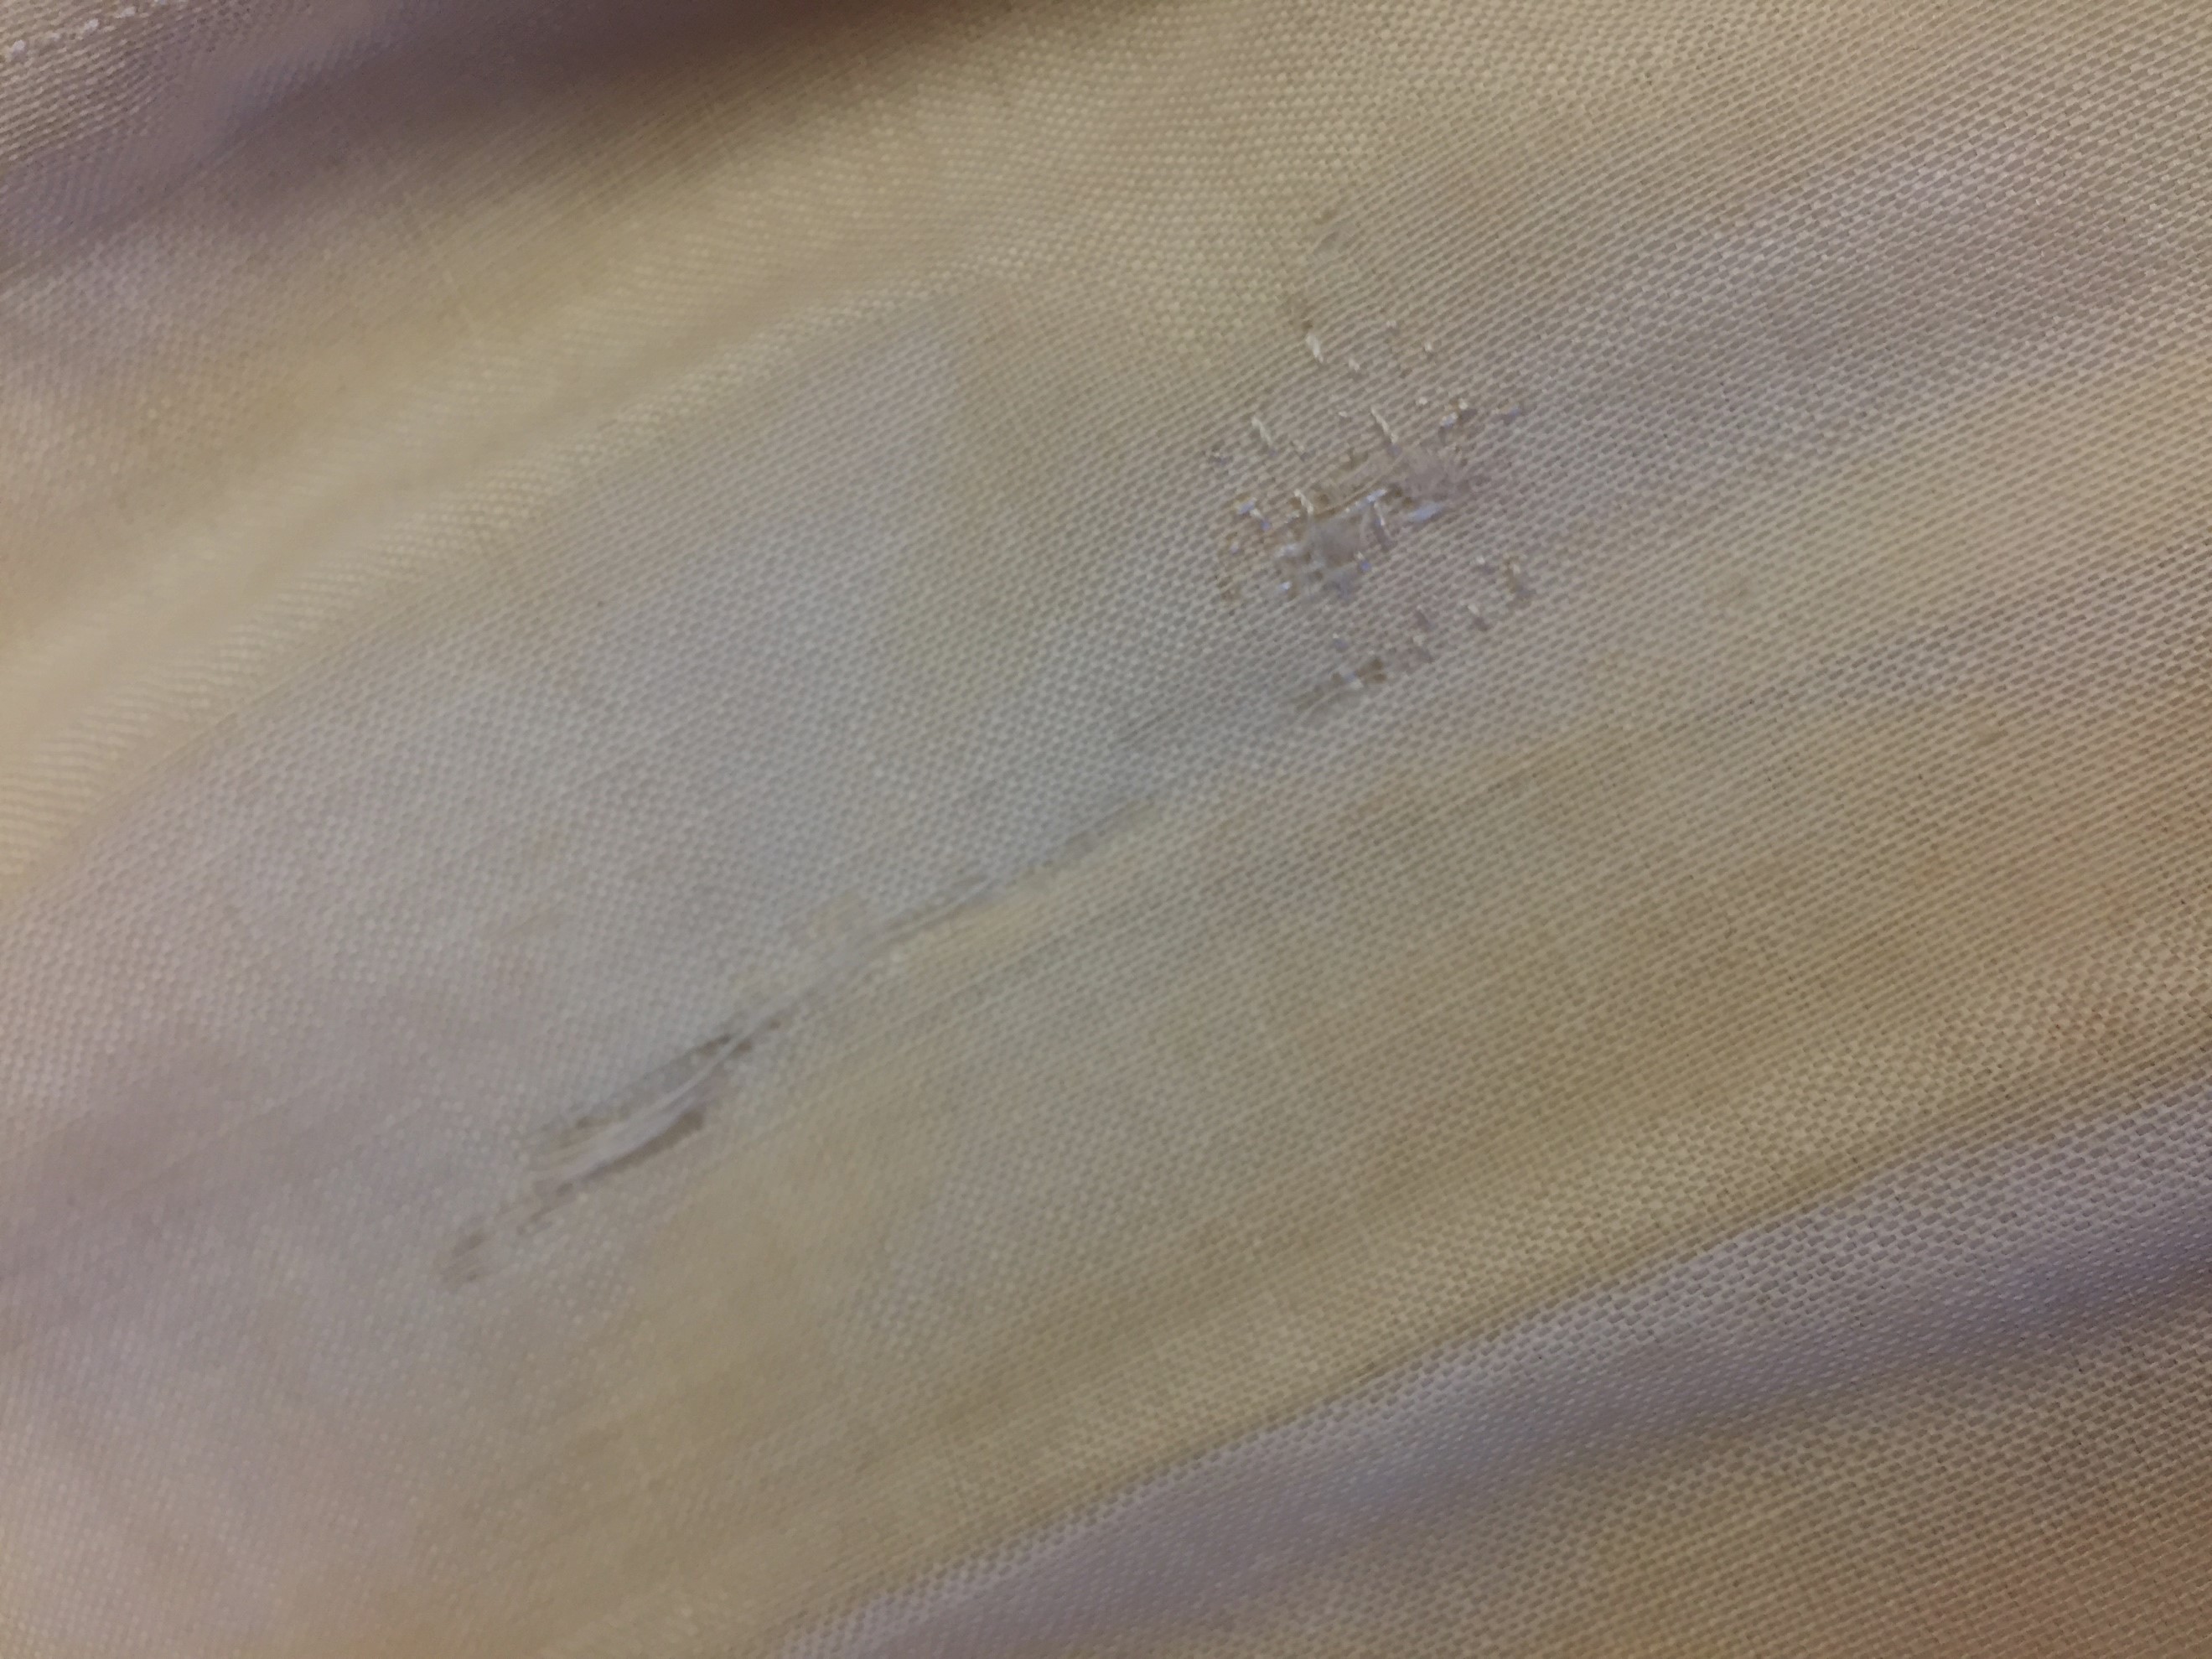
There are two obvious areas of alteration within the bodice. The first area is indicated by two small sections of darning along the front right side of the bodice where someone tried to repair it before the fabric got too frayed (see Figure 23). It appears that at some point someone attempted to weave over and under the shredding fibers of the fabric with a thicker thread.
Second, there are clues that suggest that at some point the bodice was let out along the side seams and thus into the sleeve. The left sleeve’s front seam is stitched by hand while the rest of the bodice’s seams are machine stitched. In addition to the incongruent stitching techniques, there is scaring along both side seams within the bodice with two rows of machine needle punches. Lastly, the sleeve placement within the armscye are slightly different from one another, and the binding around the bottom of the bodice is broken up in a few places. A reasonable hypothesis is that the sleeve and bottom binding had to be removed in order to let out the side seams. Because the side seams were let out making the bodice larger, the armscye was also made larger, thus the sleeve needed to be let out along the front seam in order to keep the same proportion of gathering at the sleeve cap leading, to the different seam allowance between the back and front seams within the sleeve (as mentioned before in the sleeve section). Then when the sleeves were set back into the armhole, they were slightly off from one another by 0.5" The binding at the bottom of the bodice had to then also be let out in order to stretch across the now wider bodice hem, which led to the seaming and probably added to the wear and tear visible there now.
The only other area of mystery that cannot be explained is an alteration to the interior of one of the undersleeves. Along the left interior sleeve, there is a 1” tuck all the way around 3" up from the cuff. This is done using a hand stitch and was not done on the right sleeve. With the tuck that is currently in the left sleeve, the sleeve appears to hang even, as seen in Figure 1. There are no clues as to why one sleeve was cut with an extra 2" total in length in the undersleeve. One can only hyposthesize about bodice daying back to the nineteenth century, with no providence, and obviously multiple owners.
© Robin Ankerich, 2018